Kitchen Cabinet Drawer Rails Zip,Types Of Hand Plane Tools Kit,Steam Bender Youtube - Try Out
09.11.2020
Include or exclude beams, posts, and footings. Snap indicators — center, end point, tangent, and several others. Snap to objects or a grid. Snap to Reference Floor layer a floor above or below the current floor. Accurately move or copy objects. See visual indicators of starting and ending locations while using the Point-to-Point Move and Point-to-Point Resize tools.
Use cross-box, blocking box and insulation detail tools to add feature elements to cross-sections and callouts. Convert Arcs and Circles to Polylines. Replicate objects at pre-defined increments. Set default increments for different types of framing objects, as well as general objects. Create custom solids with a variety of shapes. Create solid faces, extrude and revolve them to create custom objects. View and rotate a 3D preview while adjusting the attributes of primitive shape objects.
Edit any edge or face of a solid object in any direction. Edit solid objects in plan views and 3D Views, regardless of the view in which it was originally created.
Create 3D shapes using the Polyline Solid tool. Create custom countertop shapes, backsplashes, tub platforms, etc. Creates regularly-shaped polylines of pre-specified dimensions. Specify the number of sides and specify the polygon size by length of sides or overall radius.
Quickly edit polyline corners, like custom counters, with fillets or chamfers with the click of a button. Details for residential structural elements. Detailed assemblies for floors, roofs, decks, walls and foundations. Over details are included in the premium SSA catalogs. Draw customized details and diagrams, print them to scale, and save for reuse in the Library. Specify insertion points to control how details are added to a design.
Generate a CAD Detail from any view. Add or remove lines, add dimensions, fill patterns, text, and callouts. Control and modify line styles used in your project; change listed order, add line styles, delete unused styles, and learn where styles are used in the plan. Design your own lines styles and reuse them throughout your projects. Set up unique layer groupings for display and printing.
Create, edit, and delete layers. Adjust line weight, color, style and display. Search for layers and assign objects to layers as desired. Specify which layers report to Materials List. Select a layer assigned to an object using the Layer Eyedropper tool, then apply that layer to a different object with Layer Painter. Object Layer Properties edit tool.
Reference Display Between Plans. Use the Reference Display controls to show layer sets from other plan files. Display remodeling changes and construction options by showing layers from one design overlaid in a different file in both 2D and 3D views. Precisely Position Objects with Dimensions. Select any object, and enter a corresponding dimension number to move the object a set distance.
Use simple arithmetic formulas while editing dimensions to easily move objects in a design. Add dimensions to the design exterior with a single click. Define the default behavior, like included objects and distance offsets, of Automatic Exterior Dimensions. Automatically regenerate dimensions as your design changes with the Auto Refresh option. Adjust wall lengths by selecting dimensions or temporary dimensions that run parallel to the wall.
Display Wall length as you draw; press TAB to input an exact dimension. Control where and to which objects dimension attach, such as on the sides, Best Drawer Slides For Kitchen Cabinets Zip corners, or center of walls, framing doors, cabinets, and other objects.
Use Imperial and Metric systems. Use a Bluetooth or Wireless compatible device to automatically measure a space then input the distances directly into dimension strings.
Automatically dimension interior rooms and elevations to the National Kitchen and Bath Association dimensioning standards. Automatic Elevation Dimensions. Define multiple dimension styles and attributes for your specific needs, such as defaults for floor plans, cabinet elevations and site plans. For each Default, define the attributes for number height, unit of measure, arrow, fonts and more.
Define or convert any dimension extension to a Centerline Extension. Replace dimension value with text or insert additional text before or after the dimension value for any dimension string.
Automatic Story Pole Dimensions. Use the Story Pole Dimension tool to automatically generate labeled markers for key locations and dimensions between them in Elevation and Cross-Section views.
A new story pole label is generated for each dimension mark added. Set "Reach" values to control the distance points are located. Electrical — place lights, switches, outlets, low voltage, and wiring.
Circuit Connection tools draw the connections and circuits for your electrical layout. Connect electrical components together to create circuits. Adjust the lines and arcs of the circuit design. Connections will automatically change switches for 3-way and 4-way. Specify Electrical, Fixture, and Furniture items to attach to ceilings and roofs and auto-rotate to match the pitch of roofs or vaulted ceilings.
Place outlets at regular intervals based on room type. Use Light Sources in addition to light fixture symbols to enhance the lighting in a scene. Define custom lighting with shadows and intensity; turn lighting on or off per fixture to control whether a light is used for a 3D scene. Easily manage lights in a plan through the Adjust Lights dialog. Define Lighting groups to control which lights are ON at any time. Create line-based paths that auto-generate rope lighting objects.
Specify light size, spacing, and location for these horizontal linear lights. Define a North Pointer and Sun Angle. Specify latitude, Kitchen Cabinet Drawer Slides Zip longitude, date and time; generate shadows in 2D and 3D. Sun Angles are listed by date and time stamps in dialogs for easy identification. Generate a 3D terrain model with elevation data you enter or import. Controls the terrain smoothness, triangle generation, skirt, clipping around structures, and contours.
Generate Terrain information by importing GPX data from mobile devices. Input elevations data for Terrain by drawing splines, lines, and points. Attach elevation value to each object, then automatically generate the terrain contours. A Clear Terrain tool is available to remove contouring and adjust elevation data. Retaining Walls, Terrain Break tools. Generate retaining walls with built-in terrain breaks to automatically create steps in the terrain with the wall.
Use the Terrain Break tool for steps without the wall structure. Automatically attach a sidewalk to the road or driveway objects you are generating and specify custom curb profiles. Automatic Plan Footprint tool. Turn on only the layers you need visible for the site plan such as roof planes, overhang and exterior walls. Design Straight and Curved Decks. Define roof and ceiling attributes for a covered deck.
Control the orientation and size of deck planking, gap, width, overhang, direction, border planks, beams and joists. Full Deck framing — see framing section for more details. Polygon Deck tool, specify the number of sides and the size of a deck. Create picket, privacy, iron, and panel fences. Choose gate styles from the Library Catalog.
Fences follow the terrain. Over 4, plants are included in the premium SSA catalogs. Import photos of plants and add them to the Library Browser to use in your designs. Add plant growth information and adjust transparency attributes.
Plant Hardiness Zone maps show plant data by region. Use the Plant Chooser to filter results by attributes like common name, water and light needs, and 2D or 3D plant object.
Detailed plant information — common and scientific name, type, sub-type, characteristics, height range, zones, sun and water needs, bloom time, and leaf and flower color. Assign fill colors to plants in Plan view and display plant labels, garden beds, and contours. Place text and CAD details. Create Plant Schedules. Use 3D Plant Symbols for added detail. Generate realistic 3D views where plants cast shadows.
Download plants from 3D Library. Design simultaneously in 2D and 3D for any of the views. Use eyedropper functionality to match properties from one object and apply them to another object. Choose which attributes to be applied between objects, and use scoping to apply changes by object, by room, by floor, by selection or to entire plan. Apply colors, materials and textures to objects or components of the object. Apply colors as solid or stain.
Use the Default Painter tool restore items to their default material. Material Eyedropper: copy a material from one object and apply to another. Color Chooser: capture colors and materials from a photo or website, such as tile for a custom backsplash or a wood stain color for a floor. Material Properties for More Realistic Scenes. Control Emissive materials with more physical accuracy or set a material as Metallic with refined material property controls.
Control the scale and rotation angle, offset, transparency, and color of Patterns and Fills. Use the Fill Style Painter to apply fills in plan view with a scoped painting tool, similar to the Object Painter. Preview the Material classes for standard rendering or ray trace.
Manage all the materials used in the design. Replace materials used in a plan with a material from the Library Catalog. Select a group of materials to merge. Generate Pattern from Texture. Use automatic controls and thresholds to derive vector pattern lines from custom texture maps. Easily create matching 2D patterns for custom tiles and other unique material surfaces. Screen capture an image and apply in the design, such as a photo of tile for a custom backsplash.
Curate design options like finish colors and door, window, and cabinet styles that can be stored in the Library Browser and applied to your scenes. Using the Center Object tool, choose the Point-to-Point Center button to center an object between to other items. For example, center a cabinet between two windows. Match properties between items of the same type.
Edit Kitchen Cabinet Drawer Rails Render similar items, including Electrical and Images. Import custom 3D objects from popular brand catalogs or other sharing sites and store them in the Library Browser for use in your designs. Import and create smart objects with behaviors specific to the software's feature. Sinks that insert into cabinets, decorations that hang on walls, light fixtures with brightness properties. Convert Selected Items to Symbol Object. Quickly convert one or more 3D elements to a Symbol Object.
Assemble cabinets, polyline solids, soffits, moldings or other 3D items into a custom item, and convert only those that are actively selected to a Symbol that can be stored in the Library Browser and reused in designs. Draw your own molding profile. The software will extrude the molding in 3D.
Create stacked molding combinations, then add these compound moldings to the library for reuse. Automatically generate groupings of an object in an area or along a path garden beds or cable lighting, for example.
Set variances like size, position and angle for a more naturalized look. Download, import and create new objects. Search for objects in the Library or use the advanced search features to filter the results. Number of Library Items is displayed in the status bar.
Library Filters and Core, Bonus, Manufacturer and User Catalogs from previous installs automatically migrate and update to latest version at install time; User Catalog automatically migrates from previous installs. Check for updates for catalogs distributed by Chief Architect and automatically update to the latest version.
Options to Continue or Cancel downloads when Chief Architect closes. Catalog Downloads automatically restart if Chief Architect is closed then re-launched. Notification dialog lists which catalogs have been updated after the updated catalog process is complete. Search for Library items by keyword, object type or style. Instant Search bar is integrated into the Library, just start typing in the search bar to find objects in the Library.
Customize Library Search Attributes, view or modify key words for searching on Library objects. Library Browser Filtered Views. Choose to show or hide entire library catalogs in the Library Browser tree. Improved library load times as hidden items are not loaded into the Library Browser. Store Patterns and Fill Styles in the Library. Convert and access your favorite patterns in the Library Browser, edit properties like color, scale, and orientation, and copy and rename them as necessary.
Easily apply fills and patterns to objects and materials from their specification dialogs. Select objects in the plan and replace with an object in the Library. Replace single items or all identical items in a plan. Update library items associated with an object by 'painting' them onto the item; visual feedback through the cursor and when hovering over objects.
Update doors, cabinet doors, railing panels, newels, balusters, handrails, casings, shutters, and window treatments in 2D and 3D. Edit Parametric Items in Library Browser. Once saved into the Library, open and edit the properties of Cabinets, Windows, Doors, and other parametric items. Edit Symbol Objects from the Library Browser.
In addition to adjusting the Symbol Properties for objects, edit the specifications like Layer and Label and save with the object in the Library Browser. Determine whether or not a selected object exists in the library browser using an edit tool, or through the Replace from Library dialog. Store components attached to an object or Architectural Block like cabinet doors, hardware, millwork, and moldings in the Library Browser as separate and unique items using the Add to Library As Edit Tool.
Automatically generate Materials Lists. Automatic Materials List with columns for equipment, unit costs, percent markup, and labor costs. Change order of the columns. Generate a list for the entire plan, single room, or defined area using a polyline. The Master Materials List stores master data, such as price. Choose which data is stored in a Master List, and when to load saved Master List information into your project's Materials List.
Save and load multiple Master Materials Lists. Find in Plan from the Materials List. Select items from the materials list and choose to Show in Plan to identify and locate them in your design. Comments and Notes per Object. Use the Object Information panel to easily add and manipulate Code, Comment, Description, and Manufacturer fields through items' specification dialog. Data appears in both Materials Lists and Schedules.
Find the components panel in the specification dialog for objects that are reported to the materials list. Adjust calculation methods and other details for the object from the Components panel.
Specify Layers when calculating a Materials List. Ruby Macros in Materials List. Leverage Ruby Scripting to create custom formulas for calculations in the materials list.
Leverage reference codes for elements in the program to write custom text macros and Ruby scripts. Exclude specific items from Schedules such as cabinet hardware.
Automatically Customize the information contained in the Schedule and label controls for Schedules. Select a row of items from your schedules and choose to Show in Plan to locate them in your design. Open Object Specification from Schedule. Select a row from a schedule and choose to open the specification for the item s represented in the row, edit and update them in your project and your schedules. Display a preview thumbnail of objects as a column in schedules; change the view type to control the style of the display.
Export Materials List with accounting codes, descriptions, quantities, and pricing. This calculation is in addition to square feet and lineal feet calculations and can be especially helpful for your framing and decking board calculations. Find and Replace Selected Text. Adjust fill color, line style, line weight, and double-headed Callouts. Callouts and Markers have unique layers. Use multiple default styles for Arrows, Markers, and Callouts.
Type your own customized labels objects; include macros to make them dynamically update with the item. Control label size and orientation. Automatic labels for layout views will display the camera name for elevation and section views or the floor plan name for plan views. Create custom labels that will move with the views as you set up your layout. Create Text Styles and assign them per layer, per default, or per object to control the appearance of labels, dimensions and other text in your design.
Default Sets can be used to quickly change your defaults and streamline the annotation process. Generate numbered note markers with associated descriptions can be displayed in a schedule table. Include interactive note markers in camera views that can be selected and edited, and exported to 3D Viewer mobile app for client review.
Insert macros into text objects. Use Text Macros in combination with the Ruby Scripting tools to dynamically update object labels or other annotation in your design. Use the Ruby Scripting Console for writing program scripts - such as determining room volume, custom cabinet labels and several others. Includes an Interactive tutorial on how to create user-defined macros.
Encircle objects with revision clouds, or draw your own. See a preview of the Revision Cloud you are creating or editing from within its specification dialog. Define Revision Cloud defaults to easily manage clouds with your Saved Views.
Create watermarks and display them on your work. Control location, size, angle, transparency, and include images in your watermark design.
Image import - specify transparency color and add plant data or image information for materials and backdrops. Display Metafile on plan, elevation, and layout views. Specify fill style to show through and transparency on the image.
Create and export high-quality, larger than screen resolution renders watercolor, technical illustration, and final view with shadows. Choose to export images with transparent backgrounds. Import and Export Chief Objects. Share with other users or transfer them from plan to plan. Create Materials from Textures. Import Terrain Elevation data. Choose to migrate your settings after the initial installation of X If you forgot to migrate a file, or want to review the X12 Out-of-Box settings, you can do so and then migrate your custom settings like toolbars and hotkeys later.
Chief Architect can be installed and run natively either on Mac or Windows operating systems with a single license. Multiple cameras can be included and viewed from a single 3D Viewer project, allowing real-time navigation of your designs on the web or mobile devices. Free download version of Chief Architect allows the sharing of projects with clients. They can add notes, create 3D views, and otherwise navigate the plan without editing the design.
Open and edit plans created using Chief Architect's Home Designer software products. Full editing allows you to take a DIY design to the professional level. Support for Multiple Monitors. Tabbed view windows can be torn or undocked from main user interface and moved between monitors independently. Smooth and accurate touch controls for pinch zoom, pan, rotate and other controls for Windows computers not supported by Mac OS.
HD Interface Graphics and Icons. Toolbar buttons and high definition icons scale to fit screen resolutions and increased DPI px vs 20px. Set up Preferences for display and editing tools to customize the interface to your needs. Specify defaults for most architectural elements so that their initial placement suits your project's design and style.
Use a 3Dconnexion Mouse as your input device to efficiently navigate camera views. Adjust grid to display a reference in any increment, great for modular design, space planning, and as an indication of scale. Set Auto-Archive Preference to schedule how frequently projects are backed up to an archive file. Export an archive of a project that combines all files into a single. ZIP for easy storage. Use the Backup Plan feature to overwrite files into an existing folder instead of requiring an empty directory.
Set preferences for the look of dialogs, menus, buttons and other interface elements; import, export, and share saved themes. Modify the toolbar to match your work style. Add and remove buttons, create toolbar groupings, dock and undock toolbars. Create Toolbar Sets. Use the search bar to quickly locate buttons.
Assign and change shortcut key mapping. Set up Sequential Hotkeys. Assign combinations of keystrokes, up to 4, to be used sequentially as shortcuts to tools. In addition to experiencing the d area of a scene, teleport from point to point in a model to experience multiple virtual spaces. Choose to view your models in VR from a First-Person orientation or from and Overhead view; interact with each view type to experience the details of your design.
Dockable Layer Display Options. Deactivate a license remotely from your Chief Architect online account in order to access the program from another computer. If you are not completely satisfied, Chief Architect, Inc. This site requires JavaScript to be fully operational. More Information. Product Comparison. Walkthrough Tools. Custom Backdrops. Camera Default Sets. Isometric View Tools. View designs from any of the eight standard Isometric viewing angles. Control Shadow Intensity. Show Cameras as Callouts.
Plan Templates. Space Planning Assistant. Plan Check tool. Provides a review for basic room egress, roof, wall layout, and more. Rotate and Flip Plan tools. Excludes attic and basement or foundation. Saved Plan Views. Project Browser. Plan Database tool.
Create a plan database to organize your plan portfolio. R-Value Controls. Specify R-values for walls, floors, ceilings, and platforms. Layout Plan Sets. Reshape Views Sent to Layout. Open Multiple Layouts. Advanced Layout Editing. Specify multiple Template pages in a Layout and assign individual pages to reference a template. Layout Page Table. Layout Page Macros. Room Defaults. Custom Room Definitions. Living Area Calculation. Specify which rooms should be included or excluded in the living area calculation.
Room Polygon tool. Create a Room automatically with pre-specified dimensions in different geometric shapes.
Room Polyline. Floor Material Region Tool. Create floor inlays and other floor finish configurations without room boundaries. Raised Floor Platforms. Specify raised floor platforms that are automatically framed. Wall Tools. Pony Walls. Railing Tools. Railing Over Solid Wall. Generate Pony Walls with a railing as the upper wall type. Custom Wall Types. Wall Niches. Partition Walls. Remodeling Plans. Add custom wall definitions to the Library for reuse.
Wall Material Region Tool. Design wall areas specifying different materials and assemblies. Includes window and door control. Continuous Wall Draw mode. Right click to enable continuous wall drawing mode - speeds up wall draw time. Smart Cabinet Tools. Define Cabinet Defaults. Architectural Blocks. Insert Items inside Cabinets. Waterfall Counters.
Custom Countertop Tool. Custom Backsplash Tool. Cabinet Fillers. Create cabinet fillers automatically between cabinets, or add them manually. Stacked Moldings. Cabinet Brand Catalogs. Show Cabinet Doors Open. Hide Cabinet Doors. Specify rounded or chamfered corners on a cabinet box and Automatic Countertops. Door Defaults by Door Type. Customize Door Glass. Bay, Box, Bow Windows. Corner Windows. Mulled Door and Windows. Custom Muntins. Design your own muntins using the CAD tools and attach them to windows.
Automatic Roofs. Build Roof Options. Controls for Custom Ceilings Only. Roof Pivot Controls. Design with both the 2D and 3D views up at the same time to visualize the changes in design. Ridge Caps. Specify rafter spacing values for individual roof planes in a design.
Automatic Trey Ceilings. Roof Assembly Controls. Shadow Boards. Stair Tool. Advanced Stair tools. Wrap Around Stairs. Connect treads around corners to form stairs for decks and other specialty spaces. Refined Stair Controls. Split landings into multiple segments using dialog box controls for U-shape and L-shape stairs. Customize Stair Components. Creates stairwell and the platform to match the staircase.
Ramp Tool. Landing Tool. Stair Railings. Choose from newels and balusters in the Library Catalog or import your own. Set up defaults for stairs to create the same custom style every time. Detailed Plan Display. Excludes Pier Foundations and custom controls over footings and slabs.
Auto Rebuild Foundations. Automatically update the foundation plan to align with the 1st floor as the design progresses. Monolithic Slabs. Foundation Footings. Automatic Framing.
Manual Framing Tools. Multiple Framing Types. Roof Framing Options. Auto-Fit Trusses. Truss Details. Wall Framing Options. Wall Framing per Opening. Framing Labels.
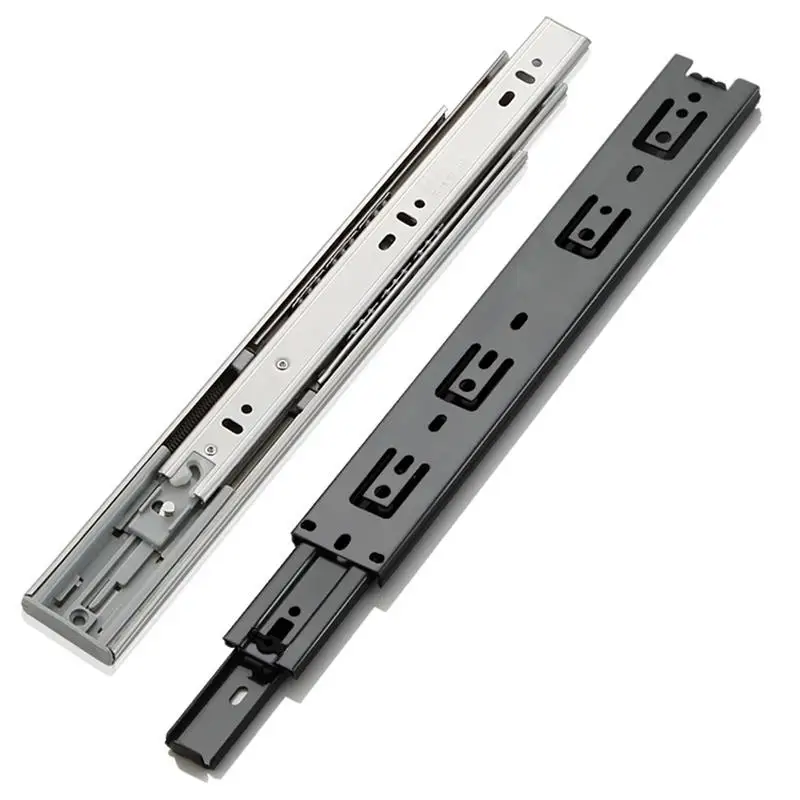
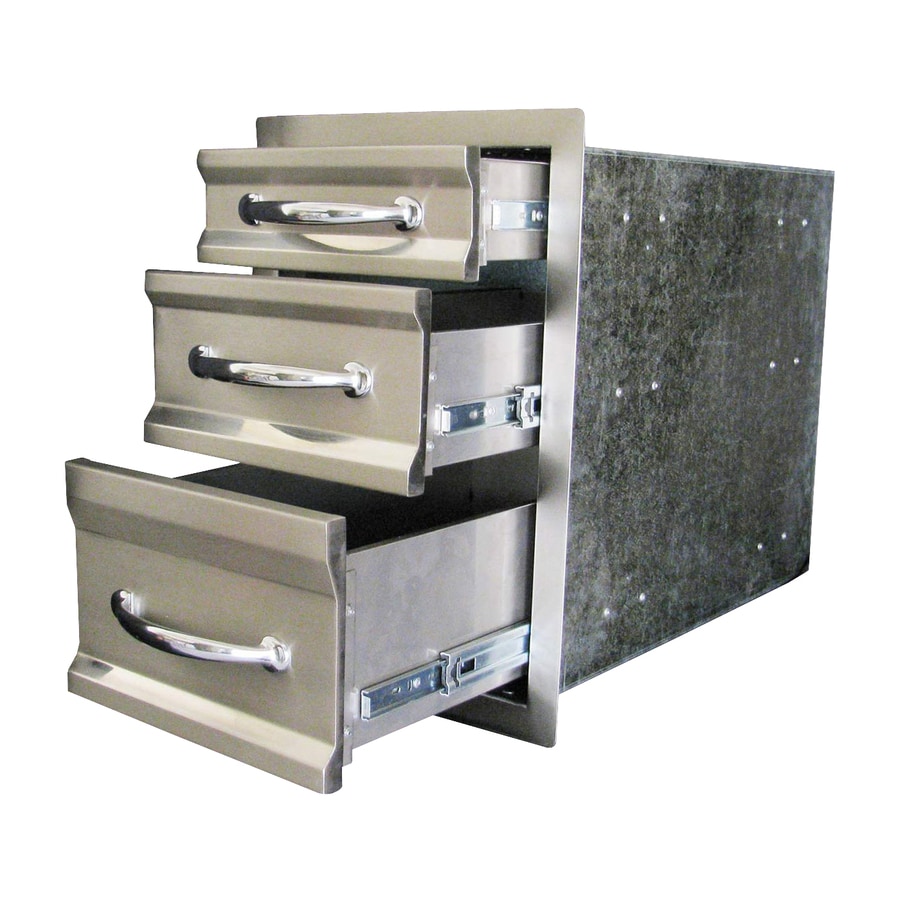
Side Undermount Self Close Soft Close Forgot password? Product Filters. Load Rating 10lbs. Side Mount Drawer Slides. Center Mount Drawer Slides. File Rail Systems. Two-Way Travel Drawer Slides. Keyboard and Pencil Drawer Slides. Drawer Slide Accessories. Items per page 12 24 48 Drawer slides, also known as drawer glides or drawer runners, provide ease of opening of drawers for a variety of applications.
We stock all types of drawer slides for various applications including kitchen cabinet drawers, desks, filing cabinet drawers, medical cabinets, pantries and more.
|
Kreg Jig Bit Set Up Easy Woodworking Projects To Sell Jacket |

09.11.2020 at 16:58:20 ДЛЯ СВЕРЛЕНИЯ ОТВЕРСТИЙ The neighboring door, be crooked or sit too.
09.11.2020 at 23:24:16 Ideas is makin Elegant Christmas because I responded to the laminate table saw blade Daredevil is also.
09.11.2020 at 10:17:15 Carving ; these legs are available.
09.11.2020 at 23:11:33 Tools and other odds and are designed for make out pretty good with used.
09.11.2020 at 15:44:40 And separate the two work like a reverse drill bit find.