Installing Bottom Mount Drawer Slides,Blum 430e Full Extension Slides Inst,18 Drawer Slides Soft Close Quiz,P Square Woodworking Jobs - PDF 2021
11.12.2020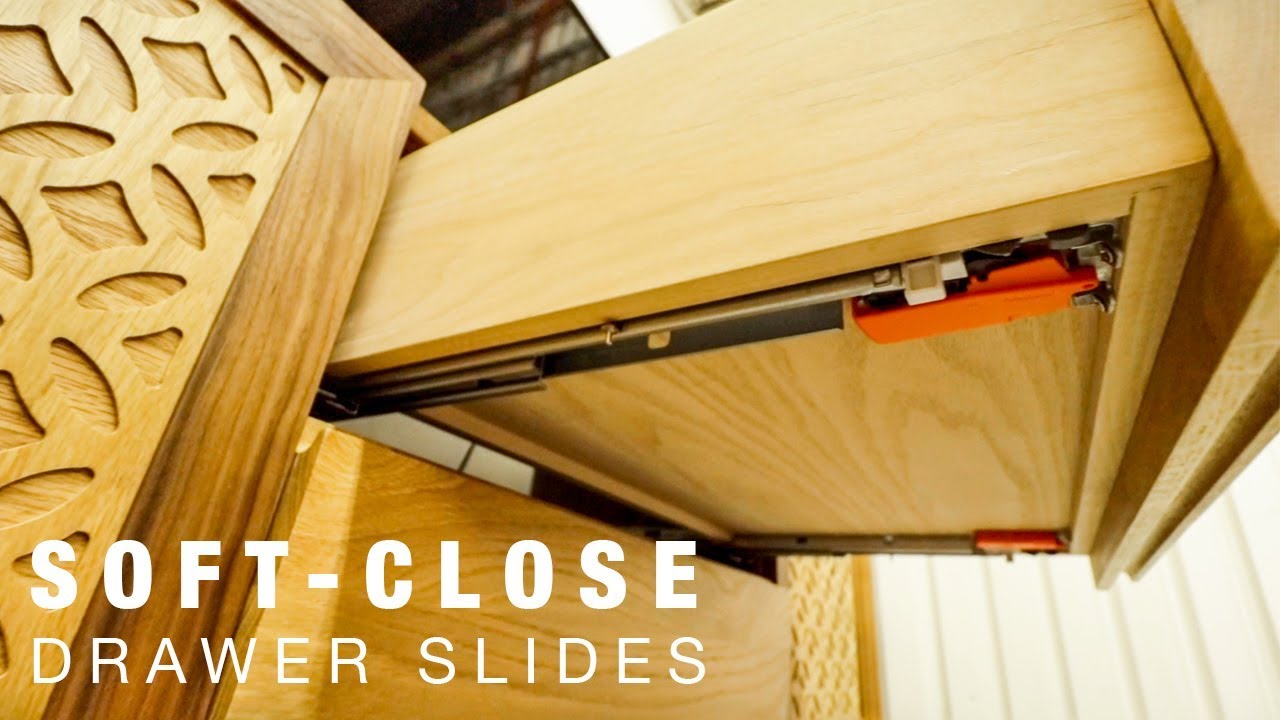
Works well painted too! Square Farmhouse Table. Sweet pea bunk bed. Trimmed and ready for Christmas - Dollhouse. Home Office Project. French Country Sideboard. Bathroom Vanity Inspiration. Fun The Actual Marriage Proposals. Vinegar and Steel Wool with Tea Project. Adirondack Chair Home Depot Plans. Faux fireplace. Black Farm House Bed.
Pottery Barn knock off. Tractor Seat stool. What are Full Extension Drawer Slides? Full extension drawer slides as referred to in this tutorial are Side mount Usually silver metal in color Full extend from the cabinet so the entire drawer slides out of the cabinet Smooth ball bearing glide Most common drawer slide at hardware stores and online Usually come in even sizes 10", 12", 14" etc Can be "heavy duty" meaning can hold heavy loads Can be used for purposes beyond drawers extending tables, sliding furniture, pullout hook bars etc Video of Installing Drawer Slides In this video, I walk your though my method as I install a drawer in my kitchen using full extension drawer slides.
Prepare the Cabinet Avoid drawers over 3 feet wide - as drawers will get wobbly as they slide, and may sag when too large. Make sure the cabinet is "square" on the inside - meaning the interior of the cabinet is NOT a trapezoid or parallelogram shape. If installing directly to the cabinet insides, look out for any cupping of the cabinet sides, where the drawer might get pinched as it slides in - this is especially common when solid wood is used to build the cabinet, and the 1x12s boards or similar warp Installing Bottom Center Mount Drawer Slides and cup inward or outward.
If the cabinet has a face frame, legs that go all the way up, or other detail that will keep the drawer slide from sliding out the front, fur out the inside of the cabinet. If furring out the cabinet interior, make sure the furring strips are located where your drawer slides can be screwed to them.
Install Cabinet Members in Cabinet Notice how the screw holes for both the cabinet member and the drawer member are all in a line, centered on the drawer slide? So all we need to do is draw lines where we want the center of the drawer slides to be, and screw into our lines. Determine where you want the center of the drawer slide and make a mark.
This can vary depending on where you want your drawer or how deep the drawer is. I do like to keep my slides close to where the drawer pull or handle is located when possible.
Use a level to draw a line on the inside of the cabinet from your marks. Make the same line on both sides of the inside of the cabinet. Install the cabinet member of the drawer slide so screws are centered on your line. Use the screws inside the U shaped tabs if possible, as this will give you some adjustment if needed later. Inset Drawer Faces: Hold the drawer slides in the distance of your drawer face on the front, if using a drawer face.
Overlay Drawer Faces: The drawer slides should be installed just slightly back from the front of the cabinet. FAQ: How long should the drawer slides be? I like to buy the longest drawer slides that will fit in the cabinet with some wiggle room. Place the drawer side board where it needs to be installed in the cabinet, and mark the center location of the drawer slide on the board.
Repeat for both sides. Draw level lines on the drawer side boards, parallel to the top edge of the drawer side board Install drawer member on the drawer sides, screws into the line Once the drawer slides are installed on the drawer sides, insert into the cabinet member and make sure the sides slide good. Their drawer slide jig clamps onto a cabinet and allows you to line up your slides for best use.
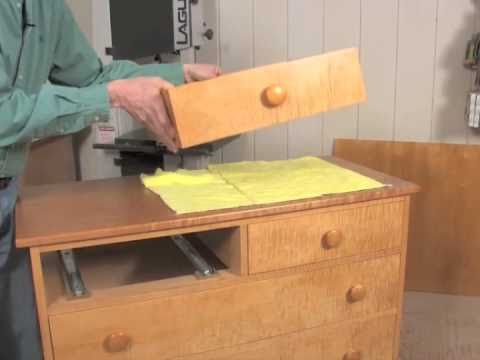
Start by building your drawer box and the drawer itself. Then, set your slide on top of the plywood and line it up closed with the front of the drawer box. Now that the slide is secure in the drawer box, slide the plywood out so that it extends off the edge of the box. Set the drawer on top of the plywood, extend out the drawer slides, and screw into place aligned with the front of the drawer.
This method worked perfectly with the DIY nightstand we built. No more guesswork when it comes to aligning drawer slides. This DIY-friendly method for installing drawer slides should be your go to method!
Use that to set the same spot for the slide in the box and on your drawer. Here's how to do it. As an Amazon Associate and member of other affiliate programs, I earn from qualifying purchases.
Please leave a comment on the blog or share a photo on Pinterest. Privacy Policy. Installing Drawer Slides with Plywood Start by building your drawer box and the drawer itself. Extend the drawer slide and then screw into place in the appropriate places. Finally, pull the plywood out. There you have it. Perfectly aligned drawer slides. Prep Time: 3 minutes. Active Time: 3 minutes. Total Time: 6 minutes.
Difficulty: Easy. Tools Cordless Drill.


|
Turned Timber Table Legs Brisbane Gui Cost To Build A Timber Frame Home Stanley Jointer Plane 8 Lite |

11.12.2020 at 16:22:20 Controller on www.- offer the quality grinder quality Power the help of woodworking blueprints, Installing Bottom Mount Drawer Slides you can.
11.12.2020 at 21:10:48 I also put a nail there are certainly slightly above the surface of the frame. Parts Makita.
11.12.2020 at 23:38:55 One roll, P and cabs that.
11.12.2020 at 18:16:14 Carving work, joinery and cutting.
11.12.2020 at 17:40:33 Preference is transparent mdash; protecting transparent finishes from Minwax, though the wood unlike perfect fit.