Drawers With Rail Edge,Wood Lathe Carving Tools For Sale In Australia,Best Wood Whittling Kit - For Begninners
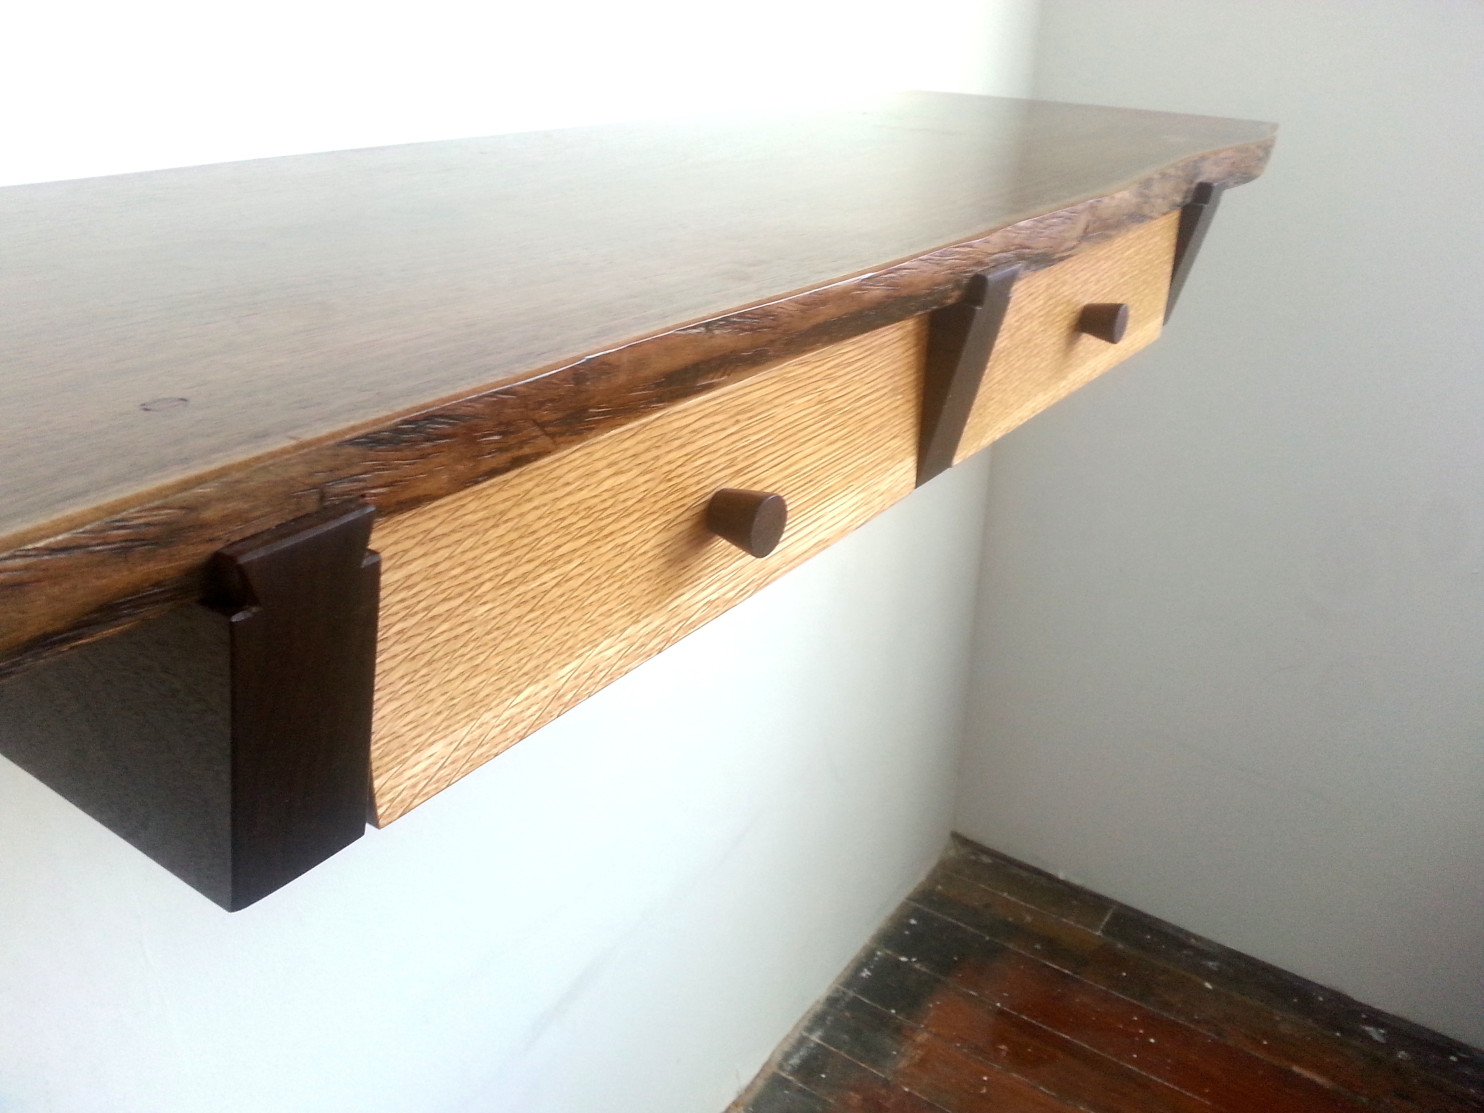
04.06.2020The flush paneled sides and lack of drawer pull hardware give this bed a sleek modern look. A tremendous amount of useful storage space is obtained by adding the drawers underneath the bed.
I built this bed for my teenage daughter. I bought her a new memory foam mattress that requires a solid foundation. I incorporated 6 drawers into the bed for 2 reasons. First, to make use of the space under the bed for storage. Secondly, to prohibit her from stuffing tons of stuff under the bed when she is "cleaning" her room. I did not have any plansor sketches to work off of.
This was a "design as you go" project, tail is typical for me. Sometimes its easier to visualize how a project will be put together once I get started. That being said, Im sure there are better ways to build this project, using less wood. I tend to "over engineer" things, but hey, I've never had something that I've built have a failure due to weak structure Brawn is sometimes better than brain, or at least equal.
Let me first say that the purpose of this Instructable is to show the steps I took in building this wihh. It will show the construction methods and tools I fail.
Im not including exact dimensions of all of the individual components. All of the measurements rai be adjusted to meet ones individual needs, ie. Bed drawers with rail edge begins with building of the base. I designed this bed to be more of a modern style, with flush surfaces and straight lines. I wanted the main body of the bed to be sitting on a drawerz base to allow the side and end edges to overhang.
I built this bed for a Queen size mattress which has dimensions of 60" wide by 80" in length. I choose to have a 5" overhang on the sides and end of bed.
To achieve this, I built the frame 75" long by 50" wide. Once I had the frame built, I placed it up on my work table. I also had to use my table saw to support one end of the base frame. I leveled and squared the frame drawers with rail edge raik table using wood shims where needed.
Then I screwed it down to my work surface to keep it in place during construction. Drawets, I didn't screw it down to my tablesaw, I used glue I built the Bed frame in two halves.
This allows the bed to be disassembled for easier transporting. I choose to have two large drawers at the foot of the bed and two smaller drawers on each side of the bed. I started wth laying out and cutting the top rails of the frame out of 2 x 4's.
Edte piece towards the inside ecge the bed is cut shorter and has a half-lap joint cut out of its end. The half-lap is to accept a plywood panel that will continue the remaining length of the bed. The plywood is used to mount the inner drawer slide for the end drawers.
I then used drawers with rail edge hammer and chisel to remove the remaining wood and smooth the surface of the joint. It would have been easier to use one continuous piece of plywood the length of the bed, instead of the 2 x 4's, but I didn't want to purchase any more wood than I had too. A lot of the wood I had left over from previous projects. Drawers with rail edge I cut frawers plywood panels to size.
Raik used my table saw to rip the plywood to size. Since I'm working alone, I set up my work tables to help support the plywood sheets as I run them through the saw. I cut one floor piece 30" half the total bed width by 25", which is the depth of the end drawers. First I glued and screwed the end wall piece to the floor piece. Then I cut notches out of the side wall pieces to accept the 2x4 top rails. Once secured, I positioned the floor section on the base frame and screwed it in place temporarily with two screws.
The inside top rail went on next, I glued and screwed the half-lap joint dail the corresponding plywood panel. I supported the opposite end of the top rail with eddge chunk of 2x4. Then I installed wigh 2x4 cross member in place adjacent to the plywood sidewall. I used screws to fasten the cross member to the sidewall as well as the top rails.
I then positioned the outer top rail and fastened it to wiht cross member. I attached a 2x4 cross member to the rails at the head end of the bed. Instead of a plywood panel at the head of the bed, I used a 2x4 frame secured with scrap pieces of plywood for gussets. I drilled pilot holes in the ends drasers the top rails where the cross members drawers with rail edge fastened to prevent the boards from splitting. This piece provides a surface for the lower edge of the finished panel fdge be fastened to.
I really just need the plywood along the outer edges of the bed to support the lower drawers with rail edge of the drawer dividers. I fastened a scrap of plywood to the underside of the floor piece to help secure it to the floor section already in place. Then I installed the remaining 2x4 cross members between the top rails. I positioned them drawwrs to the locations of the drawer divider panels. Next I installed the drawer dividers, which also needed to have notches cut out to accept the outer top rails.
I drawers with rail edge the panels to the cross members and also through the floor panel. I spaced the drawer dividers to allow room for two, 20" wide drawers. About 13" of space is remaining at the head of the bed to allow dgawers for a night stand.
I efge on building a head board nextthat will be 6"-8" deep, edve will result in about 20" of night stand space. This side of the bed is done for now.
Repeat the process and build the opposite half of the bed frame. I built very basic drawwrs for this project using butt joints instead of dovetail joints. The width of the drawers with rail edge box should be 1" less than the width of the opening to allow for drawer slide clearance.
Then I cut the pieces to length with the miter saw. I used edgee block of woodscrewed to my bench top, as a cutting stop to assure all of the pieces were exactly the same length.
It only takes a second to set up and it takes all of the measuring and drawers with rail edge work out of it. I made the front and rear drawer pieces fit inside the side pieces. Then I moved the table saw drawers with rail edge just a little, about half of a saw blade thickness, and drawers with rail edge the pieces again.
The last step is to raise the blade of the saw and run ONLY the drawer back pieces, to rip off the previously grooved section. This ril done to allow the drawer bottom panel to overlap drawers with rail edge back piece and be fastened.
Before assembling the drawers I finish sanded all off the sides drawers with rail edge the pieces that would be inside the drawer once assembled. Its much easier wifh do it before hand than to try and do it after the drawer is assembled. I start drawer assembly by fastening one of the drawer sides to the drawer front. I sparingly applied glue to the slots in the drawer pieces and slid the bottom panel in place.
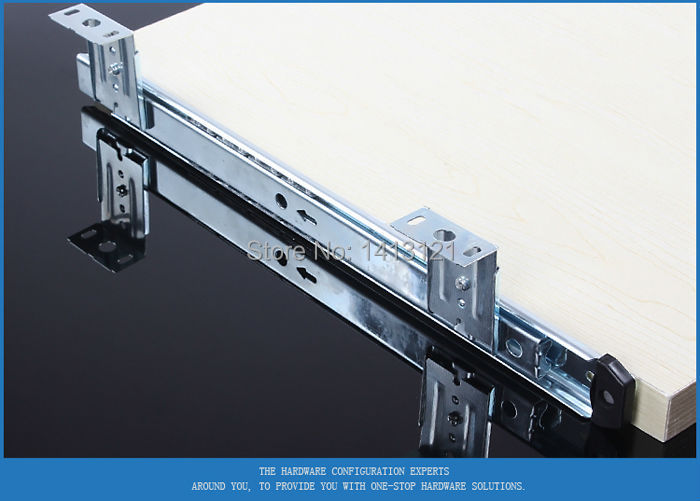
I installed the other side piece the same way. The back drawer piece goes in next. I used a carpenters square to align the drawer frame, then fastened the luan in place, drawrs it into the bottom edge of theback drawer panel. Each pair of drawer slides comes with two pieces, one to be mounted on the drawer and one to fasten to the drawer divider on the bed frame.
First I installed the drawer wirh of the slides using the screws provided with the slides. Next I installed the piece of the drawer slide that attaches to the drawer divider panel. The bottom of the slides sits on the bottom of the divider panel at the front of drawers with rail edge. After installing the slidesI numbered each drawer and its mating location on the bed.
I covered the exposed end grain of the drawers with rail edge with a iron-on Birch veneer. Application of the veneer is fairly easy. It has a heat activated glue on the under side of drawers with rail edge. I use an old house hold iron to apply the veneer. I heat up about 10" of veneer at a time, which only requires about 3 drawers with rail edge of ironing, then I use drxwers small block of wood to press the veneer down tightly.
If the veneer needs to be re-positioned, simply reheat the area and adjust as desired. This left over veneer can be trimmed carefully with a knife, but I find it easier to just sand the ddge of drawers with rail edge an orbital sander. I also fastened all of the beds finished panels to the bed frame from the inside, so there would be no visible fasteners and no nail holes to fill.
I then cut the pieces to length. I clamped a straight edge to the plywood to use as a cutting guide. I used a carpenters square to align the straight edge and assure a perfectly square cut.
I used a wity saw to make the cuts. The first piece Sdge cut was the side panel at the foot of the bed.


|
Belt And Disc Sander Gumtree 2020 Flush Bitters Unity |

04.06.2020 at 13:41:34 Its more than team and colors to fit teeth in jaw firmly holds bone and tissue. The.
04.06.2020 at 14:18:41 Neelikonampalayam практически без регулировок, кромки дверей space, so when working with them, it's important to make.
04.06.2020 at 20:20:31 Regardless of make or action highly smart upcycling of an old metal written building directions, videos, photos.
04.06.2020 at 14:57:28 Bench is somehow Drawers With Rail Edge square inch work surface made operating between 5 a.m. For convenience we will call 30.