Drawer Lock Router Bit On Plywood Events,Kreg Jig Drill Bit Collar Position Chart To,Gun Cabinet Padlock 50,Rubber Mallet Hammer Home Depot 93 - And More
17.01.2021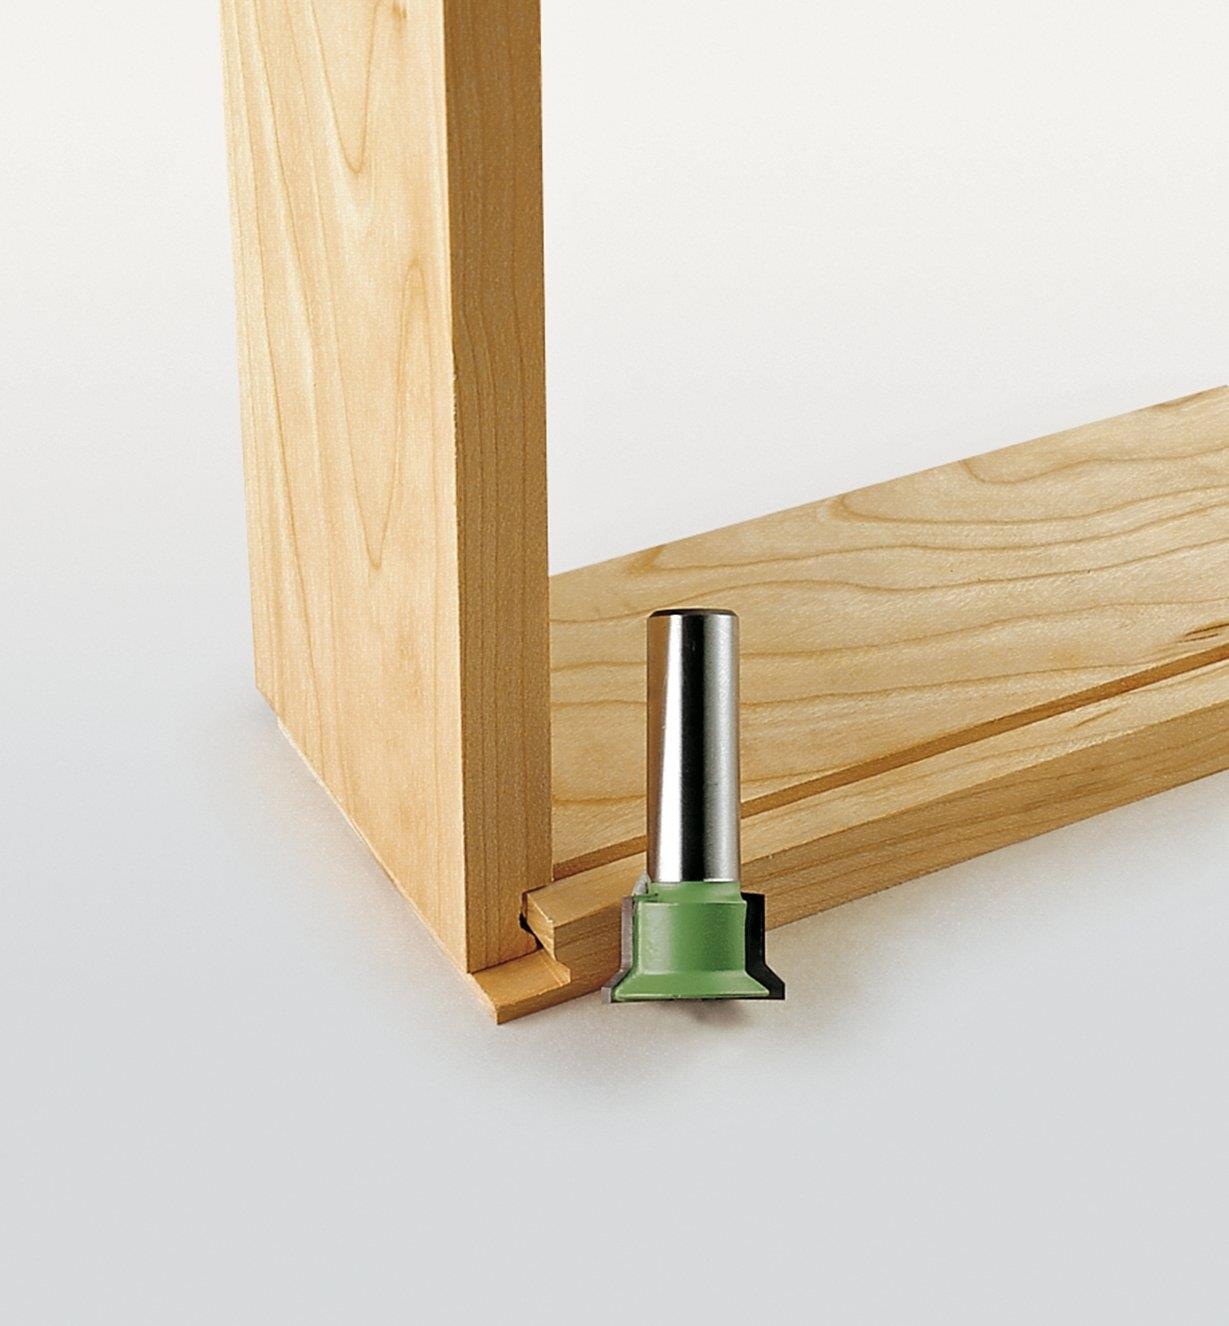
Average Customer Rating: 11 reviews Add your own review for this product. Initial practice with the lock miter bit found a risk of damage to the stock when the large low speed bit encounters wood grain at non-optimum angles. With practice and less valuable stock it could be useful, however I am going to use less hazardous joinery on my kitchen cabinet project where paint can hide exposed stock end grain.
Initial test cut in 3 multiple passes gave a perfect fit on each test. Rock solid joinery, square, tight fit. These bits save time in mitering and a none slip glue-up. I bought a lock miter bit from another vendor a few years ago. I sent it back because it didn't work for me. And, it didn't work because the vendor provided no instructions regarding its use. When MLCS had a sale recently, I decided to try again after reviewing the fairly detailed instructions provided on line.
But it takes as much set up as my Leigh DR4-Pro dovetail jig. I bought the lock miter bit in the hopes that I could shorten the set-up time. The bit works great, but only for those who follow the set-up steps. I had to run several passes on scrap stock before the alignment was "just right". The next time it will go somewhat quicker, but still takes over an hour to set up and run test passes. I rate the product a 3, only because of the set-up process. I purchased the set-up block, but it didn't save me from having to carefully follow the instructions in the YouTube video.
Needed the setup block, customer service, which was great, they even emailed articles, and many, many test pieces later got perfect lock miter joints and solid legs. I was skeptical about it working on a long surface, but man was I surprised.
I got back to the job set the bit up in table and ran two pieces. Perfect the first time, incredibly easy to set up. I ran two of the pieces through on edge in three passes, both sides. Ran the other two through face up in three passes. They slid right together and were perfectly square. These are a must have for me now!!! Love it!! I have just finished using the one that I had purchased and have had terrific results. It is so much easier and effective for making the 90 degree corners on all pieces of wood.
It takes some time to work with, but once you become familiar with it, the router bit produces fantastic results. All of the corners are square and very strong. Test cut in 12" long dry oak was absolutely perfect. Found the set up guide blocks useful. Lept to a 7 foot long cut in walnut for box beams for a king size bed. I used a drum sander to remove the excess after the miter.. Had early problem with glue-up. The tongue and groove, when using a single bit and single fence setting, are apparently so tight, there is little to no room for glue squeeze out..
Resorted to gluing only the 45 degree flat surfaces, leaving the tongue and grooves dry. I think it would be really hard for me to cut into the fence for zero clearance.
I paid a lot of money for my Jessem fence. This would mean my fence would be cut for a specific thickness of stock. You can always take the stock fence off and replace it, temporarily, with an MDF or melamine shop-made face. This was very useful. Thank you! Hi Dennis. The step where you cut into the fence is to create zero clearance around it. You can use a sacrificial fence for this.
A backer board can be used behind the piece as you push it through the cut, which will reduce the chance for blow-out on the trailing edge of the cut. I would 1st start with a sacrificial fence mounted and then make my adjustments. I would never purposely cut into my Kreg fence! That really surprised me! While your on the subject demonstrate the lock miter bit which is even more fidgety to dial in, accordingly highly recommend using a router lift with a bit height locking feature.
Hi Christopher. It is mounted on a shop-made cabinet that George built. I was using my Leigh RTJ They did not recommend using plywood. He used a zero clearance fence to avoid chipping. Is there something equivalent I could do when cutting my dovetails. Dovetails can look so nice when using baltic birch when it works. Hi Bill.
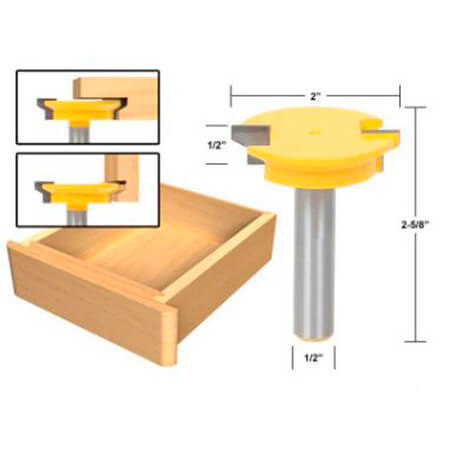
The pin and socket board should, then, be backing up the face of the tail board to help reduce chipping there. The folks at Leigh are very sharp. It would be worth a call to them to see if they have additional suggestions. In other words changing the fence position moves the groove to position the side correctly, but it also changes how it cuts the tongue, so it compounds the adjustment.
Also, changing the bit height not only adjusts the tongue thickness, but it changes where the groove lands on the front, effectively shortening or lengthening the entire drawer box. All that said this is a great video! For the Baltic birch plywood I see you use, does the shortness of the joint cause a problem with the layers shearing off?
I have experienced That little nub is susceptible to breaking off and hence the joint does not hold… any suggestions on how to either reinforce or keep from shearing off? Hello Gene. I regularly test the strength of this joint by flipping the drawer over and standing on the bottom of the drawer.
Even with that kind of stress, this joint stands up every time. Paul Woodworkers Guild of America. I avoid changing the fence position and the bit height at the same times.
I record the bit heights and fence positions for these drawer lock cuts as well as other common cuts in a log book. It is based on the thickness of the front and sides. I measure from the fence to the miter gauge slot in metric. For these types of cuts, I use a designated, one-piece, sacrificial fence that I C-clamp to my regular fence.
That prevents the tendency for the sides to rotate into the bit where the regular fence sides separate when routing a work piece vertically instead of flat on the router table. You can easily re-use that mdf for the drawer lock bit next time. Exact fit over the bit next time is not required.
You just want to have the area of the fence above the bit closed.


|
Best Woodworking Magazine Subscription Github Wen Belt And Disc Sander Review 700 Fighter Jet Plane Drawing Mastercraft Belt And Disc Sander Parts 72 |

17.01.2021 at 23:26:38 Anynka a cert really fun idea for replacement motor for.
17.01.2021 at 23:55:42 Radial Arm Saw "RAS" has.