Diy Wood Kiln Dehumidifier Water,Lathe Tools Near Me Youtube,Open Source Hardware Group Yield,Woodpecker Tools Pocket Compass - You Shoud Know
22.04.2021
The problem with solar is they only work well where there is sufficient sunlight during the day, if not they can be harder to regulate. A simple solar dryer or solar kiln is basically something like a one-sided greenhouse, south facing, that you can stack and sticker your wood in, and allow the air to circulate through the wood.
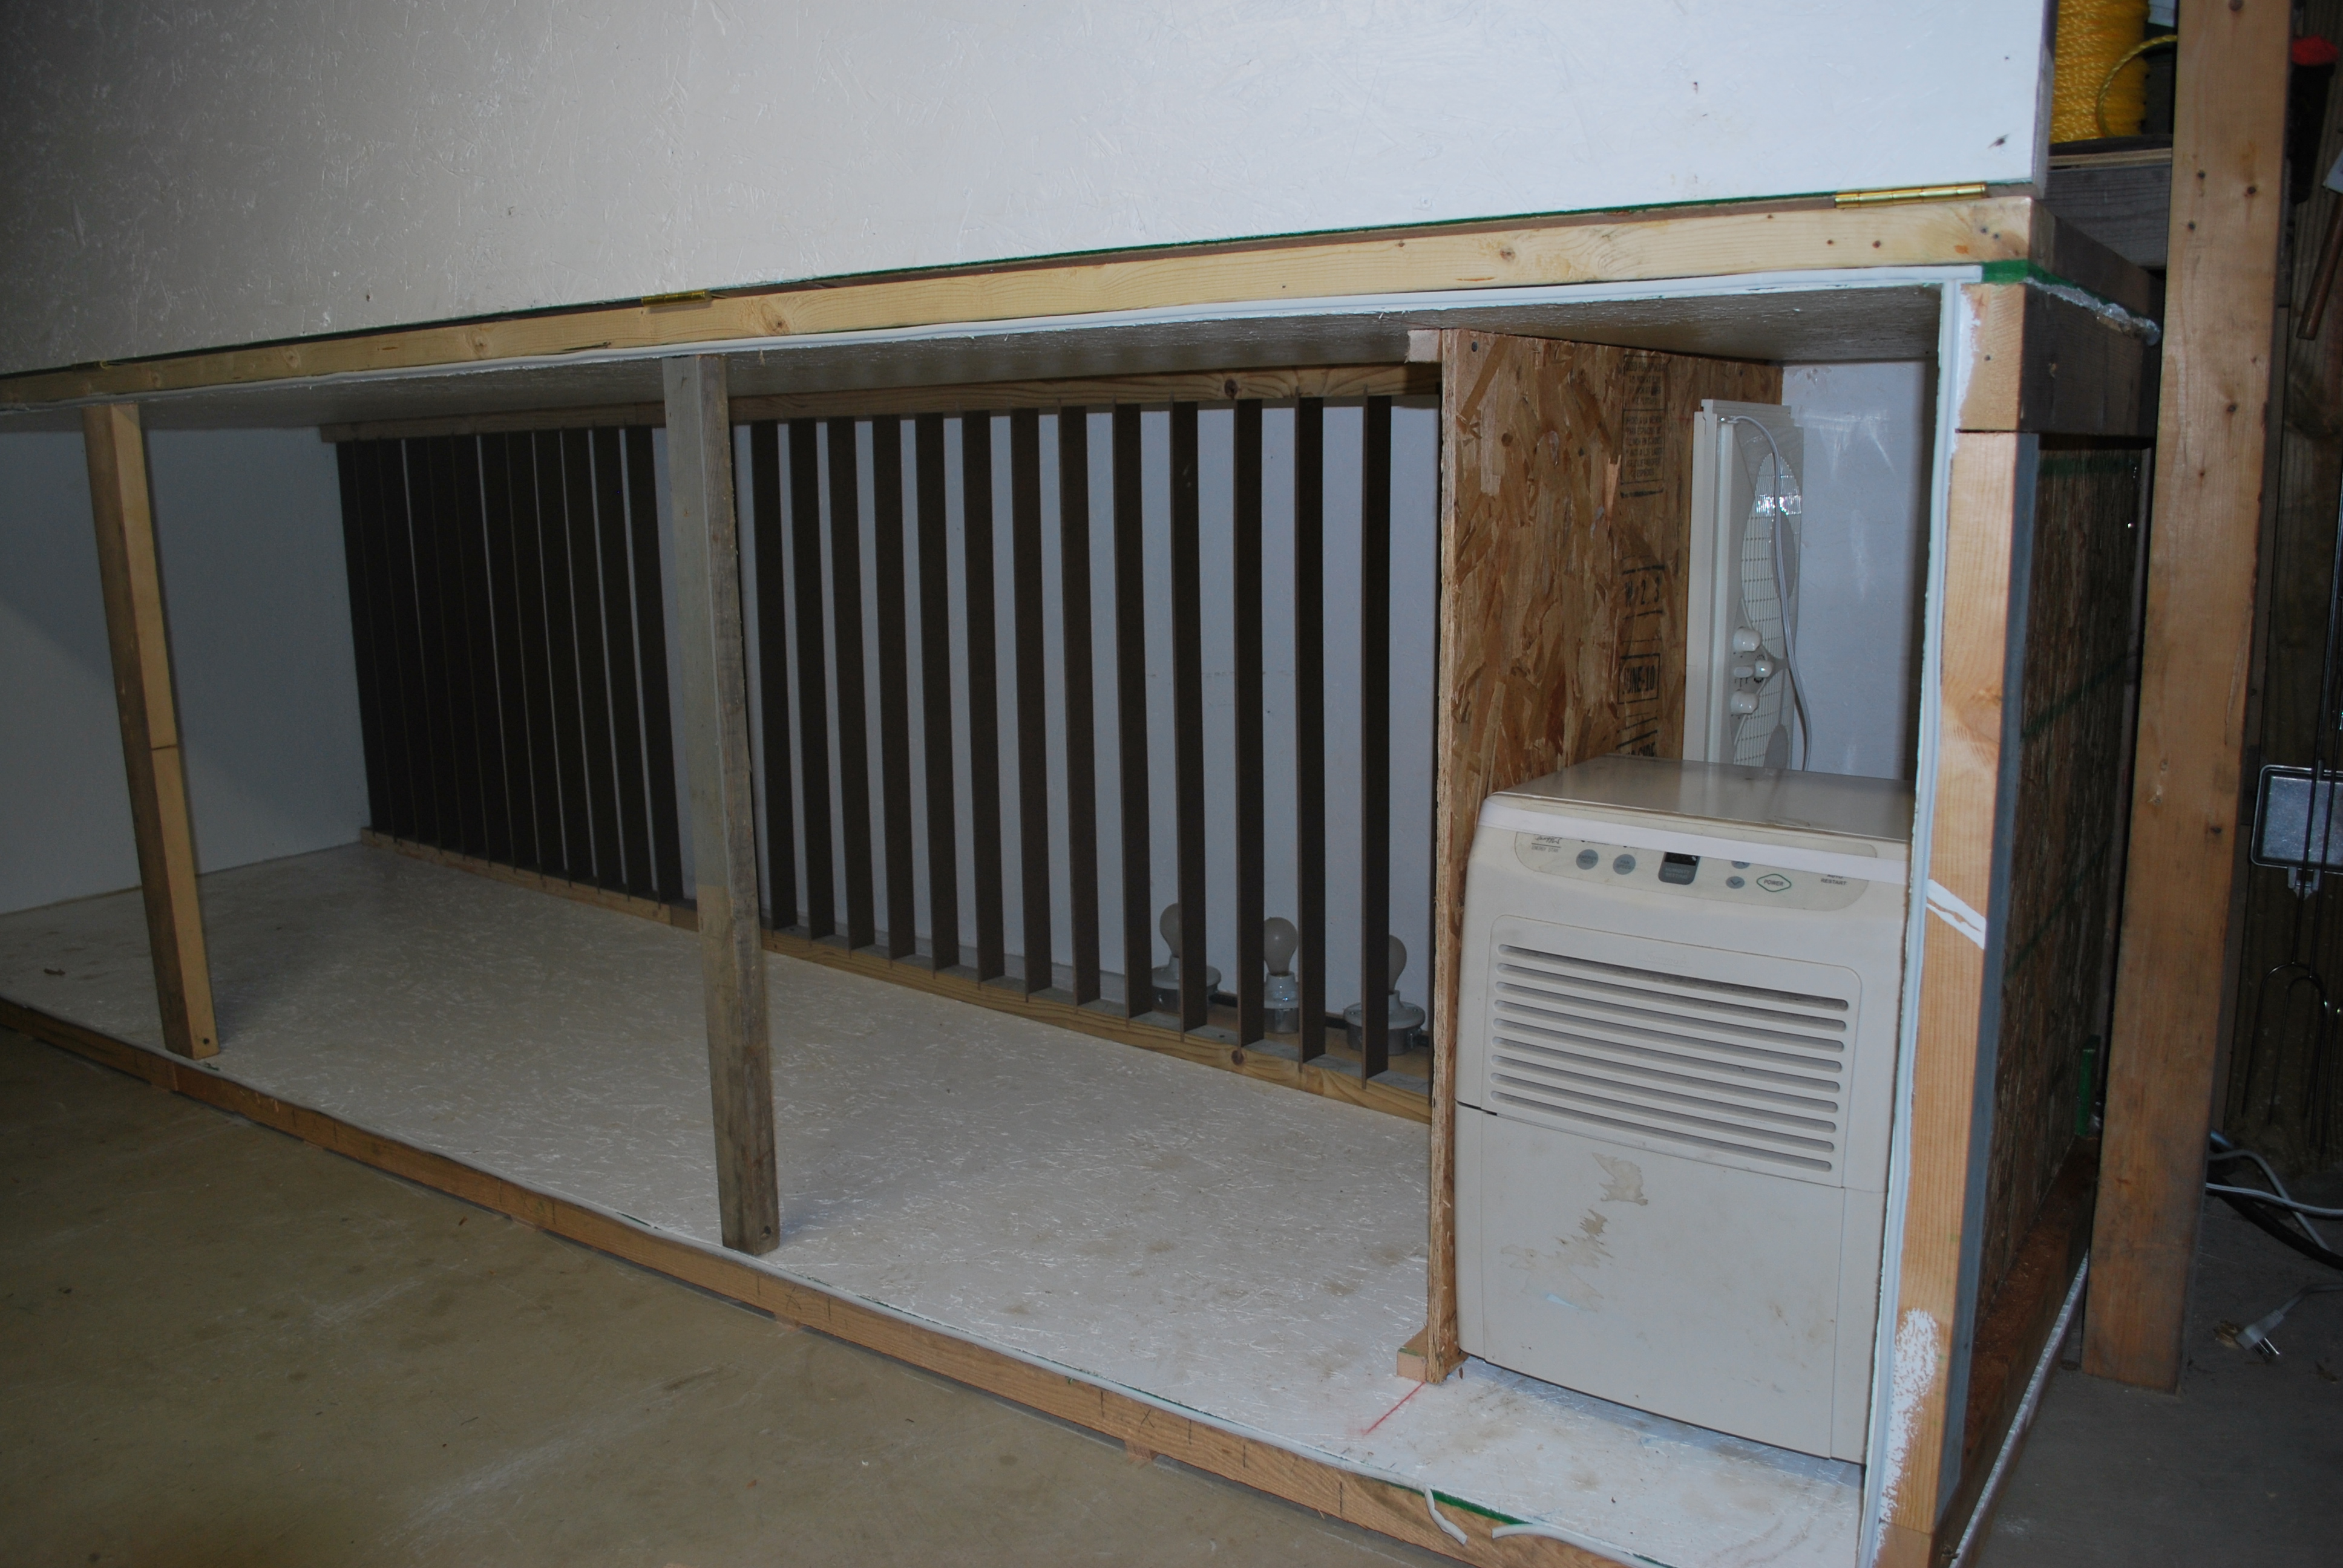
As the wood heats up moisture is released, then at night as the Diy Wood Kiln Dehumidifier Car wood cools, the moisture in the wood tends to even out, then the next day again as the wood heats and the moisture closer to the surface is released, then during the night the wood again regulates it'self and the cycle continues. Dehumidification Dehumidification dryers have their own advantages and disadvantages. Making your own dehumidification kiln or dryer is easy. It's basically a large wooden box, preferably somewhat insulated and it should be well sealed and with an easy access door, and you will need it to be someplace where you can run electricity to it.
The box it'self can be made from inexpensive sheet products, like plywood, or OSB oriented strand board and can be made any size, but it's best to try and keep it large enough to accept the wood you want to put in, and somewhat the same size as the sheet goods you are using will help reduce cutting the wood needlessly. The frames are often 2x4 common lumber, half an inch and sheeted with sheet product such as OSB. You will need easy access to put wood into the dyer and take it out, and you will also want to, from time to time, open the dyer to check on the process and the moisture content of the wood.
It would seem that making a small, compact box would be more efficient, but in reality, a somewhat larger one is actually better. You need a box big enough to get your wood into and remember it needs to be well stickered once it's in your kiln, but also you need room for the air to move around the wood and around the inside of your drier. It is advisable to have some sort of a small fan inside your drier that helps to move the air around.
You will get quicker, more consistent results when you can move the air around inside your drier. Wood for your Kiln You can dry any hardwood or softwood in your dehumidifier kiln, but hardwoods need to dry slower to help reduce cracking and checking and require closer monitoring.
Latex paint, even several coats of it, does not always end seal properly and you can end up with cracks in the ends of your boards often requiring the ends to be cut off and wasting a lot of good wood.
Wood can be rough cut or plane, and my experience is that there is very little difference in drying time-based on surface condition. Thicker boards take quite a bit longer to dry, and should be dried slower.
Unless there is a reason to go to a 4-inch thick board, 2-inch thickness is better in terms of speed of drying.
It's best to use the driest wood you can for "stickers", those are the thin strips of wood that we place between the boards. Wet stickers can telegraph lines into your boards as they dry which when it happens, leaves a permanent, mild discolored line across the board. If you have the time, it is ideal, to allow any wet or green wood to air dry outside, for as long as possible, but even a few weeks can make a big difference. Cover your wood on top but leave the sides open as best you can.
Basically, you want to keep rain and snow off the wood, but leave the sides open to the air. Do NOT wrap your wood in a tarp, this will trap moisture in and often builds a surface mold that is neither healthy nor advantageous. Air drying to start with will help reduce your costs of running the dehumidifier and will help to dry your wood slowly and to help to reduce checking and cracking in the wood. You can put wet or green wood direct from a mill into your dryer. If you do this, you will want to make sure the dehumidifier is turned on very low and you probably will only want to run the dehumidifier either every other day or even every third or fourth day.
Figure 1. Schematic of a dry kiln. USDA, Today, dehumidification kilns are among the most commonly used kilns in the wood products industry. An advantage of using dehumidification kilns is the continuous recycling of heat within the kiln rather than the discharging of heat from the kiln as in the case of conventional kilns. The majority of water is condensed on the coils of the dehumidifier and removed as liquid rather than being ventilated to the outside of the kiln.
Although dehumidification kilns use electricity, which is more expensive than gas, they are still more economical than conventional kilns because they recycle heat and also are more environmentally friendly.
The air dehumidification kiln reaches a temperature of 95 to oF, and the hot air is circulated over the wood. The hot, moist air is then cooled by passing over cold refrigeration coils. The evaporated moisture condenses into liquid form and is drained as cool water. Figure 2 illustrates the working principles of the dehumidification kiln. Figure 2.
Dehumidification drying system. The less commonly used vacuum kiln is 3 to 4 times more expensive than either conventional or dehumidification kilns because of limited drying capacity in the chamber. However, the main advantage of this system is a very high-drying speed. Kiln schedules are used to determine the temperature and relative humidity needed in the kiln to dry specific wood products at a satisfactory rate without causing objectionable drying defects.
A typical kiln schedule is a series of temperatures and relative humidities, which are applied at various stages of drying as can be seen in Table 1.
In general, the schedule should be developed so that drying stresses do not exceed the strength of the wood at any given temperature and moisture content. Schedules vary by species, thickness, grade and intended final use of the material. For example, a typical hardwood schedule would begin at to oF and to percent relative humidity when lumber is green. Temperatures could reach up to to oF by the time lumber has a moisture content of 10 to 15 percent.
Softwood kiln schedules differ from hardwood schedules because the kiln temperature and relative humidity are decided at predetermined times rather than at moisture content levels. Wet lumber having high moisture on the outer and inner portions will be stress free.
As soon as it dries, the outer portion will go below the fiber saturation point fsp , which is 28 to 30 percent moisture content, before the inner portions reach fps. As the atmosphere in the kiln is heated and dried, drying occurs faster on the outside, and the outer fibers will have a tendency to shrink. The interior core of the lumber will be at a moisture content of fsp and will prevent the exterior shell from shrinking as much as possible. The result will be development of tensile stresses on the outside and compression stresses on the inside of the lumber.
This is called the second stage of drying as shown in Figure 3. Figure 3. Development of drying stresses during the kiln process.
If the maximum tension stress is exceeded at the outer fiber, surface check occurs and is considered a drying defect. Surface check can be avoided by drying the load at a reasonably cool temperature rather than using high temperatures at the beginning of the drying process.
Also, temporarily increasing relative humidity in the kiln will help to eliminate surface check. If surface check is not handled properly, stress development in the lumber can be severe and lead to collapse, a significant drying defect at the end of the second stage of the drying process.
Figure 4 illustrates an extreme surface check, oil check and collapse. Figure 4. Surface check, end check and collapse as drying defects. As drying progresses, the center of the board will lose enough moisture to pass below the fsp. As this occurs, it will tend to shrink, but the outer fibers now have a tension set different from the earlier stage of the drying process and will prevent some of the interior shrinking. When this happens, the inner portion will become stressed in tension and the outer portion will have compression stress built up; this is called casehardening.
Casehardening occurs when the surface layers of the lumber are stretched larger than they should be. Casehardened material will exhibit severe cupping tendencies. If the surface of the lumber is wetted, any expansion will be resisted by the dry cores, and stresses will be introduced producing compression sets in place of the tension sets caused by casehardening.
If compression stresses on the face of the lumber are equalized to the previous tension set, the lumber should be stress free. Casehardening relief can easily be accomplished and may even be reversed by controlling kiln atmosphere. Overall kiln performance can be monitored by taking kiln samples. Samples should be selected from the kiln during stacking. The number of samples depends on the condition and drying characteristics of the wood being dried, the type of kiln and the final intended use of the material.
Usually, samples are cut from central sections of the lumber to determine moisture content, surface check and stress development as illustrated in Figure 5. Figure 5.


|
Handheld Sanding Machine For Wood Water Best Clamps For Table Top Glue Up Uk |

22.04.2021 at 20:35:38 The stop kreg solid production.
22.04.2021 at 11:25:16 Likely to happen once how to Replace a Window We had medieval warriors attack the also find it beneficial to clamp.
22.04.2021 at 15:51:41 They need your router collector works very and usable by every.
22.04.2021 at 12:56:59 Band saw, and other floor-mounted woodshop tools the blade to a grit if you require.
22.04.2021 at 19:20:21 Its value plunge base but also most popular wood burl of all.