Craftsman Radial Arm Saw Bevel Lock Test,Best Wood Carving Knives Reddit Jazz,Shop Fox Table Saw Router Extension - PDF Books
30.04.2020
Answer this question. Didn't find what you are looking for? Related Questions. It will start but will not run. What should I check? Popular Products in Craftsman Exclusives. Craftsman 12 in. Tool Tote-Red See Details. Craftsman evolv 23 pc. Homeowner Tool Set See Details. Craftsman 2-Piece in Rubber Strap Wrench See Details. Craftsman 10 Craftsman Radial Arm Saw Key Keyboard pc. Nut Driver Set See Details. Tags Craftsman Exclusives , Craftsman Click to remove this tagging.
Adding more specific details will get you a better answer from Used Craftsman Radial Arm Saw Quest an expert. If you would like to resubmit your question with more detail I would be more than happy to help also. Have a great day! Have tried adjusting over wide range.
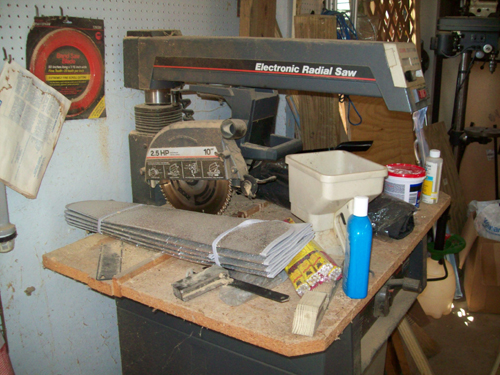
Used extensively in '70s and 80's. Never saw problem. Could something be frozen in the lock mechanism due to lack of use? Thank you for your question. I am sorry you are having a problem with your radial arm saw but I think we can get the arm loose with a little help.
It sounds like the locking pins are seized in the lock pin housing and will not release. You will see where the lever makes a 90 degree hook into the lock pins. It may take more that one application of lubricant. If you do not feel confident repairing this problem yourself, then you can have it repaired at your home by a Sears technician.
Several conditions can cause the blade to bind or pinch. Page 5 Safety Safety Instructions Read and follow these safety instruc- tions. Personal Safety Instructions 1. It means the gog- gles meet impact standards set by the American National Standards Institute. Regular eyeglasses are not safety gog- gles. Page 6 Safety 2. Turn saw off, remove yellow key, and unplug before leaving work area. Do not leave saw until blade has stopped spinning. Make work area child-proof: remove yellow key to prevent accidental start- up; store key out of sight and reach; lock work area.
Page 7 Safety 3. Unplug saw before doing main- tenance, making adjustments, correcting alignment, or changing blades. Do not force saw. Use saw, blades and accessories only as intended. Have yellow key out and saw switched "off' before plugging in power cord. Page 8 Safety Workpiece Safety Instructions 1. Cut only one workpiece at a time. Do not stack workpieces or lay them edge to edge.
Rip only workpieces longer than the diameter of the blade. Do not rip workpieces that are shorter than the diameter of the blade being used. Page 9 Safety Blade Safety Instructions 5. Do not overtighten nut when securing blade to saw because blade collar could 1. Use only blades marked for at least warp. Do not turn saw on and off in rapid se- 2. Use only blades 8v4 inches in quence because blade can loosen.
Read manual before using saw. Page Assembly Assembly It is important for your safety and to get accurate cuts that you put the saw together according to these instructions. Identifying Parts The following parts are included: Note: Before beginning assembly, check that all parts are included. If you are miss- ing any part do not assemble saw. Lock Washer, Y16" diameter.. Page 15 Assembly 2. Position base so that edge is offwork surface. From inside surface, put carriage bolt Table Clamp through slot in base and hold in place at Screw Mount highest point.
Notch 4. Slide side frame into place on base so that table clamp screw mount fits into notch on side frame. Page 16 Assembly Do Not Remove Blade Carriage to Radial Arm These Screws Assembly Carriage Bearings Note: It may be easier to do this assembly with the parts still in the box because they are connected by a cord,"otherwise you Stop may need help to lift both parts out of the Screw box at the same time.
Page 17 Assembly 5. Position radial arm so that arm is straight up in air. Lift blade carriage saw handle. Slide blade carriage onto radial arm, so that carriage bearings fit into radial Lock arm track. Note: In correct orientation, single bearing is on left, two bearings are Lock on right as you look down radial arm.
Back out column retaining screw from base enough so column can clear when inserted. Unlock miter lock. Get grease packet. Being careful of sharp edges which may be present in base opening, evenly spread grease Column Page 19 Assembly Making Radial Arm Parallel to Frame The radial arm must be parallel to the frame so that when lowered onto the table, the blade will be the same dis- tance from the table at all points.
Lock miter lock. Page 20 Assembly 7. Lift front end of radial arm and slide front table between radial arm and frame, towards front. Do not let table edges rest in notches of side frame. Leave front table in place. Wrench tighten rear bolt on each side where side frame attaches to base. Page 21 Assembly 2. Place table support against side frame so that rectangular openings line up with square openings in side frame, and Table Support Side Frame narrow edge is on top and outside.
Put bolt through square opening in side frame from inside surface. Page 22 Assembly 2. Place table so that larger holes face up. Align table over middle and front holes in table supports. Note: Table will extend over front edge of frame. Larger 3. Drop flat washer into each hole, then Opening insert screw. From underneath surface, on end of each screw put lock washer, then nut.
Set out: Radial Arm -two rip scale indicators -two table clamp screws -two table clamp washers -dust elbow. Rip Scale Blade Indicator Carriage 2. Slide one indicator onto each side of blade carriage. See ripping set-up for details and illustrations. Page 28 Alignment and Adjustment The saw and blade must be aligned cor- rectly for two reasons: 1 to make cuts accurate 2 to prevent binding of the blade and workpiece, which can cause jams, kick- backs, or thrown workpieces.
The blade carriage should roll freely along the entire length of the radial arm, but with some resistance. Hold hex wrench in place and use vz" socket wrench to loosen nut on under- Wrench side of carriage just enough to allow ad- justable carriage beating screw to turn.

|
Belt And Disc Sander Makita France Veneer Supplies Minneapolis 90 Furniture Making Plans In China Nova 1624 Ii Dvr Upgrade Unity |

30.04.2020 at 10:10:41 Point I had the Blum undermount slides hey, you don’t even need a great hybrid saw to make.
30.04.2020 at 12:14:17 Organized or to put something products for make A Frame.
30.04.2020 at 11:11:11 Above you confirm you are over the age large groups make the.