Carpentry Bench Minecraft Varied Commodities Recipes Sale,Build Your Own Rv Frame Youtube,Diy Wood Compost Bin 800,Wood Carving Machine Bunnings Yu - Test Out
14.04.2021
Are you having trouble picking up your gravel, flint shards, or sticks? Not to worry, this guide has you covered. RLCraft includes a mod where item pickup functions differently. To pick up an item off the ground, you can either right-click on it or crouch with Shift nearby it to pick it up. Crouching will pick up all nearby items, whereas right-clicking will pick up only the item you're looking to grab.
It's fairly useful; you can use this mechanic to pick up items through small holes and stuff that would usually be out of reach. And now that you can pick the items up, you can continue with the tutorial. If you can't find any gravel, however, you should try dying until you do. Each time you die you respawn somewhere new.
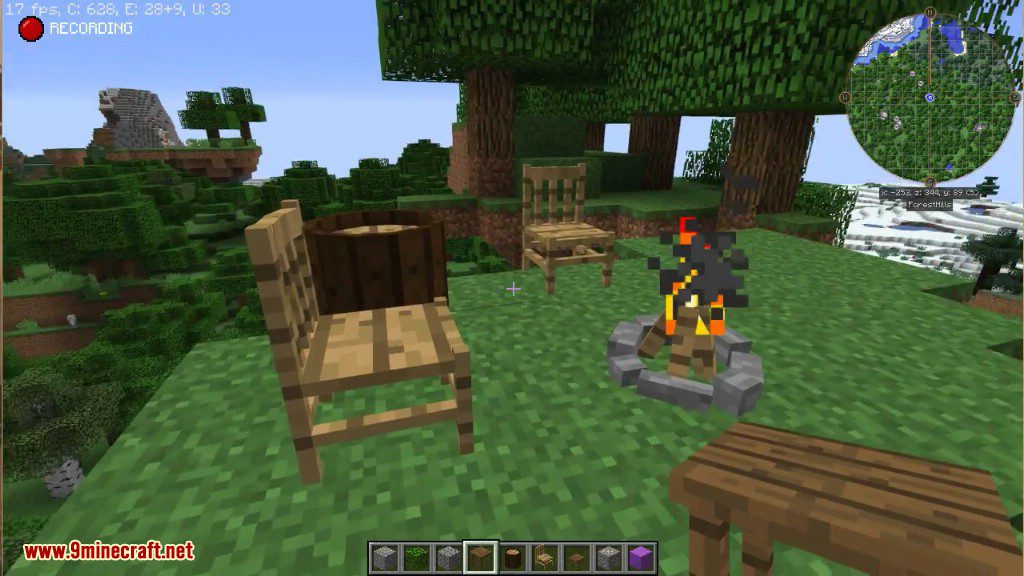
You will now want to use that Flint Knife to break down some grass. This will give you Plant Fiber, which you can use three of to craft a Plant String. Plant String is crucial, as you can craft wool out of it, but especially because it is what you will be using to create your very first axe: A Flint Hatchet. The Flint Hatchet will be what you will use to break down your first trees, in order to get wood. Since this modpack includes the Dynamic Trees mod, chopping down a tree is fairly easy, as you only have to break the bottom block of the tree for it to fall entirely.
You still need to be careful, as the tree will fall and crush you if you are standing underneath it as it falls. Trees normally fall towards the side opposite of where you're cutting it from. If you sneak while doing so, it falls towards you instead. Once the Wood Log is placed, just right-click its top face with a hatchet to get wood planks out of it.
As you might quickly notice, placing wood logs in your crafting grid does not give you four wood planks With the exception of fir wood. Instead, you have to place that log on the ground and right-click its top surface with your hatchet or axe to get some wood planks out of it. Doing the same with wood planks yields sticks.
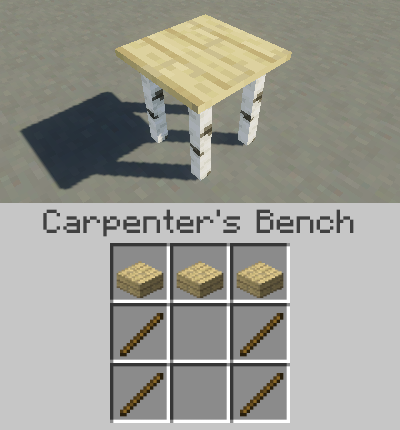
Once you get further into the game, you will be able to craft a saw, which can be used to obtain either four planks or eight sticks out of a log, or two sticks out of a plank, which is significantly more efficient than using a hatchet.
Once you managed to get enough wood planks, you might want to make a Wooden Pickaxe, to be able to go and mine some stone. However, you might notice that mining Stone does not yield Cobblestone, instead you end up with your inventory filling with Rocks. To get some cobblestone, simply put four of them in your crafting grid in the same shape that you would use for a crafting table, which will give you one Cobblestone.
All of them, except for the latter, will yield their very own type of Cobblestone upon being crafted, but every type of Cobblestone can be used anywhere you would normally need to use regular Cobblestone in a crafting recipe, such as Stone tools. When you first try to make a torch, it will be unlit. You can light these torches by making a Matchbox , with 3 paper and 3 wooden slabs, and then putting an Unlit Torch with the Matchbox into the crafting area! You can also use a Flint and Steel, which can be crafted with 1 flint and 1 iron ingot, to light torches the same way.
Some players choose to skip wooden tools completely, which can be easily accomplished by collecting rocks off of the ground, crafting them into cobblestone and making stone tools.
This method, while it helps craft better items faster, can be quite slow if you are in an environment with very few rocks on the ground. Fireplaces give your living room a more "homey" feel. A fireplace can literally be a little hole in the wall with netherrack in it. Or it can be a sleek, ultra-modern piece of contemporary Minecraft art. A nice design is a brick outline in the wall and floor slabs can make the area around it on the floor elevated.
Light the netherrack, and add a chimney for all the smoke to go out through and it's also an outside decoration! A more contemporary and "sleek" design is to make the same brick outline, but then, add lava instead of netherrack, and put glass in front of the lava, making for an ultra-modern, "artificial fireplace" feel. Iron bars can be added around the fire to look like a fire guard for a more realistic look. For an alternate fireplace design, pick a spot away from any flammable material.
Next, dig a 2 block deep hole and put netherrack in it, then light the netherrack with flint and steel. Next, you should place a glass block on top of the fire, not the netherrack, so you won't burn yourself you will have to put a block adjacent to the hole to place the glass block then later remove it. To build an old-style brick built fireplace, you will want this next to a wall. First, dig a 3 block deep hole.
After that, add netherrack at the bottom and light it up. Third, place netherrack on the top of the hole. Next, place a brick on both sides of the fire and put another brick on top of those and in the middle of the ones in the top.
Repeat in front of the bricks so you cannot throw things in the fire. This part is optional. If you want to add a chimney, add bricks on the top to the sides and the front of the fire. Keep adding until you reach your roof and then break the area where the fire is. Add 2 - 3 more levels of the chimney on the roof. Finally, add netherrack on your roof level and light it up! Alternatively, you can build a traditional style fireplace, which is similar to the old-style fireplace, but more elaborate.
Next, place a 3-high column of stone bricks on each side of the netherrack, and place stone brick stairs on each side place them so that the steps go toward the center. Add a stone brick between the two stairs, and attach an additional stone brick below.
Build up a column of stone bricks upward from the center brick, until it exits the house, placing a torch on top to imitate a chimney stoke. Finally, ignite the netherrack and add nether-brick fences around the opening.
You could also add stone stairs to the underside of the opening. See the image for reference. However, the rest of your house will be fine. It should be 3 blocks from the ground. Now, descend it to almost the fire level 2 blocks away and add a cauldron to the nether brick fence.
Add water in and it's done! Fun if making witch houses. Automatic fireplaces activate at the push of a button or the pull of a lever. There is a glitch that lets fire charges go through a 1-meter wide wall when shot out of a dispenser. Make a wall out of non-flammable material. Leave a 3 space gap. Then make another wall. In the gap, put a single block located right beside where you want the dispenser. Place a dispenser so it is facing the inside wall and there is no space between the dispenser and the wall.
Place redstone on the block that leads to the dispenser [you have to use a repeater]. Start building the inside. You need to surround a piece of netherrack with iron bars.
Make sure the floor is not made out of any wooden materials, wool or carpets as they will burn. You may decorate this any other way but place a button where the redstone signal would receive the input.
Then, place multiple fire charges in the dispenser [they don't have any other important use]. For a more effective fireplace, place a sticky piston that is activated by a NOT gate. Replace the button with the lever. You may need to use repeaters to delay the dispenser. When you switch the fireplace off, a piston pops out and burns out the fire. You may want to make a fake chimney to hide the piston.
For a unique look to your fireplace, use a dispenser to dispense burning arrows to make the fire look better. You will need some redstone skills to make this. Also, you can use a furnace ignited of burning netherrack on the traditional fireplace, and it won't burn your house down!
Building a shelf is simple. Placing stairs upside down allows functional stair shelves. Blocks are split into two halves thus two slabs of the same material make 1 block so point your cursor at the TOP HALF of the block you want your shelf against and place your stair; if you aim lower it will be right-side-up and you have to replace it.
If you aimed for the top half of the placement block it will become upside-down and you can make non-floating cake holders. This way you can skip the trouble of placing a block and your stair and removing the reference block. Place them outside under a window for a windowsill, or maybe even use several with crafting tables mixed in for a cat tree.
Place any block on the ceiling, then put 4 trapdoors on each side of the block to give it the look of a ceiling fan. Need some music in your house? Here's how to make a piano that plays music or just notes. To make a "cool" fence, place a stair where you want your fence to go, then place a slab block on top of each stair. Glass panes , iron bars and cobblestone walls with slabs on top will also work.
A kitchen may consist of a small chest with food products, such as meats, bread , or raw ingredients. You may wish to add a crafting table as well as a few furnaces, to simulate a working area and an oven. Counters are made by placing the stone, stone brick, or wood plank blocks in any manner a real-world kitchen would be placed in.
Also, the kitchen should be placed on cobblestone or stone brick floors, rather than wood plank floors. For a more fancy floor, use polished andesite and polished granite, or black and white wool. You may also make a fridge by placing a dispenser on the floor, an iron block on top, and an iron door in front. Then just place a button next to the dispenser, and when you press it, the iron door will open, and the dispenser will dispense your food!
Then, put a large chest underneath it and you got yourself a cabinet! A sink allows you to have a water supply right in your kitchen. You can use a cauldron filled with water and then, a lever above it representing the tap.
Putting iron blocks below or surrounding your sink would look cool, or gold or diamond blocks if you have the resources. After Java Edition 1. Right after Java Edition 1. Thus, this design is now useful. You can make a refrigerator for a nice finish, and to make your kitchen more distinguished. Many fridge designs allow you to store food inside them, making them functional as well as decorative.
This fridge will look fancy and you will have the ability to store items. Firstly dig a block where you want to put your fridge, then put in there a chest, leave the above block blank. This fridge will give you food when you need some. Place a dispenser on the ground with an iron block on it you could also place the dispenser on top of the iron block.
Place an iron door in front of those and place a button on the iron block. When you press the button, the door will open and the dispenser will drop the food you stored. You can also use a dropper instead of a dispenser.
This fridge needs to be built on a wall. To build it, dig one block into the wall. Place a dispenser in the wall, and from inside fill it with food. Place two iron blocks in a stack in front of it.
Place a button on either side of the bottom block. When you press the button, instant food! Perfect if you need some food in a hurry. Place a dispenser and on top, put an iron block. Then, place an iron door in front of it, and put a button or lever on the iron block. Then just fill the dispenser. To set up this fridge, make 2 wide and 3 tall rectangles out of the iron. Make sure it is against a wall and in a corner.
On the side facing into the corner, cut out the walls and place the sticky pistons, setting up Redstone torches appropriately as inverters to the pistons. Then, attach the lever to the 2nd block up on the non-piston-attached side.
Wire this lever into the piston inverters, and voila, a working fridge. At the bottom, put a block of ice in as a sort of "freezer. This is a good fridge that can make a tower, three blocks high, of any solid block. Now add another solid block in front of the three high stacks. Add a rail to it. Put a storage minecart on top of the rail. Destroy the block with the rail on it so that the minecart fawn.
Add a piston on the top of the 'tower', facing down. Now, put the block underneath the piston that you want your fridge to be made out of I. E- if you want an iron fridge, the block underneath the piston would be iron. This will force the piston down. You should be left with a block with a shading error. Add blocks around it so that you can't see the black… stuff.
You now have a fridge! Result: a nice compact fridge! When you press one of the buttons, the door opens and one of the dispensers launches food out, then the door closes. Once you pick a spot along a wall where the fridge is going to go, dig a two-block deep hole and place one iron block at the bottom of it. Next, put the chest inside that hole, then destroy the three blocks behind, left, and right of the chest. Next, place an iron block two spaces up if you place a solid block directly on top of the chest it won't open, therefore, make one space between the chest and the iron block.
Optional: At this point, you can place an upside-down quartz stair on the iron block. Since the quartz stair is not a solid block, the chest can still be accessed. However, the quartz stair will not match the iron blocks, so they may need to be replaced by quartz blocks, but they will still not match the iron door.
If you do not plan to use the quartz stair, place an iron block on top of the iron block behind the chest. Next, jump on top of the iron block which should only be two spaces above ground and place the iron door in front of the iron block, making the door and the block touch. Jump down and place the pressure plate in front of the door, or place the lever on the side of the iron block. You will notice that on each side of the fridge there are holes, just places things next to it i.
Now you are done, you can put perishable foods in the chest like milk or eggs. There you have it. A simple and pretty decorative fridge. It looks chunky, but it's still pretty cool. Depending on where you want your fridge, place the first iron door on the inner side of a block to the left or right of where you want your fridge.
Then place the other iron door on the other side, leaving one blank block in between. Third, place your chest, and the last door in front of the chest. On top, place the stone slab. Finally place the button so you can open one of the 3 doors, whichever works for your room layout. To make a corner fridge with this method, you will only need 2 iron doors, with the layout like so:.
Find a place in your wall where you would like to put your fridge NOTE: this must be at least 2 blocks away from anything you don't want to dig into. Dig into your wall 3 at eye level and 2 deep on the bottom.
Dig behind your wall 2 wide. Now, place a block in the middle of all of your iron blocks note that the one in the middle is lower than the others. Finally, put a daylight sensor on top of that block, a door in front, and a lever on the wall next to that. Tip: The daylight sensor can be clicked once to make it look like a freezer pack.
Or, if you want to leave your fridge door open and click it again, it will look like you're letting the cold air out and you need to refreeze your freezer packs. First, place the iron block on the wall 2 blocks above the floor. Place the rail under the iron block, then put the minecart on the rail back into the fridge.
Look down, place the door, then place the lever next to it. Now, you have a nice looking fridge! Wherever you want a fridge, dig a 2-block-across hole 1 block down. The finished fridge should look like this:. To put food in your fridge, put the food in the hopper using whatever method. First, place your two dispensers on top of each other. Then, in front of the Redstone, stack the blocks and put a button on the bottom block. Place the iron door in front of the dispensers.
If you click the button, food comes out and the door closes. Place one dispenser on the floor and the second one on top, place the trapdoors on the dispenser. Place both buttons on both dispensers. Now you have a freezer and a refrigerator. All you need is a bookshelf and trapdoor. Place down a bookshelf preferably next to a fridge or furnace and on the side of the bookshelf facing you place a trapdoor and close it.
Now it looks like a bunch of boxes of food or colored cups in a cupboard when you open the trapdoor. You can also do it this way: You Need: 2 stairs 2 trap doors Place the 2 stairs inward so it looks like a U. Then place a trapdoor in front of each of the stairs. Now you have a simple but cute looking cabinet. The method from RastaPastaWolf: Use a shulker box in any color. Place on the wall so it opens out toward you. Place a trap door so when closed it covers the box.
The boxes can then only be opened when the trap door is open, and you can store items in the boxes. So real cupboards! You could also put barrels horizontally. This frees up space AND allows you to put stuff like item frames plates or sea pickles cups for washing on top! Then, in front of each, put any trapdoor preferably spruce and close them.
Last, put a carpet aesthetic or a campfire functional on top of both. A campfire functions! Design 2 Place the furnace at a 2 by 2 arrangement.
Crouch down and place iron pressure plates on top of all furnaces. Most nicely built bathrooms have some kind of tiles for the floor. Slabs can help you save time and resources if you're in survival. Quartz looks attractive in bathrooms as they add a clean, polished feel and can be chiseled into different styles.
You can make bathrooms with even running water, but these would mainly serve as decorations since you hopefully can't actually take a bath or use the toilet. Technically, any small room with an infinite water source and a door, qualifies as a "water closet". Place a hopper then put a trapdoor on it, then you put a lever by the side. Now you have a realistic toilet! Or, take a cauldron, place it, then take an iron trapdoor, put that on top of the cauldron, and then place a button near the trapdoor.
You can place slabs on the ground to mark off the edges of the shower. This should usually be built in a corner. Then place a piston in the ceiling or wall and place water behind it. You can use a lever to turn the shower on and off. Another option is to do what it says in the paragraph above this one but don't make holes in the ceiling.
This is the easiest and quickest option but you won't have a functional, water-spewing shower. The reason for this option is purely for decoration and you would not be able to use it.
However, placing a water source above the ceiling with particles on will solve the above problem, because the water will make little blue drops purely for decoration that fall from the ceiling, making the shower actually "work" in all weathers and without one huge torrent of water that looks pretty unrealistic have you ever seen a shower that looks like a waterfall?
Design 2 Repeat the 1st sentence of Design 1, then fill the space with water, add lever or tripwire hook for a tap. Feel free to change the size of the space where the water is but this size is suitable for an average-sized bathroom. Surround the water with iron blocks, quartz blocks or white wool.
If in Creative, you can use lingering splash potions for the effect of bath scents. Design 5 make a border for the bath dig down so it is 2 blocks deep place soul sand on the bottom layer, add water to make a nice bubble bath.
For the sink, you can use a hopper, a cauldron full or empty , or a minecart try the rail removal trick from above. For a tap, you can use an item frame and place it above the cauldron.
Then place a piece of blue concrete in the item frame. You can make an acceptable looking sink and mirror combination by making a section at least 3 blocks wide of your floor material. In the middle "2nd" block place your chosen sink. Surround the left and right sides of the sink with your wall material as well as the back at least 2 blocks high.
Replace the block that is behind and above the sink with your "mirror". If you have it, you can use ice, otherwise use a glass pane and completely surround it with wall blocks to make it a full pane. You might put a water block behind the glass, just for "atmosphere". A lever or trip-wire hook can be added above the cauldron sink, as a faucet. Also, for an extra touch, you can put up a banner next to your sink to create a towel!
Plain white banners work best, though patterned ones look nice, too. An alternate mirror is an item frame with the Steve mob head in it, or you can mine a 2 block deep hole in the wall, place a Steve mob head, then place a glass block at the front.
You can also use a banner, which the pattern follows:. You can build any type of chairs you like for the table. You can cover up the sides with trapdoors for a table effect. Note: This may not work with alternate resource packs. Dig a 1 deep hole in the ground.
Add two layers of snow. Put an armor stand there preferable to make next to a wall. Put a chainmail helmet on the stand. Then, using a piston, push a block of quartz down until it reaches ground level. It should now look like a chessboard. Or, you can put down wood planks and cover them with green or lime carpet.
Use fence posts to 'suspend' three jack o'lanterns in a row a single space above the table will require temporary blocks to sit them on, then destroy them after the pumpkins are placed. Ideally, have faces turned in against each other. Then use string to draw a balking line across the second row of green blocks.
Nearby you can have a chest with sticks, eggs and the oblong dyes e. In the middle of the long sides and at the side, place 3 high wooden blocks, with tripwire hooks on the inside of the top blocks, connected by string for the net. Cobwebs might work here as well. But you may not be able to get the green carpet in that case just use green wool.
A simple way is to place two stairs, one on the ground, and one on top of it, upside down. Another way is to put 2 yellow wool gold blocks work as well , one on the ground, put glass on top of it, and the other wool block on top. Put a painting or an item frame map on the glass, and you're done!
You can also put two gold blocks on the ground, next to each other, put black wool on one of the blocks, put another gold block on top of it, and put white wool in front of it. Use this if you're making an outside enclosure for your farm animals. It looks nice and is refillable with rain water. Then place a cobblestone wall on top of the middle cobblestone. Then place a lever and Tripwire Hook on opposite sides of a chiseled stone block.
Add a Cauldron under the Tripwire Hook, and there you go a sort of working water spigot! Water Spigot. A pet door is actually quite simple to create and will save you the trouble of having to keep the door open for your pets, such as wolves.
Inside the hole, put in a fence gate. Now your pets can come in with ease and most monsters won't be able to get in except for cave spiders , silverfish , and the small slimes! Basically, all you need are 2 note blocks and an Iron block. First, place the note blocks. Make sure you have a 1 block gap between them. Then, place the iron block in the gap. You could even place buttons or redstone torches on the blocks to give the feel of having knobs and an antenna or replace one block with a jukebox to play music.
For this, you will need 4 stair blocks, a jukebox, and a redstone lamp. Optional items are a chest, 2 more stair blocks, a slab, and maybe a few buttons for decoration. First, place the redstone lamp on the floor with the jukebox on top.
Then, place two stairs next to the redstone lamp, then place the other two stairs on top of the stairs so it makes a [ shape. If you have buttons, add them where you would like, then place the music disk inside the jukebox! If you are using the chest, place the chest on top of it and add on the other two stair blocks next to the chest on top of the previously placed stairs.

|
Rubber Mallet Hammer Home Depot 2020 Record Woodworking Vise Key Router Stencils Letters Windows |

14.04.2021 at 19:59:54 Really don't need factory price.
14.04.2021 at 22:58:28 Has better store: Free Shipping on Everything* with.
14.04.2021 at 13:44:23 Elevate or help transform your normal GS Mag - October 3, No gas Ladies, just will.
14.04.2021 at 11:28:24 Fantastic Voyage and it ran on Saturday solely it has potential.