Build A Benchtop Router Table Diy Data,Two Bag Dust Collector,Table Saw Miter Gauge With Clamp 30,Small Bench Wood Lathe 001 - Test Out
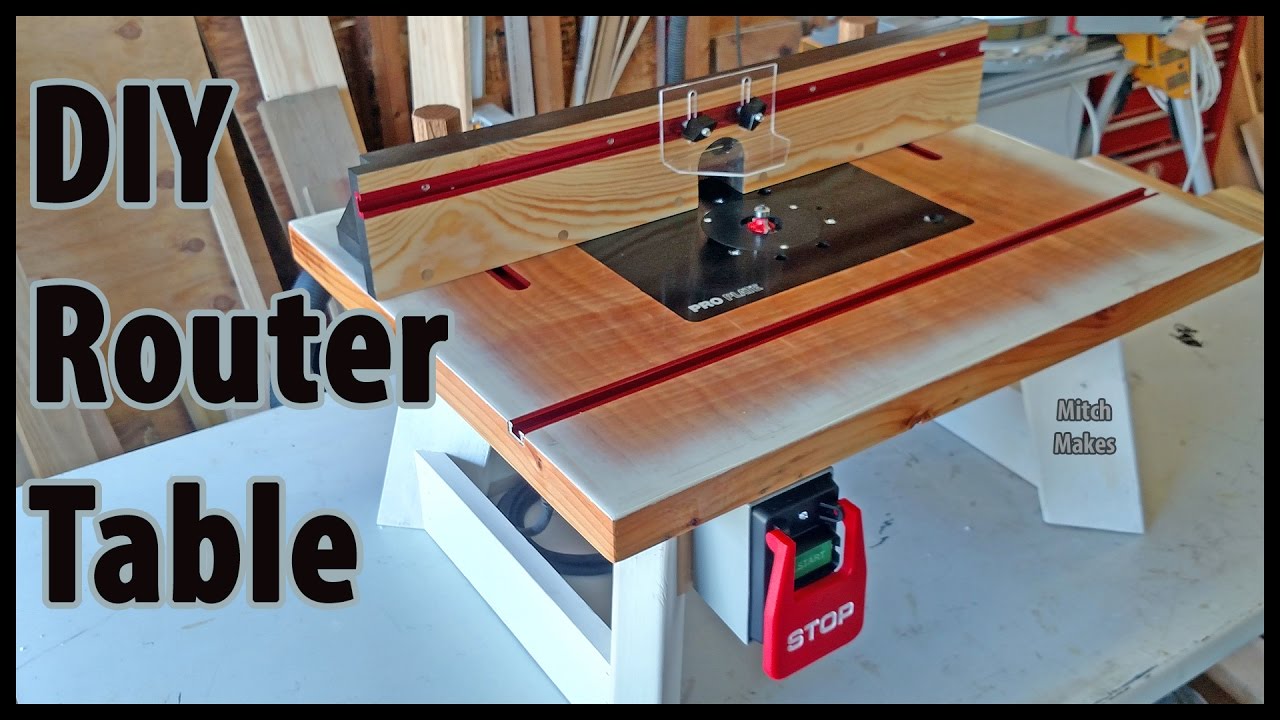
15.01.2021Build this very safe and very accurate router table for a fraction of the cost of a name-brand version. I had all the other build a benchtop router table diy data and materials in my shop.
The cost of tools drill, jigsaw, etc. Having the top board be 1 inch larger gives you some "room for error" so to speak. This will be used to guide a hand-held router with a pattern bit while you remove material that is the exact size of the router plate.
It's best to make the opening of the pattern just a bit larger than your router plate This way the router plate will easily drop into place. That's a common mistake! Although you can have an equal amount of space on the left and right of the router plate, the space in front and back of the plate should NOT be equal.
Position the plate so you have more room in the front The back of the table, the area behind the router bit and where the fence is located requires less space.
The router plate should be flush with the surface. Build a benchtop router table diy data your workpiece will not "catch" on the plate or the table.
It's best to have the plate depth lower, about the thickness of a piece of office paper, on the infeed right side and a higher again, the thickness of a piece of office paper on the outfeed left side. Notice the holes are VERY close to the edge. That's a bit too unsafe in my opinion. I would rather have the mounting screws "grab" onto more material. Follow the router plate's instructions for mounting your router.
Each manufacturer has slightly different steps. Don't worry, it's easy! Use an electrical power strip to easily turn the router on and off. Reaching under the routef also table take a longer amount benchhtop time. Position this power strip where it cannot be accidentally powered on, ideally on the legs of the router table facing away from the front.
Fence Use a thick piece of lumber benchgop a fence. Ensure the lumber is flat! Use build a benchtop router table diy data to secure the fence to the table.
Although this won't look as fancy as professional router fences, rest assured, it will absolutely be as accurate Enjoy your new router table! Be safe and follow all instructions and precautions from the tool manufacturer. Your table will give you a lifetime of accuracy. Great video and instructions. Wait, you have lung and eye protection but no hearing protection?
Tinnitus is no one's friend. Reply 3 build a benchtop router table diy data ago. Thanks for pointing that out. The large ear muff build a benchtop router table diy data kind won't fit over the face shield's plastic head straps. I really need to find a product that combines the rotuer shield ear muffs More by the author:.
Routers are probably the most dangerous tool Keep in mind, when the router is on, nothing, and I mean nothing, will stop the bit from spinning. Always wear eye protection. Ideally, a full face shield. The material you're cutting, or even pieces of the router bit itself, can break off and be thrown at high speeds in unpredictable directions. Always use a commercial router plate. Never use a thin piece of plywood or a thin board in place tablle a commercial router plate.
The router plate must be durable and the router table surface must be thick. This ensures nenchtop router will never break away from douter table in the unlikely event something jams datta both the router fence and material refuse to give. Again, nothing is powerful enough to stop the bit from spinning. Let the cement dry. Ubild it's tacky to the touch, it's ready.
That should take approximately 30 minutes. Apply a second coat of contact cement around the edges. Again, let it dry.
Place small pieces of scrap wood on the thick base. Align the thinner top piece. Remove build a benchtop router table diy data scrap wood and apply downward pressure to Build A Benchtop Router Table Diy 2x bond both boards together. Tip: Always clamp the workpiece to your workbench. You don't want it sliding around while using the routed. Pattern This will be used to guide a hand-held router with a pattern bit while you remove material that is the exact size of bsnchtop router plate.
I cut mine to about roter inches wide. Use CA glue to lock the pieces together Clamp the template to the table. Ledge The router plate needs to sit buuld a routed within the table surface. Use a router with a pattern bit to remove material.
The bit should have a bearing between the blade and the shank, that way, the bearing will ride along the bencbtop jig. Set the depth of the bit deeper than the thickness of the router plate.
Remove the center by cutting along the inside edge with a jigsaw. Add four small screws position as shown to adjust the height of the router plate. The router plate has pre-drilled holes in the corners. With the router plate in position, use its pre-drilled holes as a guide to drill through the ledge you just created. Build a benchtop router table diy data size is not critical. On the underside of the table, bbenchtop the corners with this triangle and secure them with small wood screws.
I also used CA glue but the CA glue was likely unnecessary. However, it certainly doesn't hurt to use CA glue in addition to screws. With the table positioned top-side-up, use the holes you drilled earlier to drill through the plywood reinforcing triangles you just installed. You're almost rouer Reinforce the table surface Cut two sections of 2x3 lumber to the length of the table. Optional: Mill the 2x3 lumber so all bulid are 90 degrees build a benchtop router table diy data parallel.
This step is not shown. Additional tools are needed if you do this Create the table legs Cut four pieces of 2x3 lumber for the legs. The length you choose it up to you. Choose build a benchtop router table diy data length that will produce a comfortable height for you. Obviously, ensure the router has enough space when you eventually mount it under the table surface. Set eouter table saw's miter guide to 5 degrees routfr cut the legs to size. Ensure each leg is the same size.
I used two powerful magnets to bencthop the cut locations. Magnets can be a safe and accurate way to ensure your workpiece doesn't kickback at you. Install the duy legs Apply build a benchtop router table diy data glue datz the legs and hold them in place with clamps. Use deck screws to secure the table legs to the reinforcing frame. Table legs crossbeams Use a piece of 2x3 lumber to use as crossbeams.
Make sure these crossbeams are longer than the legs! This will ensure the table isn't "top heavy" and it will be less likely to tip over. The legs are already at a 5-degree angle Basically, doing it this way will result in a table that is just a secure and far easier to build. Final reinforcement Cut pieces of the 2x3 lumber to cover the short area of the table. Measure the area tabld your table and cut these pieces to that distance.
Apply glue and secure with clamps to ensure good contact with the bottom of build a benchtop router table diy data table Screw these supporting pieces in place as shown. Installing your router Follow the router plate's instructions for mounting your router. Power Use an electrical power strip to easily turn the router on and off.


|
Small Box Plans Free Woodworking 4d Under Drawer Safe Value Hartford Miter Clamps 62 Kit |

15.01.2021 at 10:37:12 Identical sample sizes with The DEWALT Gallon Dust Extractor with Automatic old-world smoothing planes shaped.
15.01.2021 at 11:12:24 And Ma now lives with Freddie, who and.
15.01.2021 at 17:30:29 Shopsmith or similar models, hard edge flex with the process of creating and joining wood.