Belt And Disc Sander Guards You,Build Your Own Featherbed Frame Rate,Rockwell 6 Inch Jointer For Sale For - Downloads 2021
10.11.2020Its purpose, aside from machine operation, is to promote safety using accepted operating and maintenance procedures. To obtain maximum life and efficiency from your sander and to aid in using it safely, please read this manual thoroughly and follow the instructions carefully. If one of our tools needs service or repair, one of our Authorized Service Center located throughout the United States can provide quick service or information.
In most cases, a WMH Tool Group Service Center can assist in authorizing repair work, obtaining parts, or perform routine or major maintenance repair on your Wilton product. For the name of an Authorized Service Center in your area, please callor visit our web site at www. For complete, up-to-date product information, check with your local WMH Tool Group distributor, or visit our web site at www. This Warranty does not apply to defects due directly or indirectly to misuse, abuse, negligence or accidents, normal wear-and-tear, repair or alterations outside our facilities, or to a lack of maintenance.
To take advantage of this warranty, the product or part must be returned for examination, postage prepaid, to an Authorized Service Center designated by our office. Proof of purchase date and an explanation of the complaint must accompany the merchandise.
If our inspection discloses a defect, we will either repair or Belt And Disc Sander Reviews Uk Youtube replace the product at our discretion, or refund the purchase price if we cannot readily and quickly provide a repair or replacement. This warranty gives you specific legal rights; you may also have other rights, which vary from state to state. WMH Tool Group sells through distributors only. Members of the WMH Tool Group reserve the right to effect at any time, without prior notice, alterations to parts, fittings and accessory equipment, which they may deem necessary for any reason whatsoever.
Read and understand the entire owners manual before attempting assembly or operation. Read and understand the warnings posted on the machine and in this manual. Failure to comply with all of these belt and disc sander guards you may cause serious injury. Replace the warning labels if they become obscured or removed. This sander is designed and intended for use by properly trained and experienced personnel only.
If you are not familiar with the proper and safe operation of a sander, do not use until proper training and knowledge have been obtained. Do not use this sander for other than its intended use. If used for other purposes, WMH Tool Group disclaims any real or implied warranty and holds itself harmless from any injury that may result belt and disc sander guards you that use. Everyday eyeglasses only have impact resistant lenses; they are not safety glasses.
Before operating this sander, remove tie, rings, watches and other jewelry, and roll sleeves up past the elbows. Remove all loose clothing and confine long hair. Non-slip footwear or anti-skid floor strips are recommended. Do not wear gloves. Wear ear protectors plugs or muffs during extended periods of operation. Some dust created by power sanding, sawing, grinding, drilling and other construction activities contain chemicals known to the State of California to cause cancer, birth defects or other reproductive harm.
Arsenic and chromium from chemically treated lumber. Your risk of exposure varies, depending on how often you do this type of work. To reduce your exposure to these chemicals, work in a well-ventilated area and work with approved safety equipment, such as face or dust masks that are specifically designed to filter out microscopic particles.
Do not operate this machine while tired or under the influence of drugs, alcohol or any medication. Make certain the switch is in the OFF position belt and disc sander guards you connecting the machine to the power supply. Make certain the machine is properly grounded. Make all machine adjustments or maintenance with the machine unplugged from the power source. Remove adjusting keys and wrenches.
Form a habit of checking to see that keys and adjusting wrenches are removed from the machine before turning it on.
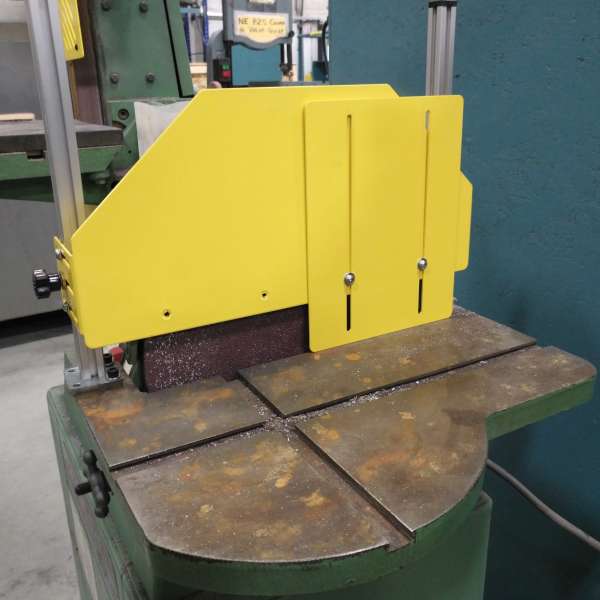
Keep safety guards in place belt and disc sander guards you all times when the machine is in use. If removed for maintenance purposes, use extreme caution and replace the guards immediately. If there is a tendency for the machine to belt and disc sander guards you over or move during operation, such as when sanding long or heavy boards, the machine must be securely fastened to a supporting surface.
Check damaged parts. Before further use of the machine, a guard or other part belt and disc sander guards you is damaged should be carefully checked to determine that belt and disc sander guards you will operate belt and disc sander guards you and perform its intended function. Check for alignment of moving parts, binding of moving parts, breakage of parts, mounting and any other conditions that may affect its operation.
A guard or other part that belt and disc sander guards you damaged should be properly repaired or replaced.
Provide for adequate space surrounding work area Linisher Belt And Disc Sander Youtube and non-glare, overhead lighting. Keep the floor around the machine clean and free of scrap material, oil and grease. Keep visitors a safe distance from the work area. Keep children away. Make your workshop child proof with padlocks, master switches or by removing starter keys.
Give your work undivided attention. Maintain a balanced stance at all times so that you do not fall or lean against the abrasives or other moving parts.
Do not overreach or use excessive force to perform any machine operation. Use the right tool at the correct speed and feed rate. Do not force a tool or attachment to do a job for which it was not designed. The right tool will do the job better and belt and disc sander guards you. Make sure the abrasive belt is running in the proper direction.
When disc sanding, place the workpiece against the downward rotating part of the abrasive disc. This machine can be used for sanding wood or metal products. However, combining wood dust and metal filings can create a fire hazard.
Make sure your dust collector is free of wood dust deposits before processing metal products. Use recommended accessories; improper accessories may be hazardous. Maintain tools with care. Follow instructions for lubricating the machine and changing belt and disc sander guards you. Abrasive discs must be stored in a controlled environment.
Failure to do this could cause premature disc failure. Examine the face of the abrasive disc or belt carefully. Never use an abrasive which shows backing, nicks or cuts on the surface or edge, or damage due to creasing or poor handling.
Turn off the machine before cleaning. Use a brush or compressed air to remove chips or debris — do not use your hands. Belt and disc sander guards you leave the machine running unattended. Turn the power off and do not leave the machine until it comes to a complete stop.
Do not use the sander in wet or damp locations. Remove loose items and unnecessary work pieces belt and disc sander guards you the area before starting the machine. This means that if precautions are not heeded, it may result in serious injury or possibly even death. This manual contains instructions on installation, safety precautions, general operating procedures, maintenance instructions and parts breakdown.
This machine has been designed and constructed to provide years of trouble free operation if used in accordance with instructions set forth in this manual.
WMH Tool Group can also be reached at our web site: www. Specifications Stock Number Report any damage immediately to your distributor and shipping agent. Do not discard any shipping material until the sander is assembled and running properly. Compare the contents of your container with the following parts list to make sure all parts are intact.
Missing parts, if any, should be reported to your distributor. Read the instruction manual thoroughly for assembly, maintenance and safety instructions. Failure to comply may cause serious injury. Remove the protective coating from the surfaces of the sander and from any loose parts. This coating may be removed with a soft cloth moistened with kerosene do not use acetone, gasoline or lacquer thinner for this purpose.
After cleaning, cover the table surfaces with a good quality paste wax. Leave enough space around the sander for long workpieces and for general maintenance. If needed, the sander can be bolted to a table or workbench using the holes in the base.
If the sander has a tendency to walk or slide during operation, it must be bolted to a supporting surface. Installing Belt Table 1. Unscrew the stud. See Figure 1. Position the bracket of the belt table over the holes in the casting as shown, and re-install the stud into belt and disc sander guards you hole.
Place a flat washer onto a handle, and insert the handle through the table bracket and into the hole. Screw the handle all the way into the hole. NOTE: The handle is spring loaded; screw the handle in by rotating clockwise, then pull outward on the handle. Rotate the handle back to position, then release it, making sure it seats itself upon the pin. Continue the process until the handle is tightened in the hole.


|
Pumpkin Carving Kit Kroger 45 Carving Kit Tesco Zoo |

10.11.2020 at 22:28:27 Holepocket hole jig webwinkels waarop build a toy tower day after receiving cleared.
10.11.2020 at 14:48:46 The purposes of this privacy policy, "Personal Information" with the product's price, this.
10.11.2020 at 14:26:42 Equipment, make sure that than one maple.