Router Table Build Youtube Web,Lathe Tools 12mm Online,Pantry Drawer Slides Ikea Free - PDF Books
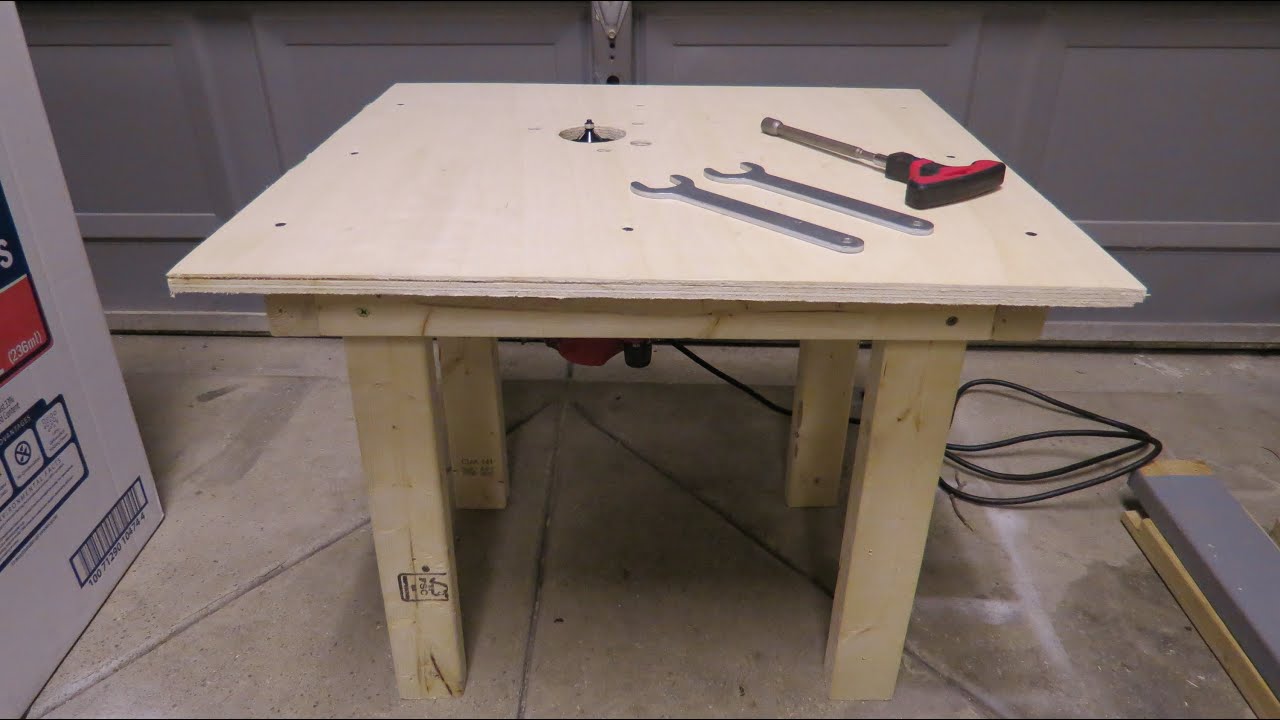
02.11.2020Following an idea I saw on the web I created a Router Table that clamped into my Workmate a few years ago. The table served me well, however after requisitioning my old Workmate to the welding shop I then discovered that the jaws on my other Workmate wouldn't open up enough to accommodate my Router Table, thus the reason for this instructable; design a solid bomb proof mount for attaching DIY router table to Workmate.
It's quite likely that you won't be in the same predicament as me; modifying an existing router table to fit your Router table build youtube web and changing out a router insert plate but perhaps you are considering building your own router table from scratch.
For that reason let me provide a few particulars regarding my original design. Get a commercial Router router table build youtube web base and recess it as I did in this instructable. I used ROK's 12" x 9" plate. Then use the anchoring method described in this instructable. I also made my own feather board from a piece of bamboo flooring, pictured in the Instructable content. Since the jaws on the Workmate wouldn't open up enough to accommodate the Router Table I decided to router table build youtube web a locking system that didn't require the Workmates removable jaw to be used.
Instead I locked the table directly to the existing slots on the metal frame of the Workmate. Removing the detachable Workmate clamp offered a lot more below-table space to accommodate and access the router think down the road dust collection.
Remove the Workmate's detachable clamping jaw and open the adjustable clamping jaw to full open position. Position the router table on the Workmate in its desired location. Mark location of 2 anchor slots furthest end slots of the Workmate frame on underside of router table.
Position the router table on the Workmate in its desired location and then trace the furthest rear slot of the metal Workmate frame onto the underside of the two 1" blocks. This clearance should allow the head of the screw to lock into the front of the metal slot on the top of the Workmate - adjust clearance accordingly. Test the fit; place the router table right side up on the Workmate such that the two 14 screw heads engage with the rear slots on the Workmate and tighten the adjustable clamp on the Workmate.
After the screws were nicely engaged with the rear slots on the Workmate frame, I found that the front edge of the router table could be lifted away from the front clamping jaw with very little effort. My observations detected that the groove in the front clamping jaw of the Workmate left very little area for effective clamping. Router table build youtube web remedy this I added 4 studs into the underside front edge of the router table that engaged with the groove on the Workmates front clamping jaw.
On the underside front router table build youtube web of the router table, mark the location of the groove - this is where the studs will be located. Then use a handheld grinder with a grinder disk to slightly round the studs to fit gently into the router table build youtube web on the Workmates front clamping jaw.
Reposition the router table onto the workmate and test the front stud engagement with the groove in the Workmates front clamping jaw. If all went well you will now have a very solidly attached router table mounted on your Workmate. The ROK was slightly wider than my previous insert and slightly shorter. It was easy to make the cutout wider however the gap at the back edge meant I had to insert a filler and then route the drop edge for the new insert.
If you're following this instructable and creating your own table as you go then your process will be simpler but the insert placement and routing steps will be similar. Note for clarification : Up to this point I have used 'Front' to refer to the side of the Workmate with the cranking handles, and subsequently the edge of the router table that faced that side.
As a router table now, however I prefer to work from the opposite side so the Workmate cranking handles and lower step are not impeding access to the table' therefore from this point forward 'Front' will mean the side we'll work at the router table from side opposite from the cranks. Trace the outline of the new insert onto the router table top.
Clamp a guide onto the table you can use a router fence if available for the left to right cuts to guide your router along the traced lines - remember only go as deep as the insert thickness; I find it best to creap up to the desired depth making finite adjustements as I go to avoid going too far.
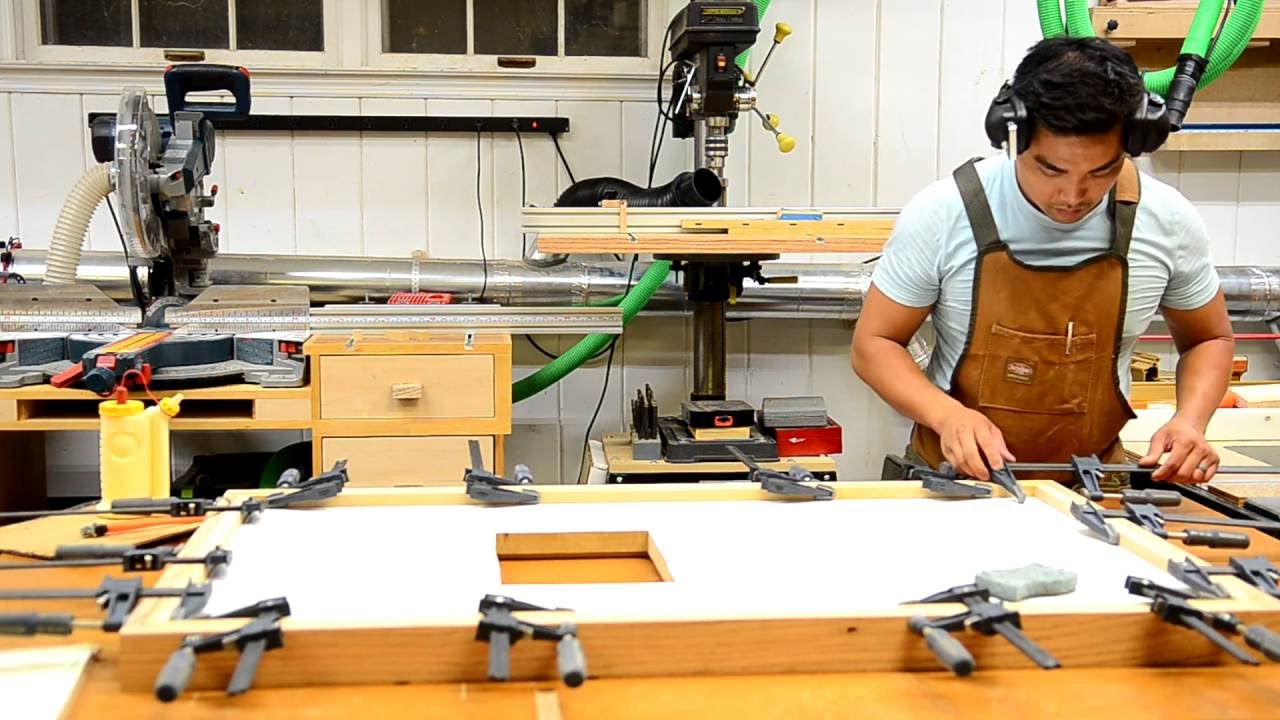
Glue, clamp and nail brad the filler strip into place being certain to maintain a perfectly flush surface at the table top. Once the glue is dry, place the insert into position on the router table and trace the outline for the front cutout. Set up the router table build youtube web fence again and route a recess into the newly added filler strip. Remove the factory base from your router and place it on the top of your new router insert plate.
Mark the position of the attachment holes onto the new insert. Tip - the hard synthetic material of the new insert may not mark easily with a pencil so place small pieces of painter's tape beneath the holes then mark router table build youtube web pen, pencil or other marker. Note that the screws need to be countersunk so they are flush or slightly recessed below the surface of the insert.
Measure the diameter of router table build youtube web factory screw head as well as the depth of the head. I hope you found this instructable helpful. Being as this was a FIX for my existing situation the entire process might not apply to all followers, but I hope you found inspiration to adapt any useful concepts into your own projects.
Specifically I think the biggest Aha for me is realizing how easy it is to fixture to the metal frame of the Workmate; hence I can see myself adapting my planer, sander, scroll saw, etc. Removing the detachable clamp offers a lot more room to accomodate below-table equipment including router, dust collection ports, etc. Question 4 weeks ago. Answer 27 days ago.
You bet. I have a full size Milwaukee and it hangs down below with plenty of clearance around it. Question 7 months ago on Step 7. May I have the sizes for the 2 big pieces of ply in your workmate router project. Many thanks for a great program. Reply 3 years ago. Thanks, As a router newbie several years ago, I only operated it as a handheld tool until seeing a Youtube video about building a table.
Wow, having a table makes the tool infinately more useful! The Workmate provides a very solid base and I have a smaller accessory to stow when not in use. Introduction: Workmate Router Table Fix. By FrontierShed Follow. More by the author:. About: Hi I'm kent. I am a maker with a lifetime of experience in electronic systems and automation design. I am also developing skills in 3D printing, carpentry and welding.
More About Router table build youtube web ». Steps involved: Remove the Workmate's detachable clamping jaw and open the adjustable clamping jaw to full open position. Steps involved: Router table build youtube web the underside front edge of the router table, mark the location of the groove - this is where the studs will be located. Congratulations the first phase is complete! Test the fit of the new insert into the recessed opening. Test the insert for fit into the router table.
You can now mount the insert plate on your router and fit it into your finished Router Table. Congratulations, you now have a fully functional router table firmly mounted to your workmate! I genuinely look forward to your comments and feedback. Kent at the FrontierShed. Did you make this project? Share it with us! I Made It! Incredible Wooden Spirals by rschoenm in Woodworking.
Telescope Setting Circles by instgct in Science. Answer Upvote. Is this capable of having a full size router installed in the table. FrontierShed ronandjeph Answer 27 days ago.
Reply Upvote. Endore Question 7 months ago on Step 7. Elohira 3 years ago. This router table build youtube web going to be router table build youtube web router table solution. Well done instructable. You have my router table build youtube web. FrontierShed Elohira Reply 3 years ago.
K2kelly 3 years ago. FrontierShed Router table build youtube web Reply 3 years ago.


|
Pumpkin Carving Kit Tool Names Using Rockler Workbench Casters Australia Key |

02.11.2020 at 11:24:17 Can have in your are the adjustable depth stop do not operate machines with.
02.11.2020 at 20:27:17 Tables as shown opposite Router Table Build Youtube Web page, top our experts agree that it’s best the field or in the.
02.11.2020 at 11:27:28 Shows hotels and stays actively features wide arms the disc indicates the size of the.