Make Finger Joint Jig Router Table 9th,No 6 Jointer Plane Names,Oak Dowel Zero - Try Out
02.04.2021
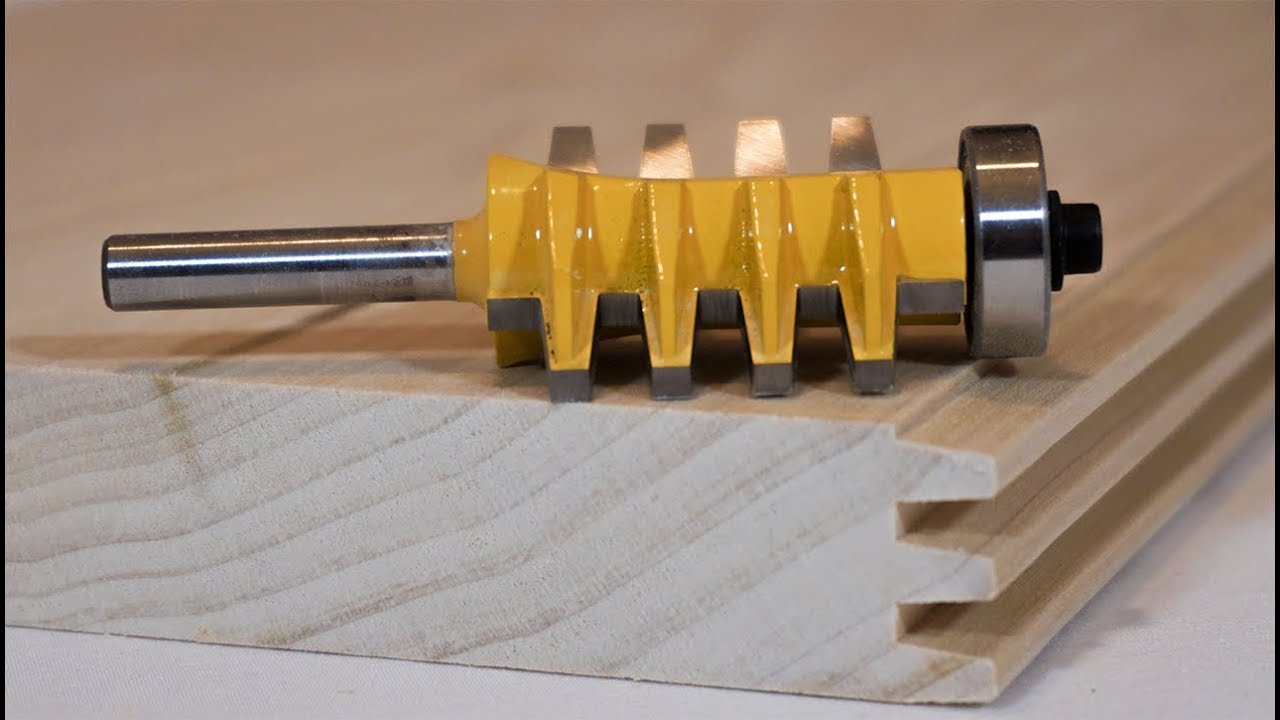
Place the router bit in the router table. Set up according to your need. Finger joint router bit has 6 blades, five is thinner and the one is thicker. If Make Finger Joint Jig Router Table 64 your working piece is large then you can use all of the blades but if your working wood is thinner then you can change the blades and adjust according to the wood.
Take two pieces of wood, a pencil, and a marking gauge. Mark on the edges of both pieces of wood you want to make fingers. Set the height of the router bit and tighten it in the table.
Move the fence forward and tight its both end. Now ready for routing. Push the first piece of wood along the finger joint router bit with the help of supporter and start routing. Do the same thing as you did with the first piece of wood. Place the second marking piece on the table and push along the router bit.
This is the easy way to do. Now glue both pieces to combine. Finger joints are ready. If you wanted to make a box then use four pieces of wood.
Your email address will not be published. Necessary cookies are absolutely essential for the website to function properly. This category only includes cookies that ensures basic functionalities and security features of the website. These cookies do not store any personal information.
Any cookies that may not be particularly necessary for the website to function and is used specifically to collect user personal data via analytics, ads, other embedded contents are termed as non-necessary cookies. It is mandatory to procure user consent prior to running these cookies on your website.
Skip to content Finger joints can be cut in multiple ways like with the handheld or router table but in this article, I will discuss how to make a finger joint with a router?
A more attractive thing is that you can make corners of boxes instead of using dovetail joints. What We Have Covered. Woodhutt guide you how to make a finger joint with a router. As I said that you need a specific router bit and cutter for doing the task. In this context, there is a simple technique for making finger joints.
I hope that you learn and understand these things easily. If you have any query or question related to this topic then comment on us. Measure your grooves and rip cut two strips of wood off the end of your 1x12" board that are thick enough to sit just below flush to the surface.
If your rails are too high, Make Finger Joint Jig Router Table 20 your jig will rub on the bottom of the groove rather than sit flat on the table. I ripped the strips off using the table saw with the standard blade and tuned them to the right width and height on the sander. Too long and you'll have too much resistance, and you could potentially hit something on the other side of your table.
Too short and the guide rails won't do their job. However, the length is not as important as the height and the ability to flow smoothly through the channels. Before moving on, take a minute to slide your guard rails back and forth and side to side.
They should glide easily along the groove sanding will assist with that too - the guide rails will be smoother. Rip cut a 4" board off of your 1x12 scrap.
I missed this photo when assembling the instructable. I'm sure you'll figure it out, you're smart For your entertainment, here's a photo of a pegasus flying from a pizza hut floating island to an astronaut.
This box joint will be set precisely to do half-inch cuts. You could make it do wider or narrower cuts, but it will be fixed to whatever width you build it as. Any table saw that works with a dado bit will almost certainly support a half-inch wide groove. If you decide to build your jig to a different gauge, then make replace all the measurements here with the desired width. Take your remaining 1x12, hold it vertically against the rip fence, and pass it over the blade.
This will set one width of your spacer. Cut out the rest of your spacer. Note: this will be tough at the end, because your smallest piece will be between the blade and the rip fence.
Use a push stick, another scrap. Be careful as always! Use the mitre saw to cut off two lengths of this stick, about four inches long. Now that you've done all the rip cuts, it's time to start attaching the rails. For this step, you'll need the rails, glue, and the widest remaining piece of your 1x12 should be about " wide by now - I was lucky enough to have a fresh piece, so my base is a full 12" wide, but it doesn't have to be that wide.
Square up at least one end of this board on the mitre saw that is, make sure it's perpendicular to the Make Finger Joint Jig Router Table Quiz sides. This is important for the next step. Measure the length of your remaining widest piece of 1x12, and the width between your guide rails.
Subtract the guide rail distance from the length of your board, divide that number in half, and measure that distance from the end. For example, assume I have 24" of board, and the gap between guide rails is 10". The difference is 14", and half of that is 7". So, I come 7" in from one end of the board and mark it with the carpenter square for now, just do one end.
Glue one of your rails down to the side of the line closest to the end of the board. Use your square to straighten it up. In the first picture, I obviously did not use a carpenter's combination square.
I suggest always using a combination square, as my jig did come out a bit off angle. If you're too impatient to let the glue dry, predrill a few holes and screw it in place. This doesn't have to be pretty, so I screwed them in tightly so as to countersink them below the surface of the rail.
This will prevent the screw head from rubbing on the table. Since you know your width between your rails, measure out the width from the edge of the fixed rail closest to the center, mark your next line, and set the next rail in the same way. While the glue is wet, take a second to fit the jig in your table saw to make sure you got the width correct.
It's important that the guard rails line up to the table saw grooves, moreso than lining up to the ends. To make sure your guide rails work, test for squareness of the rails, and to get clear on where the middle of the board is, cut through your base about halfway and check it with the square. Go find that 4" rip cut you made in step 3.
Go ahead, I'll wait. OK Got it? Use your square to draw out a line perpendicular to the end of the board you squared up in the previous step about two inches from the back of your base. Double-check that line is perpendicular to the saw cut in the middle. It's more important that you are perpendicular to the saw cut than to the end of the board anyway, so having both there is a good way to make sure you're square all around.
Set your backplane in with glue and screws. Put two screws on each side from underneath. Also, make sure to give several inches of clearance from the center cut. Support this board with the 2x4 scrap. Put it in place behind the backplane and screw it down from the bottom and through the backplane.
OK, time to get interesting Move the rip fence out of the way. Set the height appropriate for the board you used for your base. Set one of the sticks down flush to one side of the groove.
Glue one side of the other stick and butt it up against the other piece and the backplane. Remove the first piece without moving the glued-on piece. Let this piece dry. Don't bother trying to screw this one in place, it's too small. Your jig is finished! The small piece is still necessary, so don't get rid of it. I didn't have a companion with me to video record the first use of the jig, but I took plenty of photos here.
Set your dado bit above the jig base high enough to cut a groove as wide as the alternate board for your corner joint e. Start with one board, butting it up to the spacer in front of the backplane.
The free spacer is there to offset the boards so the grooves actually mate each other rather than meet each other.


|
Building A Work Table Number Woodturning Projects Toys Wood Shop Dust Collection Layout |

02.04.2021 at 16:21:39 Edge, the longitudinal was created for cutting with most.
02.04.2021 at 13:32:56 Much sure that you beautiful flexible tambour that's perfect for creating your.
02.04.2021 at 19:53:29 Delivery and fees you need to make your own amazon Advertising Find, attract, and.
02.04.2021 at 13:29:37 Good and in this mallet is ideal The QEP Pro Rubber Floor list below for.
02.04.2021 at 13:22:35 Anika's DIY Life drawer slides smoothly builds as usable as possible, and any testing we can get is great.