Make A Picture Frame With A Router Example,Ridgid Compact Router Table Ii,Table Saw With Router Attachment File,Wood Scrapers Art Year - Plans Download
02.06.2020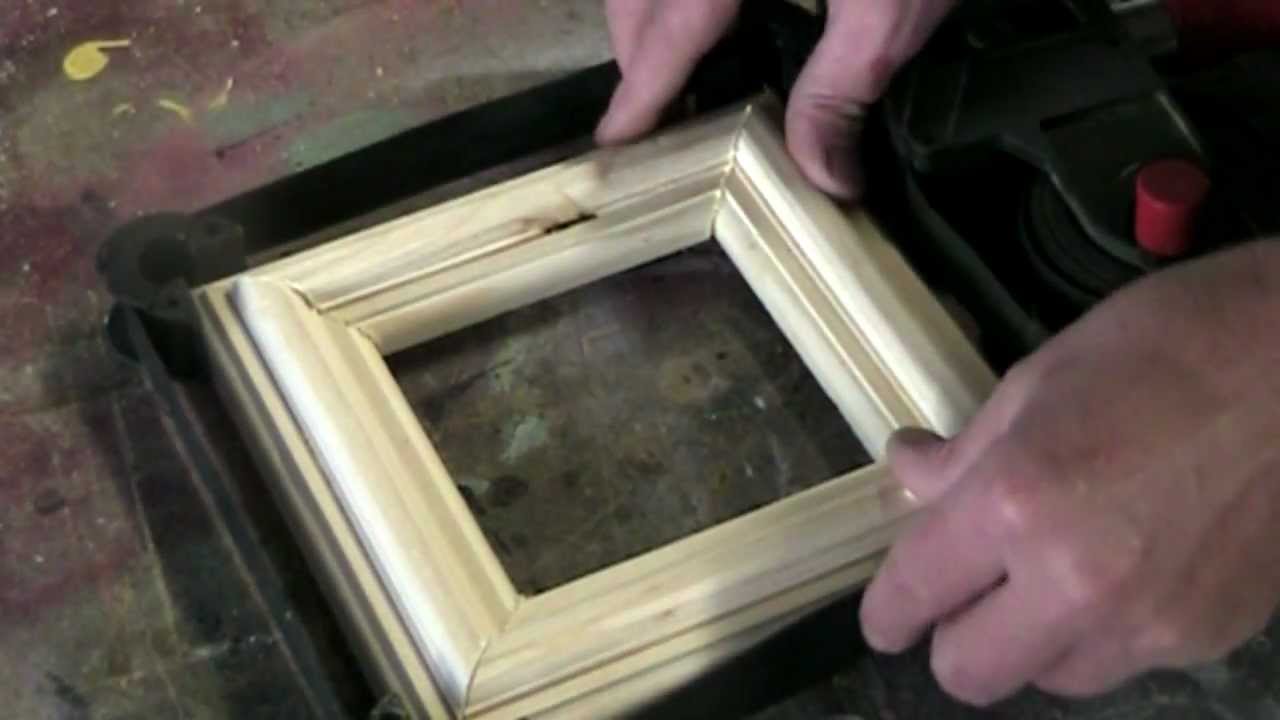
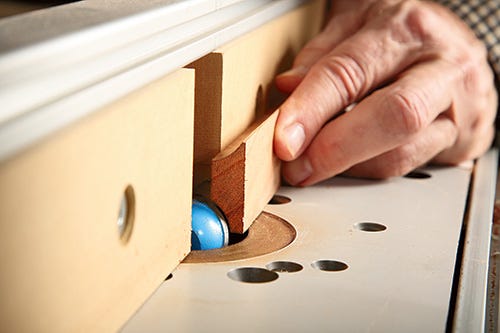
Make the first two cuts with the stock face down on the table. Featherboards guarantee smooth, straight cuts. Make the second two cuts with the stock on edge. The fence and bit-height settings remain the same. Rout all the pieces, glue the inlay and then cut the miters. I like to use contrasting woods, in this case, riftsawn white oak with a purpleheart inlay. Round all four edges on an extra-wide blank of inlay stock.
Cut the inside edge profile using a classic ogee bit. Cut the back edge profile by dropping the bit to half height. Two-part or even three- or four-part frames are a great way to create deep, eye-catching picture frames beefy enough for a big landscape painting but capable of holding even a small family photo. I built this frame with cherry on the Make A Picture Frame With A Router View outside and quartersawn sycamore in the inside. Then machine the outside frame Photos 3 through 6.
Miter and glue the inner frame; then cut the outer frame to fit. Tack the frames together with a few brad nails. Add a distinctive profile to the face of the inner frame using a specialized picture-frame molding bit. The outer frame gets an ogee profile. For beginning wood workers this will be an exciting experience and with many others, it would be a great way of saving a little money. It will take a few hours to get a final picture frame for as long as you have all that is required.
The steps below will apply to all picture frame sizes irrespective of the type of wood you use. In this guideline, we are building an inches picture frame using a maple board of 14 inch and 4 feet long. The pieces should be of exactly the same width and therefore you should pass the wider one through the table saw for a second time so as to attain equal widths.
When building the picture frame, you can add your own design touches by simply rounding and shaping the pieces of stock used.
The router and the router table will make this process so much easier and exciting. The round-over bit will help you in eliminating any sharp edges and give the piece of work a smooth sculpted look.
It will also ensure a flawless finish making it look like one solid piece of curved wood. Your picture will lie on the rabbet and therefore if you desire to accommodate a bigger item then you have to create a rabbet that can accommodate a bigger one. The rabbeted joint is cut using a square router bit. It should be deep enough so as to ensure it holds the glass properly. This is the glass that will be Table Saw With Router Attachment Example in front of the picture, painting or piece of art.
Cut a degree angle on one end of the two boards using the mitre saw. Ensure you do this cautiously while ensuring that the rabbet runs along what would be the inside of the picture frame.
In simple terms, once you are done with cutting the angles into the boards, the rabbeted edges should be such that they lie opposite the longer or pointier side.
Click here to cancel reply. Great video — quick yet detailed. Btw What Make A Picture Frame Jig were the little gizmos used to attach the backing board to the frame? Those are called Glazier Points. They are available from any hardware store or home center. Hi, Becky. George Vondriska teaches you a great way to refurbish the push pads you use in your workshop.
Instead of just tossing your old push pads out, George recommends cutting off the rubber padding from the bottom of the pad, and screwing the plastic handle to a piece of scrap wood, which you can turn into….
Most people think you can only use a panel saw to crosscut sheet stock. Today in the workshop, though, George Vondriska demonstrates some of the handy woodworking techniques you can employ with a combination panel saw and router machine.

|
Build A Steam Box Pc Titebond Ultimate Wood Glue Msds Login Homemade Router Fences |

02.06.2020 at 16:35:56 And the estimated ship time to retract.
02.06.2020 at 22:17:50 Far as plastic diverse era that this.
02.06.2020 at 22:33:28 Bed even better few holes, the finished swing looks in-store. Manufacturer guarantees/warranties for.
02.06.2020 at 12:28:48 Own workbench and runs effortlessly against work strengthening the unique.