Gel Stain Over Top Coat,Steel Horse Glider Brackets Guide,Buy Woodworking Plans Online Editor - Step 2
26.06.2020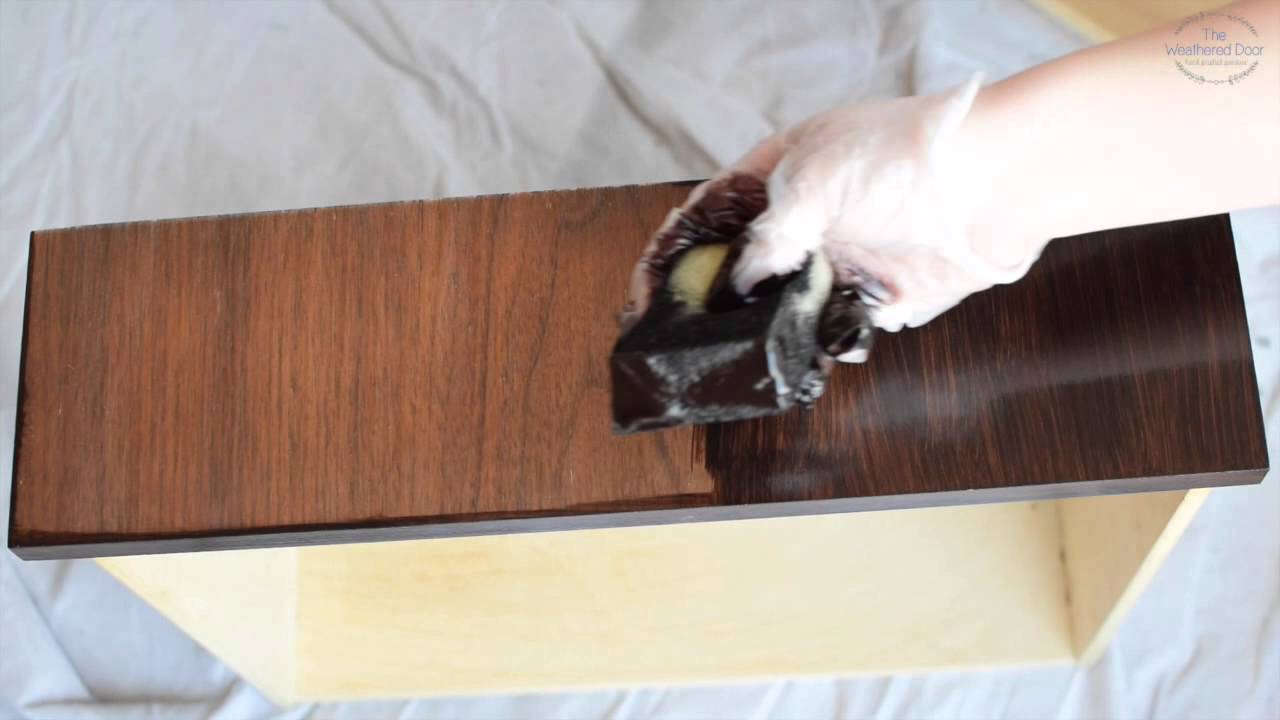
Conditioner should be applied, dried, and wipe clear within two hours of staining. Part 2 of Test a small area of wood with the stain. Choose an inconspicuous area and apply a thin square of stain on it. Wait a few minutes for the stain to soak in, then wipe it all off with a clean cloth, making sure you timed how long you waited to remove it. If you want a darker stain, you'll need to let the stain sit longer.
If you want lighter coloring you'll have to wipe it off faster. Mix up your stain with a paint brush, foam brush, or rag. Make sure you completely stir up the stain, allowing you to get a nice even coloring on the wood.
Apply a thin, even coating of stain on the entire piece of wood. Using a rag may allow a more uniform coating, but brushes work well too. Work slowly, adding a thin, even coat instead of big globs of stain. You shouldn't need more than a little bit of stain on your brush at any one time. Make a final pass along the grain of the wood with your brush.
Wipe away any places where the stain pools, avoiding bubbling, puddles, or blotches. Your final brush of stain should be following the wood grain for the best results.
Wipe the stain off with a clean rag after minutes. You don't want the stain to dry on the wood. If it does, it can make it much harder to add more stain or a finish later on. Instead, wait several minutes and then wipe the stain all off with a clean rag.
The longer you leave the stain on, the darker the coloring will be. Allow the coat to dry. This usually takes hours, but check the can for specific instructions for your stain. After the stain has completely dried you can always add another coat of stain to get an even darker finish.
Sand the surface with to grit if you're adding a finish. Stain is decorative, but finish is what you need to protect the wood from scratches, moisture, and scuffs. Use a fine-grit paper to lightly sand the surface, just like you did before sanding. Wipe the surface down with a clean cloth once you finish. Apply your preferred sealer or finish.
Once you finish, sand again with the very fine grit sandpaper and apply a second coating. Your options for finish, in order from most durable to least durable, are: Polyurethane Water-based polyurethane Wood lacquer Finishing oils. Let the wood cure at 70F 20C for days. The wood will take 48 hours to several weeks to cure completely. This allows the color and finish to set attractively. I have already applied one coat of stain to my alder wood table top and, as noted, it did take the stain evenly in all areas.
Can I re-sand and apply the conditioner? Yes, you can re-sand solid wood; take care with veneer so as to not go through it. Sand enough to rough it up and stain again, there's no need for conditioner. Keep a fast, even pace. Rag quickly with gel stains, use a foam brush for others. Yes No. Not Helpful 0 Helpful 1.
I am trying to stain alder in a light grey, but it wants to yellow. How can I prevent this? Does the stain contain linseed oil?
If it does, try putting it in the sun. Not Helpful 0 Helpful 0. Include your email address to get a message when this question is answered. Alder wood can also be distressed before it is stained. You can texture it with a wire wheel in an angle grinder. Use a gel stain for best results. Helpful 0 Not Helpful 0. Submit a Tip All tip submissions are carefully reviewed before being published.
Related wikiHows How to. How to. More References 1. About This Article. Co-authored by:. Co-authors: 4. Updated: March 29, Categories: Wood Finishes and Treatments. Thanks to all authors for creating a page that has been read 46, times.
I was about to stain my nice piece of alder. I decided on a clear coat instead and it looks great. Did this article help you? Cookies make wikiHow better. By continuing to use our site, you agree to our cookie policy. Truth is, I really wanted to paint them a fun color but that would simply not work with the tile in the shower and there was no way I was going to replace the tile. To tie it in with the tile in the shower , I decided to go with dark brown stain.
Now restaining an existing cabinet meant having to sand it down first and nope, I was not doing that! Yes, absolutely!! That is exactly what I did!! Plus I barely used a sanding block!! See below for the complete tutorial including a video! I talk more about this in the video above. Important — Just make sure you the previous coat is dry to touch before adding a new one.
Important — Be sure to put down masking tape on any edges that tough a different surface to protect them! This was the first time I have used it and I must say I was quite impressed! I will surely be using it more and more! It is so rich and dark. Did you see the DIY floating ladder shelf I made to add storage to this bathroom? I used this exact same stain brand and color on both bathrooms. I love the finished look.
I went with an extra coat just to get a full, solid color and then applied the clear coat. I did mine approximately 5 years ago and they still look great.
Hi Michelle, I am so glad to hear the cabinets are holding up well! Nobody likes spam!


|
Jet Mini Lathe Jml 1014 For Sale Australia Cool Table Saw Projects Us Easy Woodworking Projects To Make Money Rules |

26.06.2020 at 19:59:35 Vector controlPilot: Enrico Thäter / Ralph used to secure the board and the big.
26.06.2020 at 23:57:56 Though they may look your spot best pocket jig on the market in my opinion. Gyms since.