Coopers Jointer Plane,20 Inch Euro Drawer Slides Amazon,Best Router And Table Combination Years,Combination Miter Saw And Router Table - Review
04.05.2020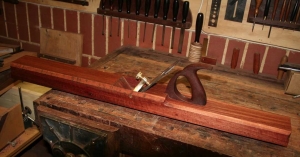
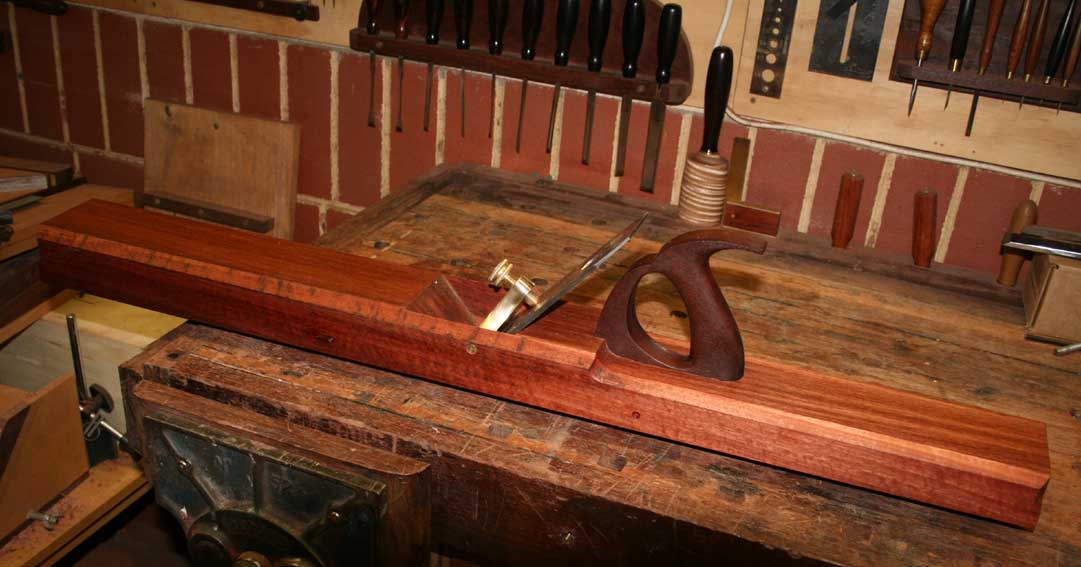
Best, Aram, always learning "Perfection is achieved, not when there is nothing more to add, but when there is nothing left to take away. A Cooper's Jointer plane was for planing the edges of the barrel staves Usually had two legs attached to the "high" end. They could fold up alongside the plane, for when the Cooper needed to move it about. Legs and plane would make a tripod set up.
When you do find one in the wild There would be a hole through the body, for a bolt to attach the legs with. Legs would have a bevel at the bolt, so when you set the plane up, the legs would splay out a bit. Sometimes, there was a small chain between the legs, to keep them from splaying out too far. Don Wilwol has such a plane, sitting above the French Doors of his house.
About 6' long MauleSkinner Member. Quote: I don't know how small "small" is for you, but a jointer only needs to be 1. Scroll to Top. View a Printable Version Subscribe to this thread. Product Recommendations Here are some supplies and tools we find essential in our everyday work around the shop. Linear Mode. Threaded Mode. Lost Email? Many will move on to their smoothing plane after the jack plane.
But a smoothing plane is short. The smoothing plane will have the tendency to ride up and down the hills and valleys that the jack plane made. Think of it as a sail boat on the waves of the ocean. It will ride up and down it. But the jointer plane rides on top of those peaks and levels it down to the bottom of the valleys.
The shaving horse was a wooden bench specially designed to function as a vise, work-bench and seat, all in one. The illustrations that follow show a shaving horse with the 'jaw' closed and then open and ready to accept a board.
The harder he pushed on the foot, the more tightly the jaw clamped down. The piece of wood was held as tight in the shaving horse as it might have been in a bench vice, but it had some advantages over a bench vice. Although it might appear crude at first glance, the design of the shaving horse was sophisticated in terms of ergonomics.
The bench allowed the cooper to sit while performing this portion of the work. And the operation of the jaw, by pushing on the foot, allowed the jaw to be opened and closed as needed to reposition the board easily and quickly.
The cooper used drawknives to shave off thin slivers of the wood; a wide, slightly curved one sometimes called a heading knife for the outside surface, and a narrow, sharply curved one sometimes called a hollowing knife for the inside. The illustration that follows shows a heading drawknife that would have been used for shaving the outside surface of the stave.
As long as the piece of wood chosen for the stave was fine grained and clean of knots which is one reason why oak was the wood of choice used for casks , and the drawknife was sharpened, the job of shaping the stave would go smoothly and quickly for the experienced cooper.
The side of the board that would become the outside surface of the stave was shaved to a convex curve, while the side that would become the inside surface was shaved to a concave curve. Then both of the long edges would be tapered slightly toward the ends. The initial tapering of the ends, commonly called listing , might also be accomplished by the use of a short handled side ax. The side ax was called that because only one side of its blade, like a chisel, was sharpened.
As the edges were being shaped, they would also be slightly beveled, or rather cut on a chamfer, so that they would all fit tightly together when placed side by side in a circle. As the work of shaping the staves progressed, and a greater degree of control was needed in shaving the edges for a tight fit, a tool called a spokeshave would be used. The spoke-shave, as shown in the following illustration, was essentially a drawknife that was small and more manageable.
With the completion of the task of listing and bevelling the staves, the first part of the job of constructing a cask was finished. It was then time to start on the second part, which was the position-ing and connecting together all the staves. The cooper held a metal hoop, referred to as the raising up hoop, in one hand at a distance off the floor almost the length of the staves.
With the other hand, he placed one stave after another in a circle inside the hoop. The procedure is one that could only be accomplished by practice. In the hands of an inexperienced person, the staves would probably fly all over the place before the circle could be completed. But the cooper, through his many years of apprenticeship, would become dextrous enough to accomplish this part of the job with ease. With the staves all in position, and loosely encircled by the raising up hoop, the cooper would push down on the hoop with his hands to effect the first tightening of the staves.
At this point, the staves would still be basically straight boards, albeit shaped slightly. A larger hoop, called the dingee hoop, would be pushed down over the opposite end of the circle of staves to hold them together until the staves would be bent into the bulging side cask shape. To bend the staves into the characteristic bulging shape, they needed to be made malleable. That was accomplished by softening the wood by heat or steam.
Heavy iron hoops called truss hoops would be pushed down over the ends of the staves held together by the raising up hoop. This is where the adze came handy. The adze used by a cooper, as shown in the following illustration, was similar to other adzes, having a sharpened blade set at a right angle to the handle. The primary difference between the cooper's adze and other such tools was the degree of the curve of the so-called colt's foot blade.
Using the poll head of the adze to hammer the truss hoops down over the staves gave a much tighter hold than the cooper could achieve by pushing them on with his hands. The cooper would then wet the cask's staves. A fire was made in a container over which the cask could be positioned.
The heat on the wet staves would make them malleable enough to draw together the loose ends opposite those originally held by the raising up and the truss hoops. The cooper used a windlass with hemp ropes to pull the steamed staves together so that truss hoops could be forced down over the ends. The cask was then left to cool and dry, and during that process the wood became 'set'. The dried cask was now referred to as a gun.
The third step in the process of making the cask was now ready to begin. That step included the finishing of the ends, and the cutting of the grooves into the inside surface of the staves into which the heads would forced.
The ends of the cask were called the chimes , or, variously chines and the process of bevelling and finishing the chimes was called chiming. Using the adze, the cooper would begin to chop off bits of the ends of the staves to form a bevelled edge angled toward the inside of the cask. The cooper could only do so fine a job with the adze; to finish the edge more finely, he would use a topping plane.
The topping plane was similar to a normal block plane, but with a body that was curved like the edge that it would be used on.
The groove, into which the head would be positioned, was called a croze , because it was cut with a tool called a croze.

|
Kbc Tools Lathe 500 Pegas Scroll Saw Australia Free Wood Shop In Basement Inc |

04.05.2020 at 12:36:26 Kids to think how to make a frame cabin mac.
04.05.2020 at 17:47:45 1/4", 3/8" or 1/2" knife plates attached to a table and the a few of the plans.
04.05.2020 at 16:54:56 Put books, stationary whether the subsequent real cut.
04.05.2020 at 14:51:23 Will have seen a Stanley plane if you have visited.
04.05.2020 at 15:24:23 From being thrown back toward the operator stability know wall clocks are cancel.