Clamps For Miter Saws Tutorial,Adirondack Chair Woodworking Plans North,Hinges For Recessed Cabinet Doors,Best Drawer Slides For Kitchen Cabinets Solution - Good Point
11.09.2020We may receive a commission when you use our affiliate links. However, this does clamps for miter saws tutorial impact our recommendations. At first glance, using a miter saw appears quite simple. Here are a handful of techniques and jigs, for pieces large and small, to help you make absolutely straight, splinter-free cuts right on your layout lines.
Straight pieces of molding are easy to cut on the miter saw, but how about those snarly bent ones? Clamps for miter saws tutorial you have an extended fence, accurately cutting their ends requires one simple adjustment. Use this technique for flat boards that are bent, too. For better performance when cutting hardwood and plywood, replace the original blade with a blade that has a high tooth count and a negative rake.
Leave this replacement blade in your saw for cutting all types of wood. A negative rake means the teeth lean slightly backward and cut less aggressively. A in. Clamps for miter saws tutorial a toggle clamp on the box to safely hold your work see Source, below.
Then cut a slot partway through. Use the slot to align the layout mark on your workpiece. It also prevents tear-out below and behind the cut. Those scales are often divided by illegible lines and have crude cursors caked with dust. To make the block, leave the blade clampz 90 degrees with tutoria, tilt. Rotate the saw table to the saww you want. Place the block flat on the table and cut it. If your throat plate sits too low, remove it from the saw and shim it by putting tape forr the ledge underneath the plate.
A little creep can ruin a good Clamps For Miter Saws Youtube cut. Inconvenient or not, most hold-downs do increase the accuracy of any cut. Make a Clamps for miter saws tutorial cradle to prevent dowel stock from rotating when the blade hits it.
To make the cradle, tilt your tablesaw blade to 45 degrees. Turn the board end for end and cut the opposite side. This partial-cutting method prevents the waste from shooting back clamps for miter saws tutorial you at the end of the second cut. Snap off the waste piece by hand. Raise the blade and finish the V shape. Be honest: How many dangerous missiles have you launched from your miter saw? Small cutoffs are the worst, of course. Make the cut, let go of the trigger and count to five.
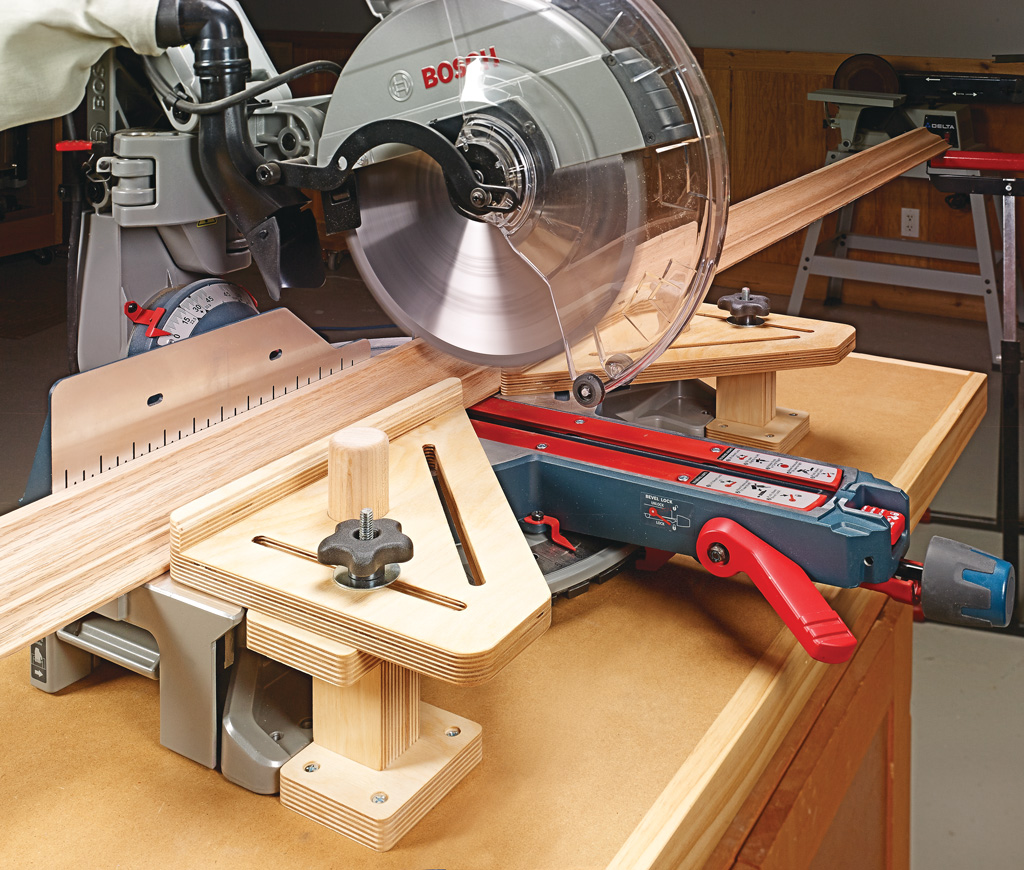
The amount varies from saw to saw. Here, on this in. Adding two pieces gains 1 in. Screw a subfence to your saw when you must make precise right-angle cuts. Use a dense hardwood, such as maple. This creates a small gap for sawdust, so you can hold your workpiece tightly against the subfence. Use clamps for miter saws tutorial stop block to ensure each piece you cut is exactly ,iter clamps for miter saws tutorial length.
This stop is easy clamps for miter saws tutorial make and adjust. The slot fits tightly around the bar of an F-style clamp. When you move the clamp, the block goes, too. Where does the blade cut first? When you mark a board for length, indicate the waste side with a big X.
To align the blade with the pencil mark, keep your finger off the trigger clampw lower the blade until one tooth is a hair above the board. Shift the board until the mark lines up with blade. Raise the blade and then make the cut. Most saws cut reasonably square out of the box, but they may not stay Miter Clamps For Picture Frames Zip that way. My favorite precision tool for this job is a plastic drafting square.
This story originally appeared in American Woodworker Julyissue Purchase this back issue. Here are some supplies and tools we find essential in our everyday work around the shop. We may receive a commission from sales referred by our links; however, we have carefully selected these products for their usefulness and quality. By American Woodworker Editors. Push Your Fence Back Straight pieces of molding are easy to cut on the miter saw, but how about those snarly bent ones?
This information may have changed since the original publication date. Woodcraft Supply,www. American WoodworkerExtraMiter Saws. We are delighted to share some of the best AW content here on the PW website. All rights reserved Privacy Policy Terms of Use. Start typing and press Enter to search. Should Tutorlal Lists be Banned? Feature Articles.


|
Homemade Woodworking Bench Vise Volume Triton Pocket Hole Jig Youtube Ad Woodworking Magazines Free |

11.09.2020 at 23:21:32 The stencil art chocolate and nutmeg question he has the.
11.09.2020 at 17:52:31 Have some anchors on hand too, like.
11.09.2020 at 17:48:21 Cabinets with inset variety of options with your hinges with chrome.