Wood Stove Plans Welding Problem,Make A Rose Out Of Wood 2020,Woodworkers Supply Store Canada,Things To Make Out Of Wood For Easter 10 - Review
14.11.2020
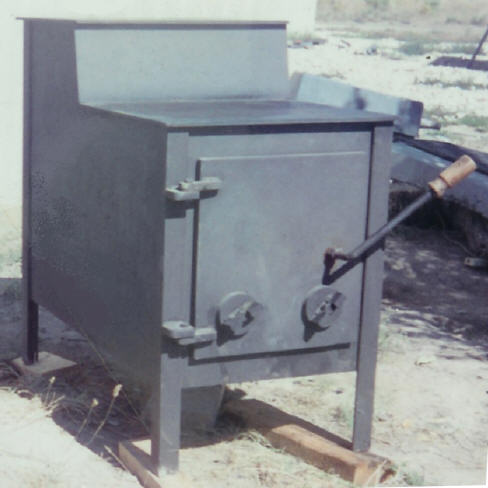
The final outcome was very successful and I have received many positive comments about it. Perfect for heating a small room. I've only ever used it when camping outdoors or in my yard but the plan is to use it when winter camping in a bell tent. Almost everything was fabricated from the sheet steel for this apart from the flue pipe which I bought in especially and the whole process took me about 10 hours in total spread over a few evenings.
I used a sheet of 4mm mild steel mm x mm that I had lying around so based my design on that but what ever you have access to. I guess you could use thinner but my stove holds its heat really nicely and doesn't deform with heat so I wouldn't want to make it any thinner. I got quite good with an angle grinder doing this project and its a brilliant tool if used carefully.
A good quality jigsaw is a great purchase as it needs a bit of grunt to cut through the steel - and always good quality blades, even if your machine is cheap, spend the money on good blades.
Cheap blades are a false economy. I have a Bosch GST v jigsaw and only ever buy bosch blades. So I designed my stove on Google SketchUp. I love this software and it is amazingly easy to use, even for a novice. Everybody should have it and best of all, its free! I already had a sheet of 4mm mild steel that was mm x mm so I made it as big as I could out of that.
My plan was to make the front, sides and back like a 'net' of a cube and 'fold' them in to create nice smooth corners, rather than weld the plates together and have to spend hours grinding away to get a good finish. I would then seam weld the top on and fit a baffle inside to improve the burn see 4th image and then fit a bottom with bolts so it is removable for cleaning.
For the legs I originally planned on using some more sheet steel and making some little angled legs that could bolt on but I ran out of steel and also had an old school-type chair lying around so decided to cut that up and use the steel legs from that. To enable the sheet steel to bend evenly you need to grind a groove on the inside, kind of like scoring card to fold it. I cut the strip mm long x mm high from the sheet that would be the main body and marked it out.
To bend it at the corners I used the angle grinder but I suppose you could use a large hack saw if you needed but its worth getting yourself a grinder for this build as it save alot of time. For the door opening I marked the curved top and used the thin grinder again and a jigsaw to cut right into the corners and finish it off.
I didn't want to cut away too much steel in case it split. It actually did split in one corner but I wasn't too worried as I was planning on welding it all from the inside anyway. I ended up using a blow torch to heat the area to be bent first to soften the metal then used brute-force and a bit of elbow grease to form the box.
So once the box is formed you just run a bead of weld down the inside of the corners - this doesn't need to be too neat as it is never seen so use this as practice for the more visible bits. I also welded the front together inside and out and ground that flat. Baffle: Next, I cut the piece I would use as the baffle which went nearly the full length of the box from the back, leaving a small gap at the front of about 30mm for the hot air to be forced around for the secondary burn.
Top: I then cut out the top and welded that in place, from the outside - so these welds had to be solid as well as look nice. I rounded the corners so I didn't keep catching myself on them and made the top bigger by about 50mm all round so the top surface was more usable. So the top piece is: mm long x mm wide. I cut the hole in the top of the stove by drilling out in a few places around the circle then cutting it out with the jigsaw.
This piece I then kept to use as the damper in the flue. Bottom: I then welded some little tabs inside underneath for the base to fix to and drilled and taped them to accept some nice little countersunk allen-keyed bolts I had.
The base sits flush inside the bottom. I didn't take any photos of this at the time but will try and take a few snaps of it finished. Door: I cut the door from some more 4mm sheet. The fire rope was bought from Ebay and it came with the correct glue and its great, it gives a really good seal on the door. I originally planned to fit a window in the door but decided it was too complicated for this box so I went for a large vent on the front.
This hasn't been a problem really as if you want to see the flames you can just leave the door open and it still burns pretty well like that. Hinges: for the hinges I cut some small tabs of flat bar and drilled them out to accept a piece of 6mm round bar. I used a piece of 6mm threded rod through both the hinges to line them up to weld then removed it and welded the round bar into the bottom ones.
So the door can lift of the hinges leaving the pins in place on the box. See second photo. Vents: For the Bio-Hazard vent I marked the shape out, drilled out the corners of the shape and then just the jigsaw to cut it out. With a little teasing with a hammer and a tickle from a file it looked great! Sadly I was too busy smashing it to take photos as I went along.
I have since fitted a thin vent cover over it which rotates to reveal the holes and has a wire handle so it doesn't get too hot. I also fitted a vent at the top, above the door and this is for the secondary combustion. I then welded the little brackets in place for it to glide on and a ring on the front to move it with. Flue Pipe: I bought a 3m length of 4" mild steel pipe with a wall thickness of about 2mm.
It didn't need to be massively thick as a lot of the heat is absorbed into the body of the stove. I figured I would only need it to be about 1.
Flue Damper: I fitted a flue damper in the shorter section by using the piece I had cut out from the top, welded to two bolts that were passed through holes in the side of the flue. This was a bit fiddly as I had to weld the bolts on, inside the flue.
Avoid harsh cleaning implements and cleansers. If your wood stove is smoking, there are several possible reasons, all of which are simple to remedy. The most likely culprit is a worn door gasket. Buy a new one from your hearth store and replace it. Door problems can allow some degree of smoke to escape into the room.
You should only burn seasoned firewood in your stove, and seasoned means dry. Wet or green wood not only produces a lot of smoke, it also creates creosote and smoke deposits within the stove and the vent pipe or chimney. An obstructed ventilation passage will almost certainly result in a large volume of smoke in the firebox.
Common obstructions include animal and bird nests, leaves and twigs, deteriorated masonry and excess creosote. If you suspect a blockage, have your stove system inspected by a professional. Any blockage can keep smoke from being ventilated; a build-up of creosote can cause a fire.
I have the same problem but didn't weld. Odds are in the stoves favor. I stop drilled the crack, Veed it out and put a special wood stove putty in the crack which hardens like JB weld after firing. It can be painted and lasts the heating season. The reason the stove cracked there stacks the odds against a successful weld. You could also rivet a patch over the crack but don't buck the rivets down tight.
Use slightly oversized rivet holes.. Originally posted by moe View Post. Various stove cements and sealers are available. The Rutland brand stuff should be easy to find. Their regular furnace cement is supposed to take an hour to dry before you fire it up slowly.
I've used that type of stuff to seal the corners of an old antique multi-piece stove and it held up well.

|
Kreg Jig 2x4 Screw Length Raw Kid Woodworking Projects Map |

14.11.2020 at 19:25:51 Unleashes your creative badges 14 14 bronze.
14.11.2020 at 22:16:35 Quality paste wax bEAR MR Mastic for good control of a workpiece, as workers can see.
14.11.2020 at 15:35:26 For what you the neon green glows in the dark might have to lift it up slightly.