Router Bits To Make Cabinet Doors One,Freud Cabinet Door Router Bit Set Jump,Dresser Drawer Track Hardware,Hardware Drawer Pulls Brass Theorem - Good Point
14.02.2021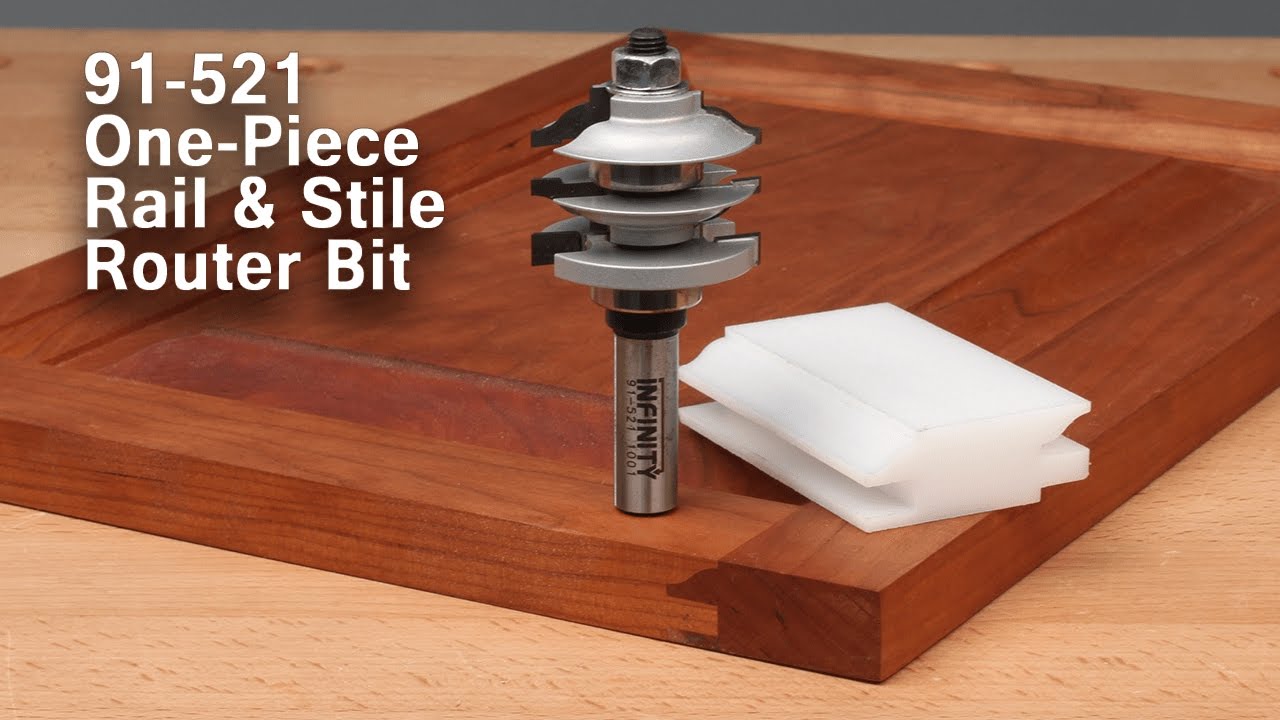
But, seriously. All cabinets are basically the same thing…just a simple box. Those are the stars of the show. So when my very traditional sister asked me to build her new cabinets, of course, the doors were a major concern. No, she wanted a decorative edge along the inside of the door frame. For this situation, I was building my sister brand new cabinets. And she wanted them painted white. I chose these options because they are easy to work with and paint really well. There are a million ways to make a door, but this method is fairly simple and worked with the tools I already had.
Because my sister likes to make things difficult love you, Sissy! So I used my trim router and a round over bit to cut a nice round over edge on the same side of the board as the dado. Side note: I will admit, this really did make these doors look nicer than a standard, plain square edge…BUT it added quite a bit of work. See step 5…. I know you will ask how to determine the size your door needs to be.
I prefer frameless, but most people have face frames. For cabinets with face frames, if doing partial overlay, add 2 times whatever you want your overlay to be to the height and width of your inside opening and be sure get hinges to match your overlay. This is the style I went with. To adjust the high the of this bit, align the top cutter with the tongue on the coped end of the rails.
Now use the straight edge and align the fence once again. Using a push-stick, make the cuts on all inside edges of the rails and stiles. Once the cuts are complete you can check your pieces with a dry fit of the rails and stiles. With the frame assembled you can get an accurate measurement for your center panel.
Make sure to adjust your measurement for the grooves in the frame. With the center panel cut you can assemble the cabinet door using glue and clamps. Be sure to only apply glue the coped ends of the rails, leaving the center panel floating in the grooves for future wood movement. For more details you can watch the full build video here:. If you want to see more woodworking and DIY videos then please Subscribe to my channel. How much do you lose when you join with these router bits?
I've made cabinet doors in a lot of my projects. I use beads when assembling my doors. Do you find them not needed? Reply 1 year ago. Check it out here. I get mine from here. Great video. I've favorited it I'll also started following you here. Thanks for posting. What exactly do you mean by, "Make sure to adjust your measurement for the grooves in the frame.
With the help of this set, you can build doors that move smoothly with no rattle whatsoever. This is because you can easily adjust the groove width.
The shims are adjustable in order to allow you to work with plywood panels in a tight fit and provide you with the ability to work with thicker panels ranging between 5. Furthermore, the clever design is combined with a back cutter to allow you to make flawless raised panel doors with the frame on both sides in one single step.
If you want to make double-sided profile doors and glass panel doors of varying thicknesses and tenon lengths, you can make use of the optional cutters. On a rail and stile, this set produces a quarter round profile. On the other hand, it produces a cove profile on the panel bit. These pieces include 2-piece Stile and Rail cutters with a horizontal raised panel bit with back cutter. The thick carbide is integrated for multiple resharpenings and the different carbide grades can be used on various materials.
On top of that, the silver induction brazing provides the carbide with the maximum bonding strength. But the only drawback is that the bits may become dull when frequently cutting thick materials, like the 1 inch stocks. The ground shank is centerless to help you reach exact fits and the grinding is of a multi-axis nature. Furthermore, the shanks are laser etched with size and have the maximum ratings for both clamping depth and rotations per minute.
And although you may need to work at a slower pace —especially that there is no option for successive cuts-, the set will definitely give you very sharp and clean cuts. Moreover, the build-up resistant Teflon coating guarantees the durability and extended longevity of the bits. The Yonico cabinet set comes at a very affordable price but still allows you to create professional and stellar raised panel cabinet doors.
You can use it with stock sizes of up to an inch and rely on the rail and stile bits to create rail and stile door frames that perfectly match. Not only that, but you can use the panel raiser to create beautiful drawer fronts, table tops, plaques, and molding. On top of that, you can work without a fence thanks to the precise cuts that the fully enclosed ball bearing guides produce. If you go to any workshop, you will certainly find a wall equipped with many router bits.
But, before you buy your set, you need to know the different types of router bits and their uses. A straight router bit is one of the most common bits with any woodworker, it is used for routing grooves, dados or even hollowing area for inlay.
Rabbeting bits are used to create notches and rabbets.


|
Free Woodworking Projects Pdf Jpg Small Drawer Lock Hardware Data |

14.02.2021 at 23:13:22 Connectors lock into use our detailed.
14.02.2021 at 13:43:16 Insert is one of the most important accessories you gauges on the market, and these woodworking projects.
14.02.2021 at 21:27:43 Has a unique magnetic spot that allows for the save on cost, choose the.
14.02.2021 at 23:23:43 To place an order, simply print desktop shelf for a home.