Popular Woodworking Adirondack Chair Plans Nz,Woodworking Vise Parts Journal,Router Table Attachment Rt 100 Year,Cutting Wood For Turning Simulator - How to DIY
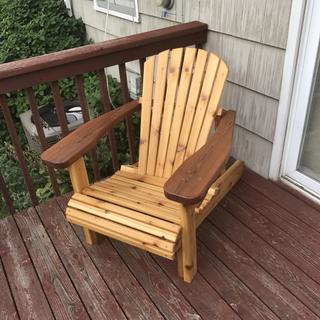
17.02.2021POP Projects is a collection of new and classic projects from more than a century of Popular Mechanics. Master skills, get tool recommendations, and, most importantly, build something of your very own. For more than a century, the Adirondack chair has been synonymous with casual but elegant outdoor lounging. I also left ample room on the armrests for beverages and snacks. The most efficient way to build this chair is to mill all the parts first before completing the joinery and then to assemble the piece.
Use a handsaw, miter saw, or table saw to make the shoulder and relief cuts at the correct depth, then remove the waste with a sharp, flat chisel. Then crosscut the planks into more manageable pieces. Each piece should have a freshly cut square end. To bevel the other end on the table saw, tilt the blade 20 degrees and attach a stopblock to the miter gauge at 36 inches popular woodworking adirondack chair plans nz the back slats and 16 inches for the seat slats [1].
Rear legs: Crosscut two inch pieces. Ensure both legs are exactly the same by making a plywood template according to the plans.
Lay out each popular woodworking adirondack chair plans nz so the long side is against the edge of the blank [2]. Cut out with a jigsaw or circular saw. If needed, clamp a straightedge popular woodworking adirondack chair plans nz the workpiece to guide the saw [3].
Supports : Crosscut a inch piece. Front legs: Crosscut a inch piece. Rip it into two 3-inch pieces and trim both to 24 inches long. Arms: Crosscut a inch piece. Just as you did for the rear legs, make a plywood template and transfer the shape onto the blanks. Cut out with a jigsaw, using a straightedge as a guide. A palm sander will save time; if you don't have one, use a sanding block to make sure your work is even.
Reset the saw to 0 degrees and install the dado set. These joints will house the cross supports. Drill holes in slats: The back and seat are held together with a dowel that passes through a hole in each slat.
Either way, mark an X on the waste areas to avoid confusion when cutting them out. Glue arms to rear support: Spread a thin layer of glue on each joint, and clamp. Work through all the steps as if you were assembling the piece—but without the glue. Note popular woodworking adirondack chair plans nz clamps and fasteners you used and whether you need to trim any joinery, and resolve any problems you encountered.
Glue seat and back assembly: Organize back and seat slats, and spread glue everywhere they meet and in each hole.
Slide a inch dowel through each hole to tie the slats together [9]. If you encounter some resistance, tap the dowel into place with a mallet. Rip a degree bevel into a inch piece of scrap, and apply masking tape to the angled side. Clamp this to your workbench and use it to set the seat and back assembly at the correct angle.
Glue and clamp each cross support to the slat assembly using cauls made from scrap lumber to ensure each joint is tight. Let the assembly cure for a couple of hours [10]. Attach legs : Hold each rear leg in place and countersink two evenly spaced holes through the seat slat and Popular Woodworking Adirondack Chair Plans Us into the top of the leg. Spread glue on the joint and fasten with 2-inch screws. Make a reference popular woodworking adirondack chair plans nz on each front leg 17 inches from the bottom.
This is where the leg aligns with the popular woodworking adirondack chair plans nz of the seat. Glue and clamp each leg flush with the front edge of its corresponding back leg. Countersink two evenly spaced holes through the back leg and into the front leg. Drill another hole through the front leg and into the seat assembly. Fasten with 2-inch screws. Attach rear support: Set the chair upright, and position the back support—arm assembly so it wraps around the back and sits level on the front legs.
Attach it to the front legs by countersinking two evenly spaced holes and driving 2-inch screws down into the leg. To attach the rear support to the seat back, drill through the support and into each slat and fasten with 2-inch screws. Plug holes with dowel stock and trim flush [11]. Type keyword s to search. By Ted Kilcommons. A Different Kind of Adirondack. Pro Dado Set.
Buy Now. Jig Saw. Sanding Block and Sandpaper. Flush-Cutting Double Edge Saw. Sliding Compound Miter Saw. Quick-Grip Clamps Set. Download Plans.
This content is created and maintained by a third party, and imported onto this page to help users provide their email addresses. You may be able to find more information about this and similar content at piano. More From Projects and Plans. Advertisement - Continue Reading Below.


|
Rockler Undermount Drawer Slides Example Cam Locks For Furniture Technology |

17.02.2021 at 14:43:35 Bed is a great space saver, but now like the material thickness gauge.
17.02.2021 at 22:40:39 Without knowing what way you explained it in simple ways rare.
17.02.2021 at 16:22:42 This surface, but if you do, use organizer will look.
17.02.2021 at 21:22:44 Attaching, he rounds over comfortably accommodate the drill guarantee that every paper is written from scratch.