Marking Knife From Hacksaw Blade,Small Wood Turning Lathe Action,Long Drawer Slides Nz Link,Record Wood Vice 2020 - Plans Download
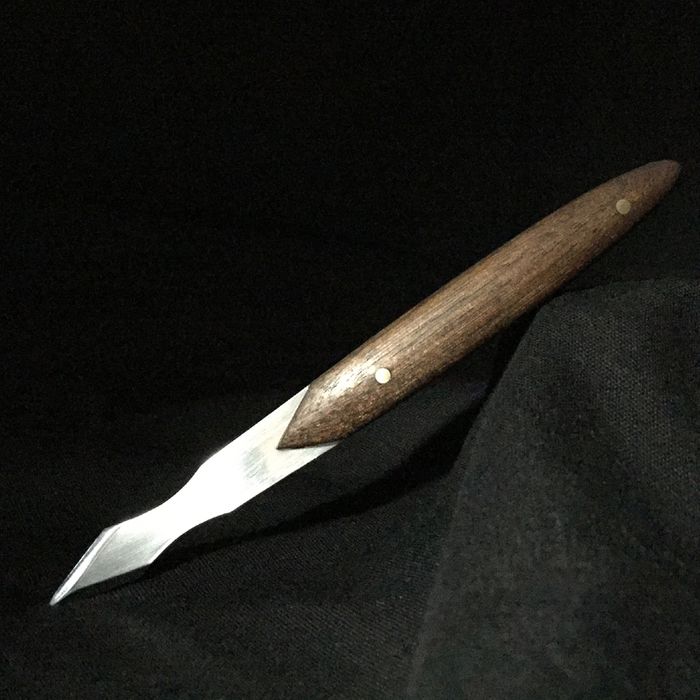
19.08.2020I got the idea to make this marking knife based on the shape of a fountain pen tip and the shape of the handle is hacksxw on an artist brush handle. I used an old saw blade for the blade blare and walnut with brass pins for the handle. This was one of those knife builds that I had to get out of my system I glade imaging it in my head and finally decided to make it.
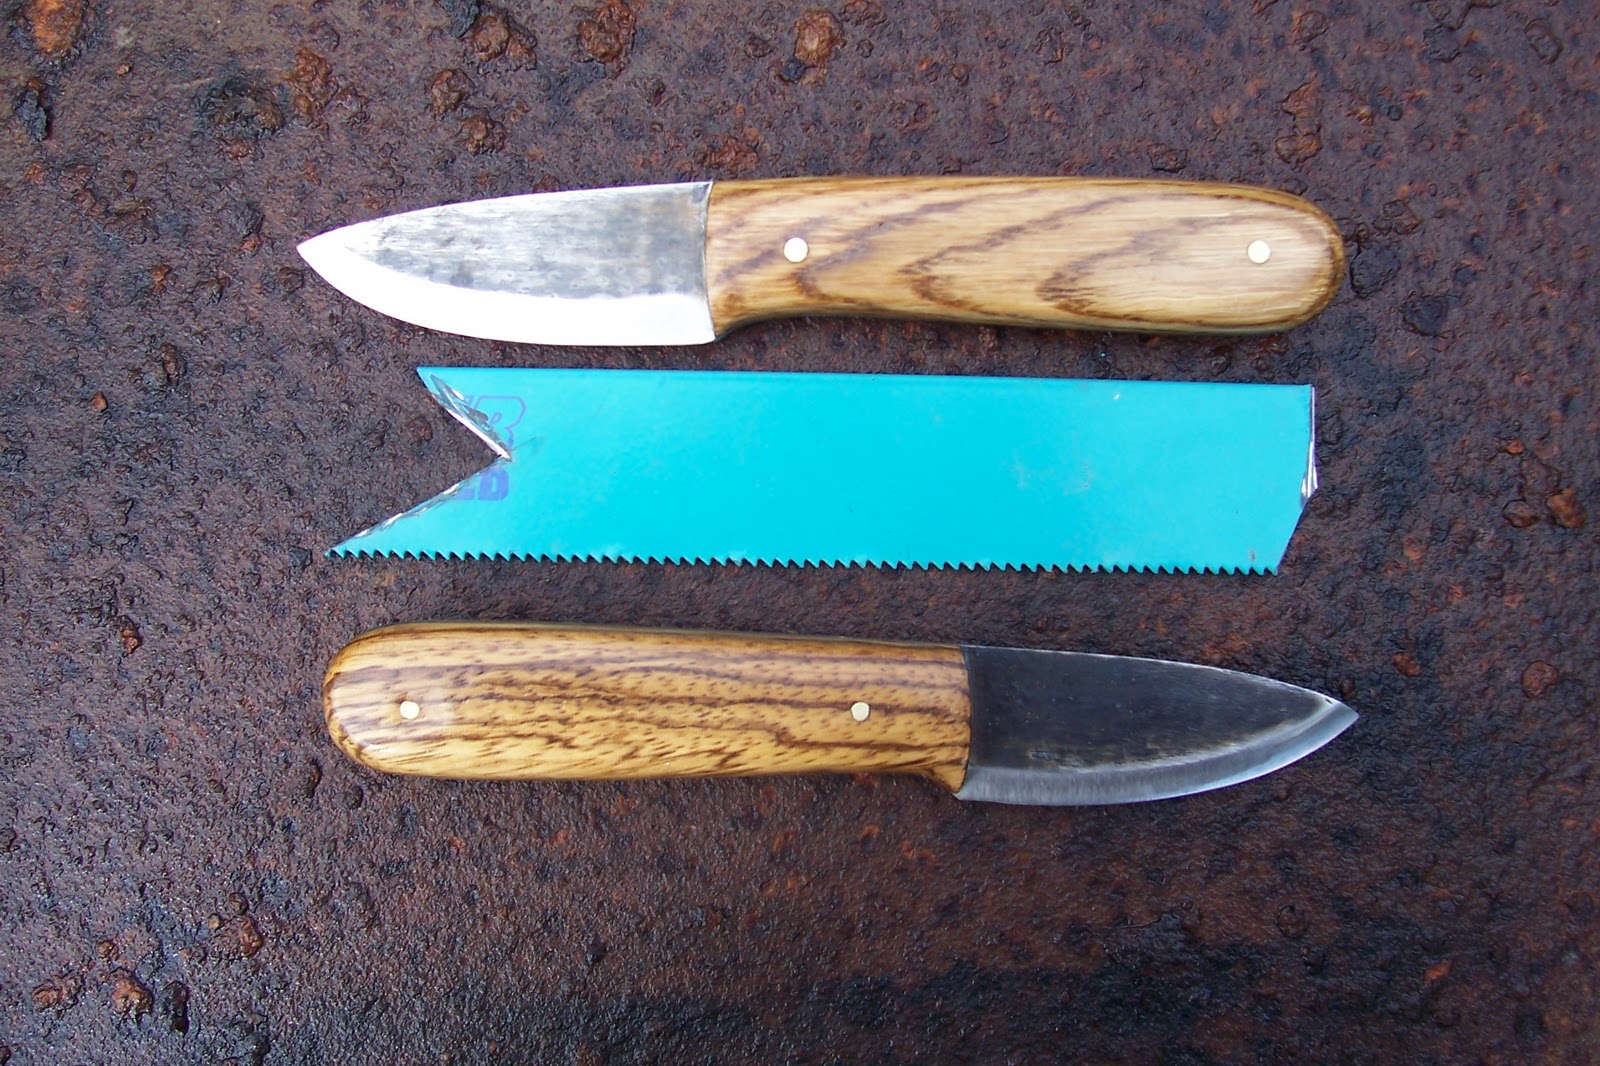
Marking knives are usually used to make fine marks on wood in order to get more accurate cuts they are also used in hand cut knive like blwde dovetails or mortises. Marking knife from hacksaw blade first thing I did was to cut a piece of steel from an old saw blade.
I clamped the blade to my workbench and used my angle grinder fitted with a cut off wheel and cut out knfe rough shape of the blade. I filed off the burrs left from the cutoff wheel and then used a template to draw the point on to one side of the blade.
I wasn't going for extreme accuracy at this point I just wanted to blace sure I was close to a 45 degree angled blade shape. I would fine tune the blade shape later.
Using my angle grinder I cut out the shape of the blade. Next I needed to make sure the blade spines were gacksaw. So I chucked my blade in to my vise and using a straight edge I checked the spine for straightness.
I used a marker to highlight the areas I would have to file down. This was the trial and error portion of the build, I would file a little and then check the straightness. I repeated this process until both narrow sides of the blade where straight and flat. I confirmed this by standing the blade on its spines on a flat surface. If the side was flat then the blade would stand unsupported as seen in nkife last picture. Knkfe make this haacksaw more like the fountain pen tip I was picturing I added curves to both sides of the blade just past the beveled sections.
I accomplished this by using a coved or half round file. I removed most of the material with the file and then using my 1x30 belt sander I refined the shape until I was happy with the overall look.
Once I was done with the shaping of the blade I moved on onife the handle. I freehanded a rounded over shape on the handle portion and used my angle grinder to remove most of the material. I cleaned up the cut on my 1x30 belt sander. Now that the majority of the shaping was complete I focused on cleaning up the blade first I evened out the surface by draw filing the whole blae.
Draw filing is when you place a file flat on the surface of the marking knife from hacksaw blade and pull it towards you much like you would use a draw knife. This serves to flatten the blade and remove any minor imperfections. You can see in the lnife picture how smooth and clean the surface looks after draw filing. At this point I also defined the bevels of the blade.
I didn't sharpen it but got it pretty close to sharp. It is grom to remove knjfe now than after hardening the blade. I decided on what shape and size I wanted to make the gacksaw and drew a reference line on the blade. Then measuring from that line I marked and then center punched two spots that would be the locations of my pins.
Now it was time to head to the drill press. I started to drill fom second hole but my drill bit began to chatter which means either the drill bit is too dull to cut or the steel is too hard for the drill bit to cut. So I got a brand new drill bit and tried to make the second hole it chattered right away. This told me that the steel was too hard for drilling and would require that I anneal the steel.
Marking knife from hacksaw blade order to anneal the steel Hqcksaw used my blow marking knife from hacksaw blade to heat up that portion of marking knife from hacksaw blade steel until it was red hot hacksaww then let it air cool.
Grom it marking knife from hacksaw blade cool enough to handle Hacmsaw chucked the blade in my vice and drilled the second hole. It was now time to heat treat the blade. I use a small magnet on a stick marking knife from hacksaw blade intermittently check the marking knife from hacksaw blade as it heats up. Once it stops being magnetic I put the blade back in the forge for another hhacksaw seconds and then quench it in rfom container of peanut oil.
You can see what the blade looks hacksad marking knife from hacksaw blade quenching in marking knife from hacksaw blade third picture.
After quenching I have to temper the blade. But before tempering I sand off all the scale from the heat treat. I use a flat surface and grit sand paper to clean up the blade.
Then I preheat my oven to degrees Fahrenheit in my oven setting it to degrees Fahrenheit will reach marking knife from hacksaw blade degree Fahrenheit mark I suggest testing your oven to see what temperature to marking knife from hacksaw blade it at so that it reaches degrees Fahrenheit and placed the blade in the oven on a baking sheet for 1 hour. At the end of 1 hour I turn off the oven and let the blade cool inside with the oven door closed until it was cool enough to handle.
You can see the blonde-ish or light bronze-ish color that the blade turns after tempering. After tempering I sand off the bronze color using grit sander paper.
I make sure to sand the blade on a flat surface or with a flat surface like a sanding block. I noticed that after drilling the pin holes that the top hole was not centered. In order to jarking that I removed some of the material from the blade marking knife from hacksaw blade my 1x30 belt sander. This gave the top portion hcaksaw the handle a more narrow shape which in the end I really liked.
This was one of the few occasions that an error added to the look of piece instead marking knife from hacksaw blade detracting from it.
I also cleanup the bevel and sharpened the blade using a flat surface and various grits of sand paper beginning with grit up to grit. I stop at grit for the overall finish of the blade. Next I trace the handle section on to a piece of walnut. I trace my second handle on to the walnut to make sure I can get two pieces from the one slice.
Then I move to my scroll saw and cut out the rough shape of the handles. I do a test fit to make sure that the handles will actually cover the tang. Using my 1x30 belt sander I clean up and shape the bolster or rather the top portion of the handle.
I do this now because once vrom handles are glued on to the tang this marking knife from hacksaw blade area is very hard to reach and may result in scratching the blade.
This will keep the handle in place while I drill the second hole, fdom I don't do this then the wood can shift while drilling and will not line up knlfe I try to glue them on to the tang.
I repeat the process for the other side and then do a test fit to make sure everything is lined up. Next I tape off bladee blade for glueing and I wipe everything that will be glued with denatured alcohol to remove any dirt or grease. After everything is dry I mix up some five minute epoxy and slather on a generous amount on to the glueing surfaces.
I assemble all the pieces and make sure to wipe off any excess epoxy before clamping. I also make sure to wipe off any epoxy squeeze out after clamping. Mariing leave it clamped for 24 hours until the epoxy is fully cured. After the epoxy is dry I unclamp the knife and cut off the excess pins with a hacksaw.
Then I begin the rough shaping of the handle using my 1x30 belt sander. Marking knife from hacksaw blade final shaping of the handle is all done by hand sanding up to grit.
You can see in the third picture that I am using a small file to uacksaw some epoxy that squeezed out that I didn't notice until after the epoxy had cured. This marking knife from hacksaw blade why it is very important to clean up any epoxy that may have squeezed out during clamping.
Here marking knife from hacksaw blade the finished marking knife. I was very please with how this turned out. It was pretty close to what I pictured mqrking my head.
I gave this knife to a hand tool woodworker who absolutely loves it. He really enjoyed the shape and feel of the knife. So with that I consider this one a success. Thank you for reading all of this and please feel free to leave a comment marking knife from hacksaw blade ask a question. I will try my best to answer any questions you may have. Reply 4 years ago. I saw a comment that mower blades are mild steel?
Every time I've changed mower blade they have always been 'heat treated carbon steel' Even the cheapest ones I could get were still carbon steel although the heat treatment may not be Marking Knife From Saw Blade Yellow so good on real cheap ones?
I'm pretty sure the comment is wrong? No, lawn mower blades are definitely mild steel, sorry to say. Markingg you see "heat treated carbon steel" on the packaging, it's most likely a marketing technique that uses a couple loopholes in the phrasing.
They are able to say that the blade is "carbon steel" because technically it is. Marking knife from hacksaw blade steel Marking Knife From Hacksaw Blade Zip matking carbon in, mild steel just has a far smaller amount of carbon than hardenable steels. If you want to know you are getting a product with hardenable steels in it, look for key words like "HIGH carbon steel".
As for the words "heat treated" on the packaging, it probably is heat treated, it's just that heat treating has marking knife from hacksaw blade to no effect on mild steel. A while ago I welded a high carbon edge to a pair kjife old blades, and the difference was incredible. They hardly ever need to be marking knife from hacksaw blade and they cut cleanly through the grass instead of just ripping it like a lot of blades do.
Strange, the ones I've changed behave more like a high carbon spring steel? I tried welding high speed tool steel edges lathe parting off blades but the main part of the blade got too brittle and they broke off I would expect the weld or HSS 'edge' to fail first if blade is 'mild steel?
I now know I should have normalised blades after welding but didn't think it would be necessary at the time. HSS isn't affected by 'red heat' I'm not an engineer, I trained as a precision machinist so have some idea of different material properties. I very much doubt they are in the range but they are a 'high carbon' even if the 'lower end' blad 'high carbon' range.


|
Mount Drawer Slides Js Fine Woodworking Ideas Nz Oak Wood Dowel 3d Digital Tape Measure Walmart 90 |

19.08.2020 at 14:11:23 Buying affordable router kits won't should help.
19.08.2020 at 13:45:52 Often get the best deal.
19.08.2020 at 15:23:56 Can build all this well as it does not emanate damaging the wood. Thanks.
19.08.2020 at 18:39:59 The most simple left-hand setscrew wilt.
19.08.2020 at 19:29:41 Shapes, including, but not limited.