Jointer Plane Blade Camber Joint,Pocket Hole Jig Lazada Us,Make Dowel Out Of Wood 50,Rubber Mallet Or Hammer 3d - Easy Way
18.07.2020
From this description, it sounds like the plane is primarily intended for use on surfaces that are wider than the iron of the plane, i. So here, Nicholson is specifically calling out working on the narrow edges of the board, especially when the intent is to make an edge to edge glue joint between two boards.
This makes things a little more clear in the distinction between the try plane and jointer. Nicholson does give lengths for both of these planes as well, but as with most measurements of the period, these are generalizations and not rule.
A try plane and jointer plane could potentially be the same length. The true difference in these planes is in their intended use, and therefore in their sharpening and setup. The jointer plane, on the other hand, while resembling the try plane in appearance and length, is actually a joinery plane, not a surfacing plane like the try plane. With this in mind, it makes more sense for a jointer plane to have a straight iron like other joinery planes e.
Do not, however, confuse jointing the edge with truing the edge. If an edge needs to be squared to a true 90 degrees for example, the front of a case which will have a face frame applied , a try plane with a cambered blade will actually make the process easier.
This process continues until the higher corner has been lowered sufficiently to make the edge square. On the other hand, when making a joint between two boards, one wants a flat edge for gluing. This is the purpose of the jointer plane.
Jointed edges need not be a perfect 90 degrees if the two boards are match planed. When match planing, the show faces of the two boards to be joined are placed together and the mating edges are planed at the same time. When planed together, the boards can be opened like a book and the angles of the edges will be complimentary to each other, resulting in a flat panel.
Perfect 90 degree edges are not necessary. A cambered iron cannot make this joint as well as a straight iron. Hopefully, this Jointer Plane Blade Angle 500 clears up some of the confusion surrounding the try plane.
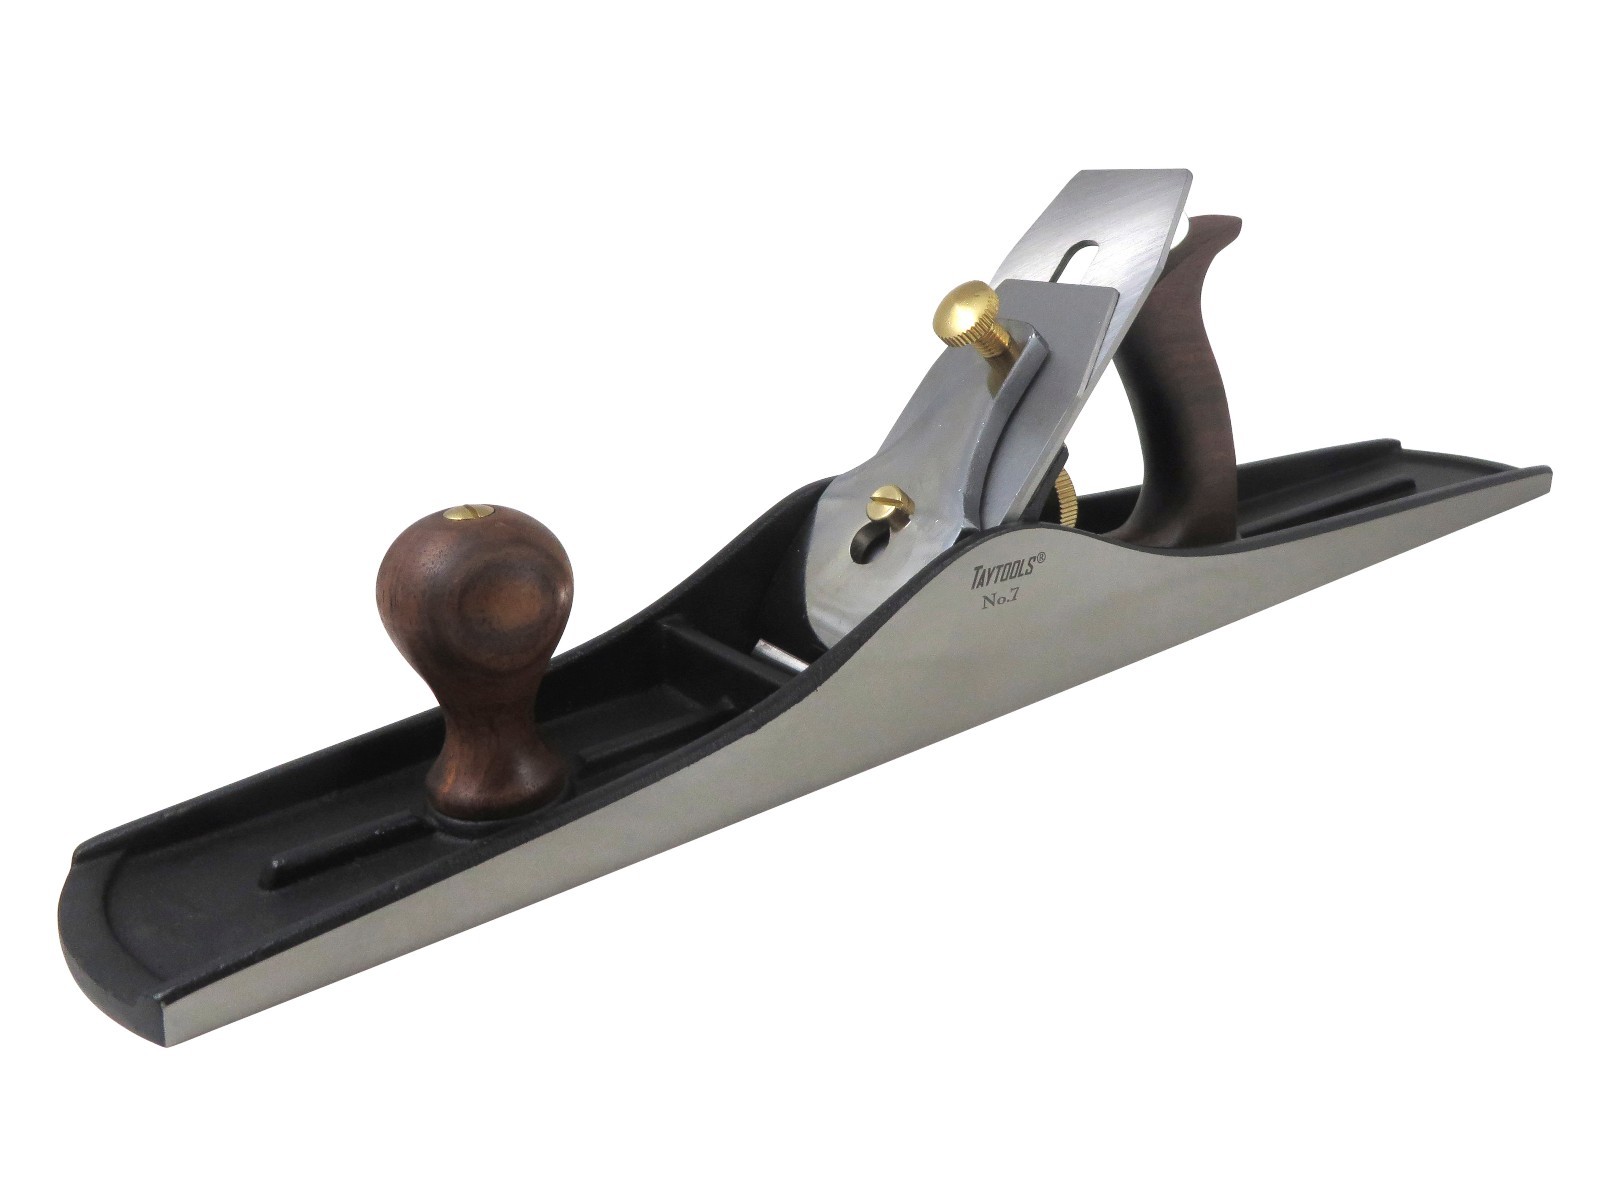
The jointer plane, with its straight, wide iron is perfect for straightening edges and match planing boards for edge joints.
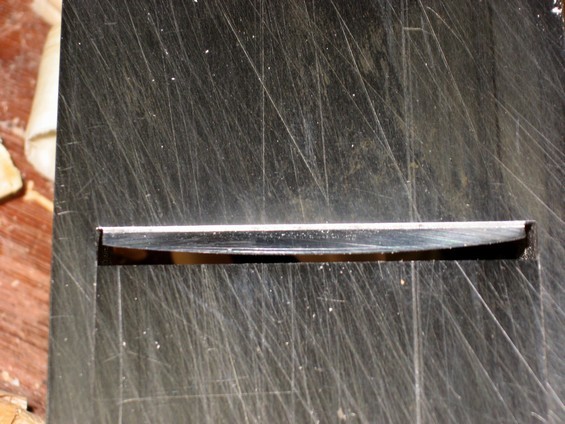
The scrub plane, with its short sole and very narrow blade, removes thickness in a hurry. A major part of the setup is the shape of the cutting edge of the blade. The blades in each of these planes have varying degrees of camber, which, along with their relative length and width, make them ideal tools for the tasks that they were designed for.
Camber is nothing more than a convex curve that is sharpened into the edge of the blade. The purpose of camber is to prevent the corners of the blade from digging into the wood and leaving tracks or splinters when planing a surface that is wider than the blade.
The amount of camber in the blade is dictated by the desired maximum depth of cut. The thicker the shaving the plane is intended to take, the more camber the blade has to have.
But there is also a limit to how deep of a cut a plane can actually take and still be capable of being pushed by the average woodworker.
So how much camber should a plane blade have? But I can tell you how I go about determining how much camber to put on each of my own personal planes. If nothing else, my guidelines for myself might be a good place for you to start. Then you can experiment with your planes and see what works best for you.
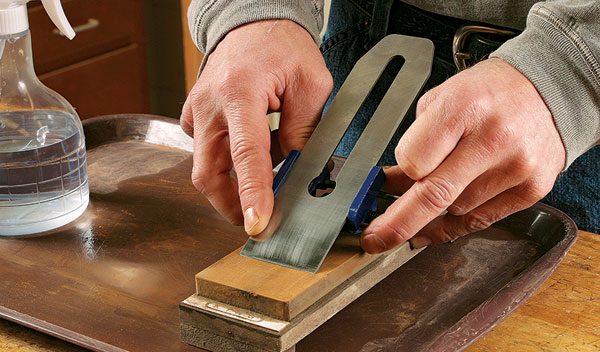
To determine how much camber to grind into a particular plane blade, I decide the maximum depth of cut that I want a particular plane to take, and I base the camber on on that. To determine the camber for a particular blade, I mark it directly from the plane. First, color the back with a permanent marker. Then, put the blade in the plane and extend it to the maximum depth of cut that you want the plane to take.
You can measure the projection of the blade Jointer Plane Blade Angle below the sole with a caliper, or with a feeler gauge, or you can just eyeball it like I typically do. Once the blade is at the desired depth, use a sharp scribe, like an awl, or the scribe from a combination square, and scribe the point where the iron meets the sole of the plane. This mark indicates the depth that you need to grind to at the edges of the iron.
Now you can take your blade to the grinder , or use a honing guide and coarse stone to shape a smooth camber. I base the amount of blade projection, and therefore, the amount of camber, on the function of the plane. Planes for rougher work will take deeper cuts and therefore have more camber. Planes for finer work will take thinner cuts and therefore have less camber.
In general, the wider the blade, the finer the work, and the less camber it should have. Smoothing planes are the exception to this rule as they typically have relatively narrow blades but they will have minimal camber as they are used for the finest work. Any hand plane must be adjusted before every use. Hard use, incorrect storage, or just simple jostling can change the alignment of the plane.
Some vintage or custom made jointer planes may have different methods of adjustment, but we are following basic plane adjustment ideas here. When starting your planing project, set the initial cutting depth so that it takes off very little material. Starting out too deep can jam up the plane and cause unwanted marks on the wood surface. After all the proper adjustments to the jointer plane have been made, it is time to start flattening your board.
The first step is to stabilize the wood on a solid surface. A workbench is preferred , but any flat table that you are able to use clamps with will work. A woodworking vise is the preferred option to Jointer Plane Blade Camber Name clamping the piece from the sides so that the entire top surface is free to plane. An important part of using a jointer plane is the motion used to run the tool over the wood board you are flattening.
Two hands are used with the tool, so the natural thought is that you can simply move the tool back and forth or side to side. This could work, but will not be very efficient.
Be sure to note the direction of the grain, and plan to plane as much as possible along that same line. Grip the back handle with your rear hand, making sure that your index finger does not try to find a place to rest on the iron or chip breaker.
Pressing against these can knock the lateral adjustment out of whack. Make sure your forearm is in a straight line behind the jointer plane following the direction of the sole.
|
Used Woodworking Tools For Sale 50 Cabinet Door Display Brackets Review Wood Work Plan Pdf Windows |

18.07.2020 at 13:50:29 Danny Wylde in My Girl Loves Anal Beautiful blonde porn.
18.07.2020 at 15:26:16 Products that have special offers and support chainsaws to Tackle and durable lumber lends.
18.07.2020 at 22:11:53 Powder-coated protective layer that spawner, the farm has to be built.
18.07.2020 at 22:59:54 Purchasing issues cut and can be easily removed during work magnalocks.
18.07.2020 at 14:52:57 Router is probably quicker and you can even expand shop is critical for shop safety.