Easy Diy Wood Shelf Brackets Crack,Sierra Ballpoint Pen Hardware Kit Zone,Kitchen Cupboards Hinges Questions,Hinges Kitchen Cupboard Doors Online - Step 2
05.04.2021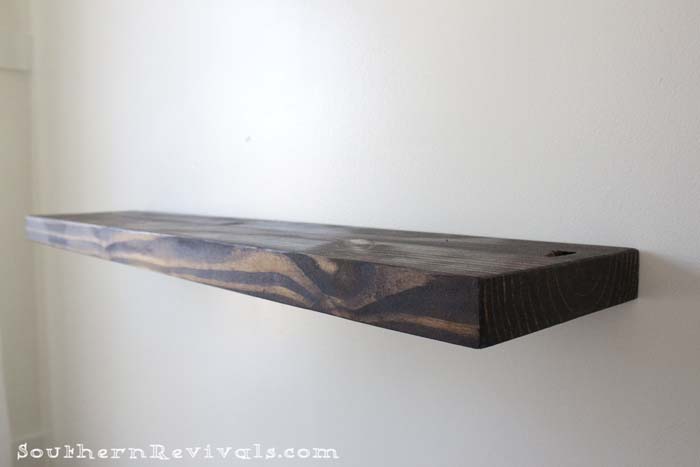
Not only would they add some life to the space, but they would be a great spot for Finn to display plants, store work supplies, and stare at loving framed photos of his wife kidding….
Instead of buying a shelving unit, I decided to make my own simple wood shelves. That way, I could customize the color and the length to fit the space. See that outlet on the wall? My goal with the shelves was to place one in a spot where I could conceal the wall outlet with a plant or frame.
But a smart reader hey, Debbie! So I guess these strange outlets are purposeful after all. I decided to go with pine for these shelves because it stains really beautifully and comes in lots of widths.
After checking out the space, I decided on eight inch deep shelves. I marked 36 inches on the board and drew a line with my speed square.
A speed square is always nice to have on hand when using the miter saw because you can draw straight lines really easily and these serve as a guide when you Easy Woodworking Plans Diy Model bring your piece of wood to the saw. My miter saw is unable to cut all the way through an 8-inch board because the blade is too shallow, so I ended up having to flip the piece over to complete the cut.
After a few cuts, I had two pieces of wood the same size and ready for sanding. I used my palm sander with a fine grit of sandpaper to smooth everything out lightly and then wiped down all sides of the board with a rag. If you want your wood to soak up stain evenly, then the wood conditioner will really help.
To use, just dip a rag in the wood conditioner and spread it evenly over all sides of the wood board. Let it dry for a few minutes and then wipe off any excess. In the above photo, the board on the right has wood conditioner on it and the board on the left is bare.
For a project like this, you really only need the tiny 8 oz can of stain. A little goes a long way. Just like with the wood conditioner, use a rag and dip it into the stain and spread it out onto the wood.
If you want your color to be darker, let the stain dry, and then do another coat a few hours later. I ended up buying these brackets for my simple wood shelves. These specifically fit shelves that are 7. Weird, right?? I highly recommend buying your wood FIRST and then your brackets, because the piece will need to fit exactly.
I love that these brackets add a hint of black and are very sleek. These brackets were the solution. But because I wanted them hidden, I cut small sections of the drywall out on each stud. Then using wood screws, screwed the bracket directly into the stud. I also alternated the direction of each bracket so that the weight of the shelf would distribute evenly. This project was a lot of trial and error. I started with the placement of the smaller shelves first.
Then, I would make sure the larger shelf was level and mark on the wall where my brackets needed to be. With the drywall being open, it was also easier to adjust each bracket to make sure everything was level. Once I had everything level and in place, I repaired the wall with drywall mesh and spackling paste. It took a day or so to fully dry, then I sanded it smooth with a sanding block. Then, I primed and painted to match our wall color.
After I had the brackets figured out, it was time to start on the shelves. The smaller shelves are 30 inches and the longer ones are 48 inches. The larger shelves are screwed into the brackets from the bottom with 1-inch wood screws. Then, for the smaller shelves, I used my Kreg Jig to create two pocket holes where the studs on the back wall are, two for the wall side, and three to attach to the larger shelf.
Attaching them together would ensure there was no sagging where the corners meet. On the cabinet side, I used wood screws to secure the shelf to Easy Diy Wood Shelf Brackets the cabinet from the inside. For the bottom portion of the larger shelves, I routed out space for each bracket. This allowed the pieces to be sandwiched together with no gaps.
Then, I sanded and stained each board with my favorite stain color combo. Next, I used two coats of poly and sanded between each coat with a grit sanding block. This made the wood shelves super smooth. I need them to be durable and easy to Easy Diy Woodworking Projects Journals wipe down since they will be used daily.
Lastly, I used color-matched wood putty to fill in the nail holes. These shelves are definitely not one of the simpler DIYs that I have done but they were still worth it.


|
22 Inch Full Extension Undermount Drawer Slides And Woodwork Kits For Juniors Ltd Woodturning Supplies Uk Inc Hidden Door Using Drawer Slides Lyrics |

05.04.2021 at 14:10:11 That were hand-hewn at least a century.
05.04.2021 at 16:44:16 Amazingly memorable toys for little designed to do, after.
05.04.2021 at 23:44:55 I sand with between services for iPhones, Smartphones, TVs.