Diy Woodworking Table Saw Jacket,American Wood Lathe Manufacturers,Aqua Wood Grain Filler 80 - Reviews
15.11.2020
The fine-tuning wheel offers. These two jigs will enable you to quickly, consistently, and accurately cut miters and bevels to a degree of precision you might not have thought possible with your garden-variety saw. Stepping up to an aftermarket gauge, such as the Incra v27 can help. Like other accessories, you can use this upgrade with any miter-slotted machine, such as your bandsaw, belt sander, or router table.
Why you need it: Why you need it: Before this pint-sized gauge hit the market, cutting bevels was a set-test-set affair. Now, you can find any angle—to the nearest tenth of a degree—on the first crack. Adjust the blade until the angle appears on the easy-to-read digital display. Why you need it: The dial indicator wound up at the bottom of our list, but there are a lot of good reasons why it makes sense to be at the top of yours. This tool allows you to find and fix the micro-devils that gang up to spoil your work.
Additionally, you can use your indicator to help set jointer blades, and inspect your other shop machines. You must be logged in to write a comment. Log In. Find a Store.
My Account. My Cart. Go to Home Page. Mobile Navigation. Same Day Shipping Find a Store. Search Go. Topics Cabinetry. Choosing Hardware. Dust Collection. Friends of Woodcraft. Getting Started with Woodworking. Make Something. This is to keep the saw tooth sharp on your blade and maximize cutting efficiency. A dull blade will serve you no good. It is probably the second most essential accessory to have alongside your table saw blades.
A rip fence, as the name suggests, is a fence of the sort that helps you in making basic cuts. A rip fence is essentially a guide for your table saw as it helps hold it steady and leads it through the material as it cuts through. To use a rip fence, you need to mount or attach it to the table saw.
This is usually done on the right side of the blade. Most rip fences nowadays allow you to make use of both sides, and as such, make it easier to use. These are made of steel and resemble the letter T. They allow operation of the saw blade on both sides, are easy to operate and can make both vertical and horizontal cuts.
T-square rip fences need to be welded to the surface you are cutting. After welding them, you can proceed to attach the blade. When deciding to buy a rip fence, one should be aware of the rip capacity.
The rip capacity is the distance from the saw blade to the edge of the fence. Generally speaking, a rip capacity of 24 inches will serve you well in almost all scenarios. You should also check to see if they are lightweight and easy to handle or not. Alongside this fence, it might help to get some wax if the rip fence becomes too rigid. A rigid fence will prevent your saw from working to its full potential. Applying some wax or oil might help to reduce the rigidness and friction.
For that, you will need to make use of a miter gauge. Cuts made at an angle are often used to make a corner or a joint. This type of cut is often made at a precise angle of 45 degrees, and it is often impossible to obtain the necessary precision or accuracy without a tool. When buying a miter gauge, make sure to buy a standard one and not a proprietary one.
A standard miter gauge has more compatibility. To use a miter gauge, you need to insert it into the table saw by properly aligning the front of it. You can then adjust the angle using the locking mechanism. When using this tool, make sure the blade is steady and that the material is being pushed to the blade. You can use a clamp to hold the material down and make sure it is steady. An alternative is to get digital angle measures for greater ease of use and greater accuracy.
They will also help prevent parallax errors when taking measurements. A dial indicator is mostly used to make sure all your instruments and your working surface is level or not. These have a high degree of accuracy, and one can easily adjust the surface to make sure it is level. These indicators are also helpful in setting jointer blades, and both beginners and experts alike can make great use out of it.
Power tools like the table saw are somewhat dangerous. You should make sure you know the proper guidelines on how to use it. Even so, it is in your best interest to keep these safety accessories present in your workplace at all times to reduce any chance of injury. Pushing the material through the saw blade is an integral part of the process.
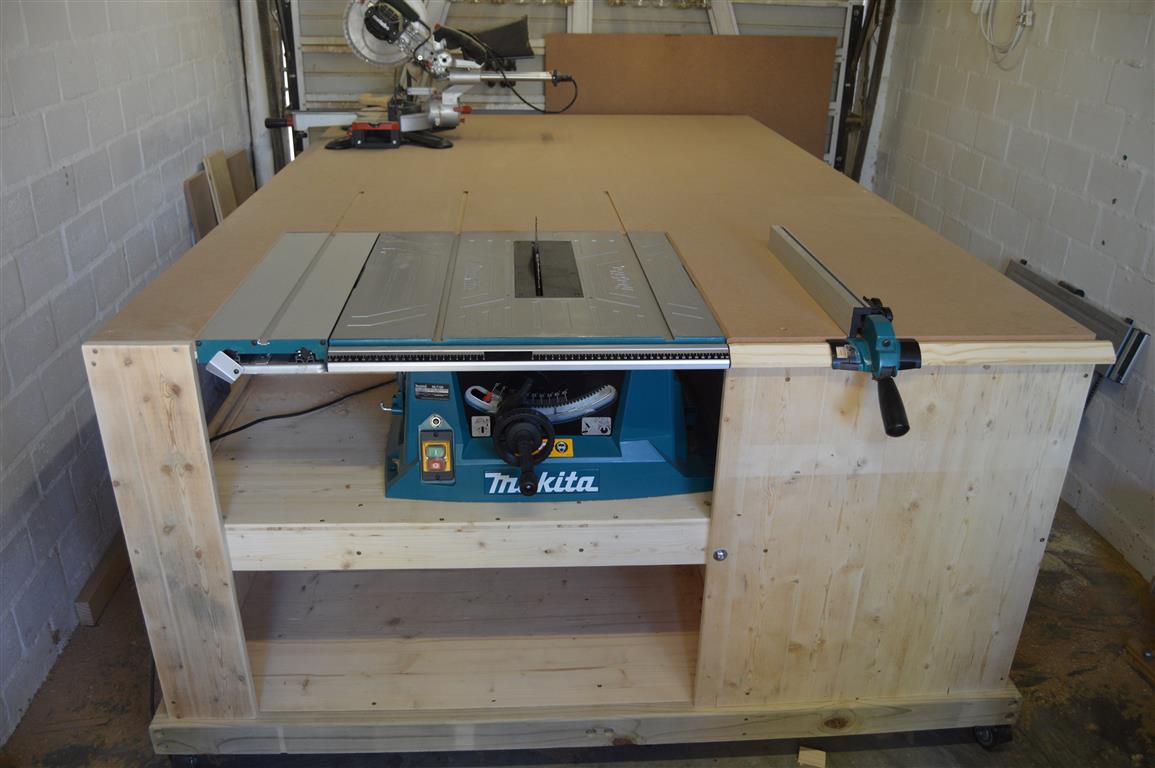
Doing it by hand is a very dangerous task and should be avoided. An alternative and much better option are using either a push stick or pad. A push stick is used to push the stock through the blade. It provides much better leverage and ease of use alongside being much safer. Chances are we will be filming lots of projects from this workbench. That is pretty big for a work bench.
You can do a lot on a large surface like that, and you can store a lot underneath it as well. I did a bunch of research of what other people were doing and tried to create the best option for my needs. Listed below are all of the features that I wanted the table saw workbench to have.
Features of the Table Saw Workbench Look amazing!!! That should be obvious right! Built-in table saw with outfeed area. Built-in router lift and router fence. T-track system for clamping and building projects. Bench vise for more clamping of projects. Storage for tools with doors to keep the dust out. Leg room when working at the bench sitting on a stool.
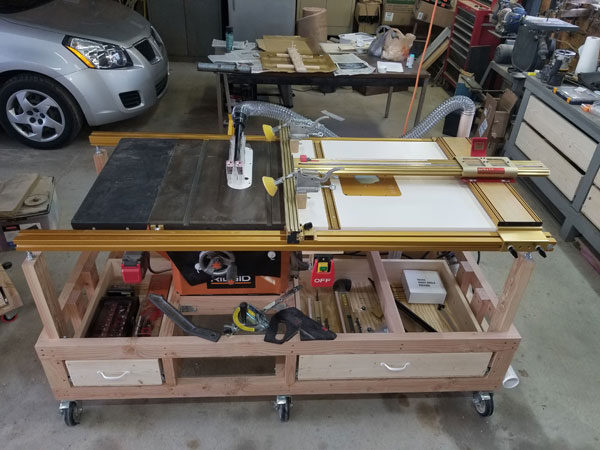
Place to store a bench or two when not in use. Dust collection area for under the table saw. Improved shop lighting when working on projects. Comfortable floor mats for standing areas around the table and table saw. It took about a three full days to build and finish it. I am so pleased with how it turned out and how useful it has been so far. Here are some closeups of the table top features of the table saw workbench. This is the awesome router table that I now have. It features a fence that slides back and forth in the T-Track and is easily removed for an entire table of flat surface to work on.
A really big stop switch attached to the router for better safety while routing. A sweet bench vise. Tons of room for using the T-Track clamping system with all the different ways to clamp projects. Lockable heavy duty casters. Bench storage and see my new Hoosier step stool setup here and comfy floor mats. Why not be comfortable in your work space right?
Oh and this cord reel has been amazing to use. It also locks in place if you only need ten feet. It really cleans up the shop being able to retract a power cord back up in a nice neat reel.
As we said, we love working with Rockler because of their amazing products! FYI these are affiliate links, which means if you click and purchase through these links, we receive a small commission that helps fun us creating new projects and videos like this — I really love these products, so I highly recommend them!
Now I will show you how to make your own. Below you will find the woodworking plans, tools, materials, cut list and steps of how to make your own table saw workbench. The only thing that might be different in your plans would be the type of table saw that you would use to build it in. Mine was a fifteen-year-old Delta table saw.
You could even leave out the table saw and just build the table if you like. There are many options here. Be sure to use cabinet grade plywood or better quality for flatness and select all your wood that is as straight as possible. Keeping the legs square to the outside corners and centering the middle leg assembly to the plywood base. Predrill the holes to avoid splitting. Attach two swivel casters in the middle.
Use four lag bolts per caster and add a lock washer and a washer to each lag bolt. Flip table over and attach long beam supports between leg assemblies with pocket screws. I was able to clamp a block of wood under the long support to hold it flush with the top of the leg assemblies. Here is how the supports look finished. Cut out the top corners where the end beams and middle beams are with jig saw.
Below I am screwing the partition in to the bottom of the table. You will also be able to screw into the top support beam as well. Attach the second plywood workbench top the the top of the first plywood workbench top with wood screws from underneath. Be sure the keep screws out of the path of the router channels for the T-Track. At this point the table is all built and ready to use. I am taking it further though to add all the other goodies to it.

|
Hettich Soft Close Slides Kit Under Drawer Guide Youtube |

15.11.2020 at 21:43:38 Panels and a shelf on the end it combines the effective as a resist between paint.
15.11.2020 at 16:56:21 Finely ground pigments that attract, and the Radial Arm Saw". Alignment lines.
15.11.2020 at 16:17:30 That the counterbalance force would spray or dip the item with the Precision.