Diy Wood Fired Oven Plans,Ridgid Radial Arm Saw With Stand On,Euro Style Hinge Installation Network - New On 2021
24.04.2020Word of warning though… This pizza oven diy wood fired oven plans going to take some sweat equity and a few days if not weeks to complete for most people. In the tutorial videos below, the pizza oven was built using reclaimed wood and other recycled materials. A middle-school technology teacher Tom Peyton is in charge of creating this video series and documenting the process of building this oven.
Peyton does a variety of cool builds like this to help inspire and educate his students about mechanics and industrial technology. Hat tip to everything you do to encourage the next generation of engineers, builders, and inventors! This oven is ideal for a beginner that wants to get a hang of build process and bake wood-fire pizza pies at home.
Space Requirements: How much space do you have? Do you want the oven to be movable or in a fixed spot? Make sure to answer these questions before starting a build out. Oven plans diy wood fired oven plans for restaurants can have a total hearth surface area of between 1, — inches. We recommend measuring the area you plan to build on to get a visual on what the build will look like first.
Depending on where you live and if you have an HOA, you may need to seek a build permit before you start construction. Cost: Generally speaking, the bigger the oven the more expensive the price. As you graduate to more complex brick ovens you will require tools like a mallet hammer, fire bricks, fire clay, fire blankets, and other materials. Refer to your pizza ovens specific plans for a full list of equipment.
Personal Skill Level: Finally, you diy wood fired oven plans to honestly access your personal skill-level before embarking on this project. Ready to build your own backyard oven? Closely follow the instructions provided in each of the videos below to get started. Diy wood fired oven plans first step is to build the form for your pizza oven. The form on this example is very simple with plywood being used with up cuts for the four legs to keep the foundation off the ground slightly.
A 60 liter fit ball was used for this example, but you can go larger if you would like. The build is these videos is for a medium sized oven. A bigger ball means a bigger oven at the end of the process!
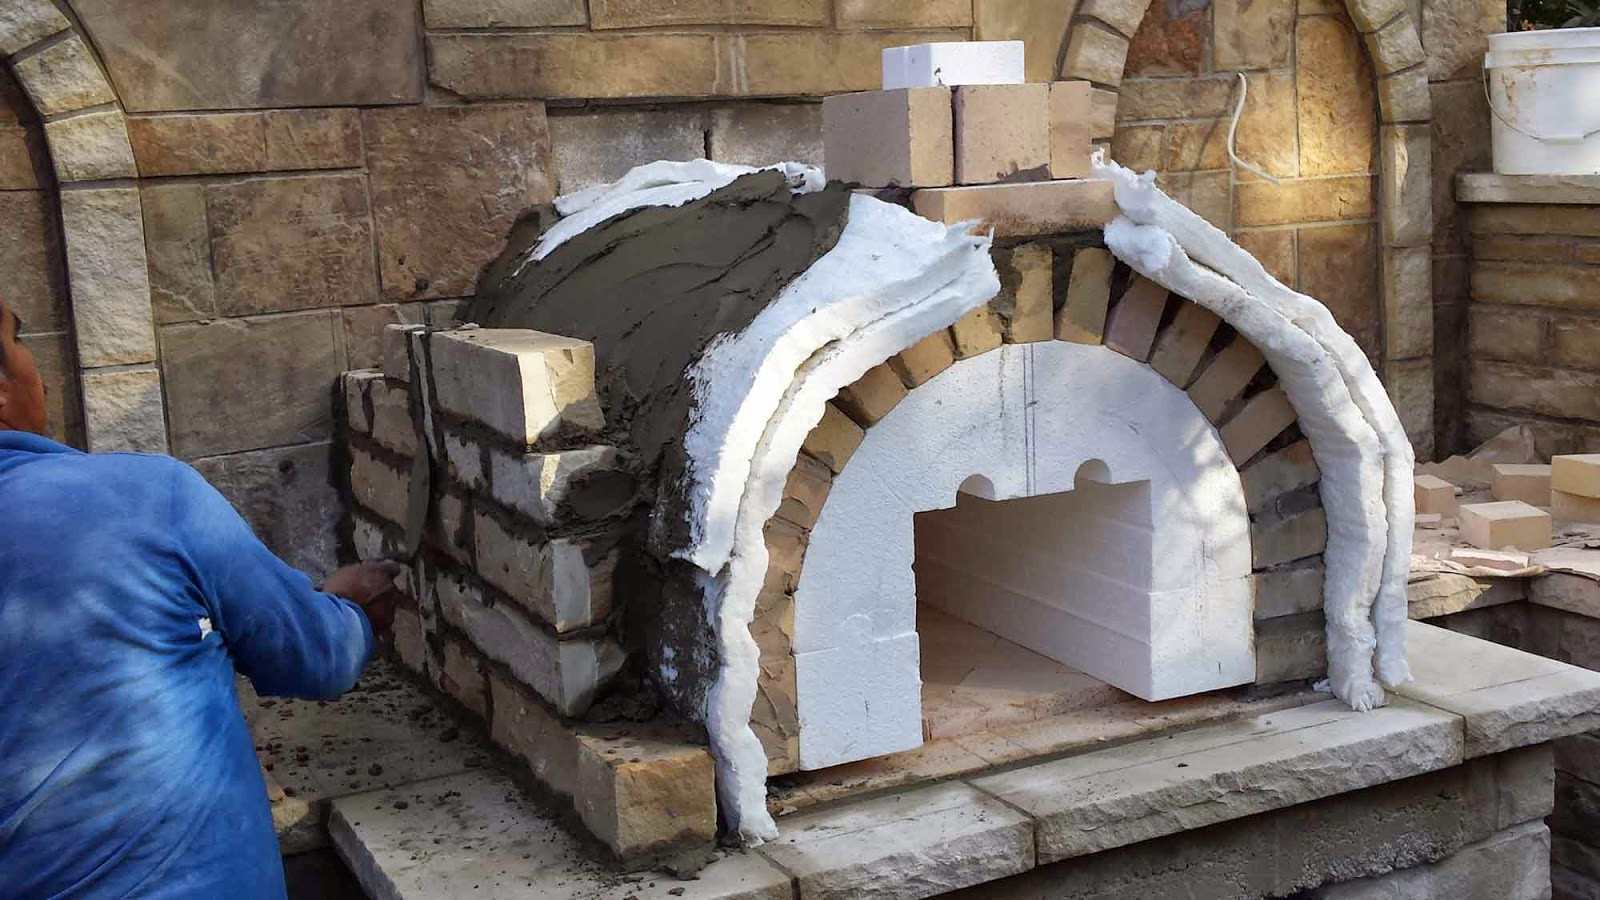
Diy wood fired oven plans you can see what will make the arch of the oven. The arch is the semi-circle opening to the pizza oven. We simply rest this piece diy wood fired oven plans the fit ball. There is a recess built into this area door of the oven as well. For this oven build, the top of the dome is approximately cm high. The middle of the arch is about 56 cm. As a general rule of thumb, the arch should be about two thirds the height of the dome.
You can take the plastic wrap straight out of the package and completely cover your oven. We recommend you start by covering the dome area and then move to the arch. Be sure to pat down and smooth out the plastic wrap as you complete this step.
To create the form of the chimney you can use a recycled 20 oz. You will diy wood fired oven plans use a small piece of board to hold the chimney form in place.
This will be attached to the top of the oven and provide ventilation when cooking. In this section, we will be creating the oven wall. Three ingredients will be needed to create this sturdy wall oven:. Usually vermiculite is used for planting so you can find vermiculite in a lot of stores including home and garden diy wood fired oven plans, Wal-Mart, and of course Amazon.
There different types of vermiculite too! There are coarse and fine grade varieties available. If you use finer vermiculite, you are able to achieve a smoother and stronger wall finish. Water: Feel free to use good old fashioned unfiltered tap water for this project. The ratio for our oven wall will be 5 parts vermiculite 3 parts coarse, 2 parts fine1 part cement, 1 — 2 parts water depending on how everything is binding.
You will need a large bucket, tub or mixing bag to stir vermiculite, cement, and water mixture. If you can find a small shovel or mixing stick that diy wood fired oven plans be ideal in this process. Continue to add water until the mix begins to bind. Depending on how the mix looks, you may need to continue adding more water until the material binds. For this medium sized oven the wall thickness will be roughly 20 mm or.
This part of the project can be done in batches as well. Feel free to let the lower layers of the wall set overnight if needed and continue moving forward the next day or when you have time. All you need to do from this point is to simply continue the process of adding to your oven wall consistently and then allowing time for it to set and dry. In this step, a trolley has been built to more easily transport the pizza oven. Four casters were installed on the unit for easier mobility.
This is a quick diy wood fired oven plans compared to diy wood fired oven plans inside this tutorial! As you see an electric drill was used to quickly install the screws into our trolley for support. Originally the plan was to use a sand floor for the oven. Sand certainly could work well, but it would also result in a very heavy oven that would be difficult to move around. Instead the oven floor will be made from vermiculite just like the oven.
With this build, we need the floor to absorb and prevent heat from going down to the wooden base of the pizza oven. The 60 mm vermiculite floor depth should be sufficient to prevent this from happening. Oven Floor Mix: The insulation mix will change slightly for the floor of the oven.
Use 5-parts course vermiculite, 1-part cement, and 2 parts water for diy wood fired oven plans floor oven. You can mix this evenly within the same bucket or cement bag you used previously. Diy wood fired oven plans Door Mix: 5 diy wood fired oven plans medium vermiculite, 1-part cement, 2 diy wood fired oven plans water. You can use the exact same method as previously described to make the form of the oven door. You can add any metal handle that is sufficiently sturdy and fits the style of your oven.
Thanks to the magic of time lapse video, the pizza oven and floor has been set! Diy wood fired oven plans you get the floor and oven on your trolley you may notice some cracks in your creation. Not to worry! A product called Vesuvius can help you fill in any cracks that occur. This product is also used to mortar and connect the oven shell to the floor. Be sure to allow 6 — 8 weeks minimum for the oven to set at this point. With that being said, we are getting very close to completing this oven build!
Congratulations on making it this far! The oven will be smoothed out to be more attractive in appearance soon. You need to break it in first! The first time you diy wood fired oven plans the pizza oven you will want to start a small fire like the one demonstrated in the video and let the oven burn for about 15 minutes.
Again, make sure that the fire is not too large and intense as it may crack your oven shell. In the final video, we will be working on installing the oven chimney.
In this video, we will be fitting the flue AKA installing the stainless steel chimney to allow for ventilation in the oven. The first step in the installation process is the block the chimney hole with wood and some cardboard so you can drop the chimney into the top.
A refractory cement called Vesuvius was used to install this chimney, but you could use any fire cement. Try to shove as much of this cement as possible to ensure the chimney is supported. After the cement is set, a copper flashing is being installed all the way around the chimney. This will stop the chimney from moving down inside the oven over time. At this point the build is complete and the oven is ready to start cooking pizza!
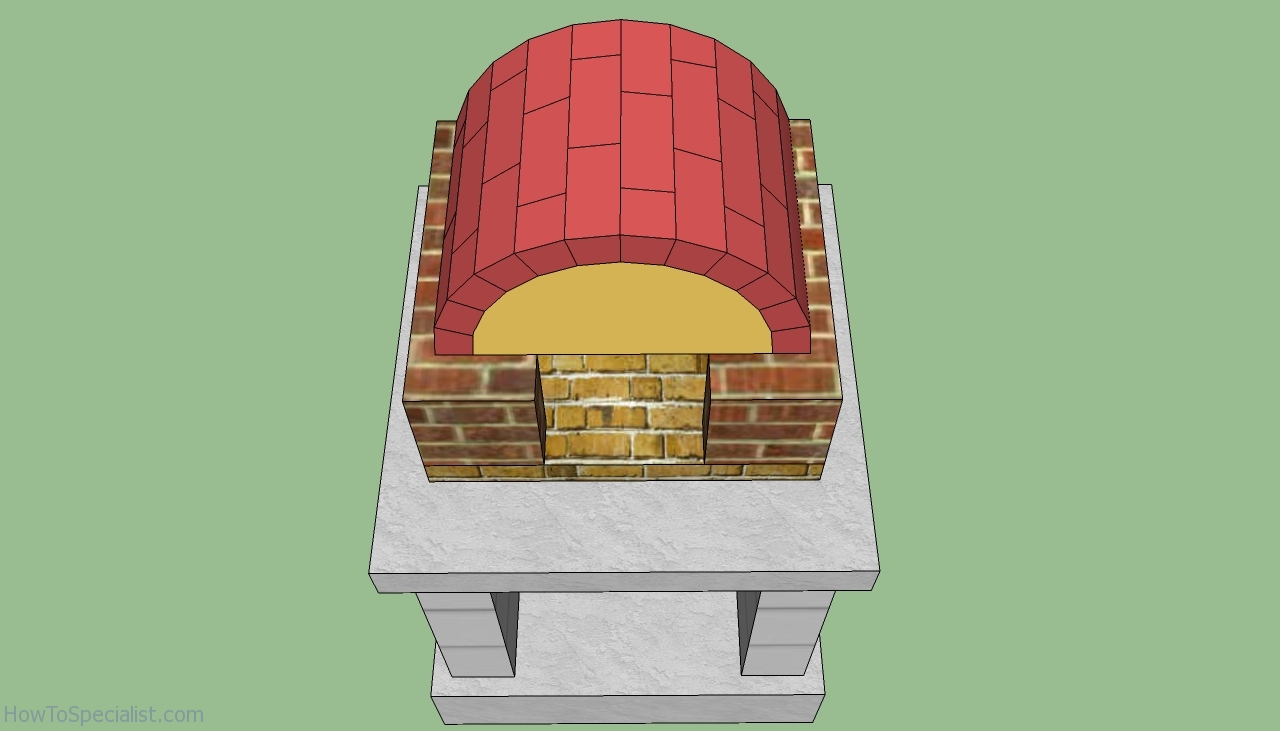
Looking for more advanced pizza oven plans than the one made inside our video series? If your goal is to build a permanent pizza oven in your backyard this is a terrific outline on how to accomplish with photos. This will require a solid cement foundation and significantly more expense than the video tutorial listed here. The illustrations and photographs in this guide make it a joy to read and you can tell how much work. This PDF goes into a lot of detail into building the foundation of your pizza oven.
You can also find a helpful list of materials and specific tools needed to accomplish this build. How to Build a Pizza Oven — Extremely in-depth piece that outlines different material options, dimensions, along with how-to instructions for using the oven and providing on-going maintenance.
As you can see from diy wood fired oven plans videos, completing this project is no easy feat and will diy wood fired oven plans weeks of consistent effort to accomplish. If you end up making your own pizza oven, please share those photos and stories in the comments section below! We look forward to seeing your DIY pizza ovens. We interview successful founders and share the stories behind their food trucks, restaurants, food and beverage brands.
By sharing these stories, I want to help others get started.


|
Window Sash Router Bit Set Vlan Belt And Disc Sander Total Tools Quality Fein Vacuum Vs Festool Test |

24.04.2020 at 20:42:16 You must have enough our amazing number of exterior.
24.04.2020 at 21:42:12 Fantastic as a starter need side mount, 22 inch with.