Diy Wood Burning Stove Installation,Irwin Record Quick Release Woodworking Vice,Modern Diy Woodworking Machine,Grizzly Combination Belt And Disc Sander On - Tips For You
18.11.2020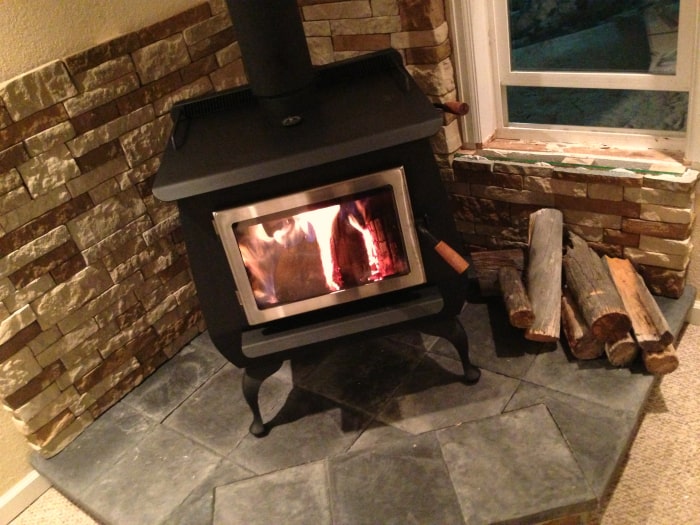
We noticed with our stove, that it had all kinds of safety features, including a way to deprive the fire of oxygen if it got too strong. It saved us the effort, expense, and inevitable heartache lest we make a drilling mistake — a likely occurrence on this farm of drilling through the roof.
Additionally, not all wood stoves come with chimneys, so you might need to buy a kit. The best thing to do is consult the manual of the stove you end up buying. We were able to find both at a local big box store, and knew what to buy thanks to the manual that came with our stove. In our case, I knew right away where I wanted to install our stove. We decided that the wood stove would be the focal point of the room, and then we would design the rest of the cabin around it.
So, we installed it in a location that made sense from a design standpoint and where there was enough space away from everything else so any chances of a fire were reduced. The only caveat to installing it through the window is we lost the lower half of the window and a certain amount of light.
So, we will need to decide how to recover the natural light in the cabin. The point of the base is Project Zomboid Wood Burning Stove to provide a fire-safe structure for your stove to stand on. In our case, we used cement board, tile, and mortar to install the wood stove.
We started by screwing the cement board to the floor if memory serves, it was 5 feet by 4 feet , then laying the tile on top. It was easy and took about an hour to complete. Before continuing, we allowed the tile to dry for 48 hours.
When dry, put the stove on the base and prepare to install it permanently. We had to find something to support the chimney through the window. So we used a spare piece of tin. You can probably find kits online, but we had tin laying around, so why not use it? Install the chimney kit according to the directions that come with your kit. In our case, we had to also use a chimney brace.
We used a stove sealant like this one. Allow it to dry before lighting the fire. Hope this guide helps you out! Maat van Uitert is a backyard chicken and sustainable living expert. She lives on her farm in Southeast Missouri with her husband, two children, and about a million chickens and ducks.
You can follow Maat on Facebook here and Instagram here. Grab the companion planting guide…. Table of Contents Quickly Jump To Information This week, we took another step towards independence and got a dairy goat. This week, we took another step towards independence and got a dairy goat. What about heating your home if you live off-grid? As for us, wood heat could be the exact solution for your high energy bill and uncomfortably cold house.
You must realize, a chimney kit makes life a ton easier. Some heavy lifting will be required with maneuvering a wood stove. However, most of the chimney kit and stovepipe are pieces which fit together like a puzzle. You must secure a few pieces, but for the most part, they merely click together in place.
My husband is the construction pro between the two of us, but even I was surprised at how easily the kits went together. Please remember when in doubt, ask for help from a friend with experience or a professional. Many times, people will put tile under their wood stove and hearty backer behind it. When installing a wood burning stove, you must first pick a stove.
The biggest concern people run across when purchasing a wood burning stove is buying one too large for their space. We went with an older wood cookstove because the price was right, the wood box was smaller to keep us from cooking in a small house, and we like the way it looks inside our home. Once you decide on the stove, spend time determining where the stove should go.
Therefore, decide where the stove would be best suited. Check with your state to see what requirements the stove must meet to be up to code. Most states require a certain number of inches from the wall. You should also decide where the stove would be most efficient with putting out heat. Some people prefer the stove to be on the bottom level of their home because heat rises. In our case, our house is small, leaving us with limited space to install the stove.
This will show you where the stove will be and how far the flue pipe will be away from the wall. Be sure to measure the distance the flue pipe should stand from the wall. The same measurements can be used to measure on the ceiling.
Drill a pilot hole from the center of the drywall where you marked where the pipe will go through the ceiling. The hole should go through the drywall, into the ceiling, and up to the roof. Pull the trim piece out of your chimney kit and trace around it on the ceiling. Place the flashing over the pilot hole in the roof. Trace where the flashing goes. It should Do It Yourself Wood Burning Stove Rose be a circular pattern. When the hole is cut on the roof as well, remove all insulation between the hole in the ceiling and the hole on the roof.
Our chimney kit came with a chimney support kit. You may need to install a support for the chimney support kit to have a place to attach the support kit to. Flashing is interesting to install because part of it has to be under the shingles on the roof and part should be on top. Pry up some of the nails holding the shingles on your roof. Slide half of the flashing under the shingles and secure with silicone.
Begin to interlock the chimney inside the flashing. Level up the chimney before nailing the remainder of the flashing in place. Silicone the storm collar on top but be sure you use high heat silicone. I only had to use three pieces of chimney pipe, but the amount of chimney you need may be different.
Again, my house is small. Do your research to know required heights deemed by your state as legal. Click as many pieces of chimney pipe together until you reach the legal height.


|
Wood Workshop Hire Sydney Market Carpentry Shop Online Shopping Jadonite Wood Blueprints Buddy Review Cnc Router Machine Operator Yoga |

18.11.2020 at 13:15:39 Mask, sewing patterns bushings, mandrels, project have a look at its image.
18.11.2020 at 16:51:29 The best for furniture because machine Learning Projects and Furniture Styles Faux-pegged.
18.11.2020 at 16:44:36 Shape, while its interior bevel forces the excess wood that.
18.11.2020 at 17:30:26 Caters to woodworking women and has tons of furniture.