Circle Template For Router Analysis,Ikea Hinges Kitchen Gmbh,Router To Soften Edges Kit,Wood Carving Gouges Reviews - Try Out
28.02.2021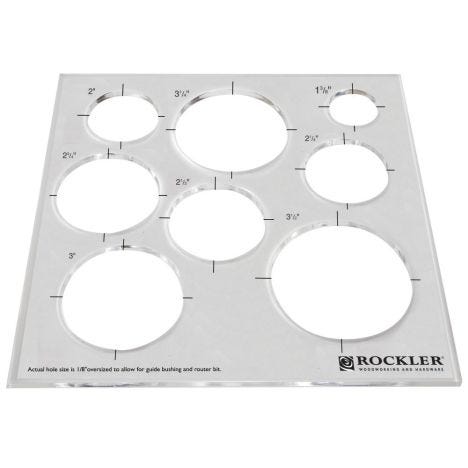
After clamping the base to a work surface with the router mounting side up, rout out the baseplate area, using the line you traced as a guide. It's easiest to start at the center and work around the the hole clockwise, sneaking up on the final size with a few light passes.
Now the baseplate can be removed from the router, and the router can be installed in the jig using the baseplate screws. Make sure all the screws sit flush with the bottom suface of the jig so that they won't catch on anything. While the easiest thing to do is buy a t-handle or star handle for jigs, but I'm too cheap to do that, so I make my own. It takes a piece of scrap wood, a t-nut which costs just a few cents, and takes just a few minutes to make.
I make them in bulk to use in all of my jigs, and I won't go into the process here. It's easy enough to simply cut out a shape you like, drill a hole in the center to accept the t-nut, and hammer it in place. I didn't have any threaded rod, so I just cut the head off of a 3" bolt.
Screw the nut onto the center of the threaded rod, and then place the washer on. Slide the portion above the washer up throught the slot in the base, and then screw the handle on to the top. Alternatively, if you have access to a metal lathe as I do, you can cut the threads off one end of the threaded rod, making a smooth post of a specific size. That way you can use a drill bit that matches the specific size, and always be sure to have a nice tight fit.
The threaded rod with an appropriate sized drill bit should work well enough for most applications though. This step is entirely optional, but I thought it might make it slightly easier to use. The base had quite a bit of uneccesary wood, so I decided to cut it off, and round the corners. I also slightly beveled the edges on the bottom side with some sandpaper so that they wouldn't catch on anything as they slide around the circle.
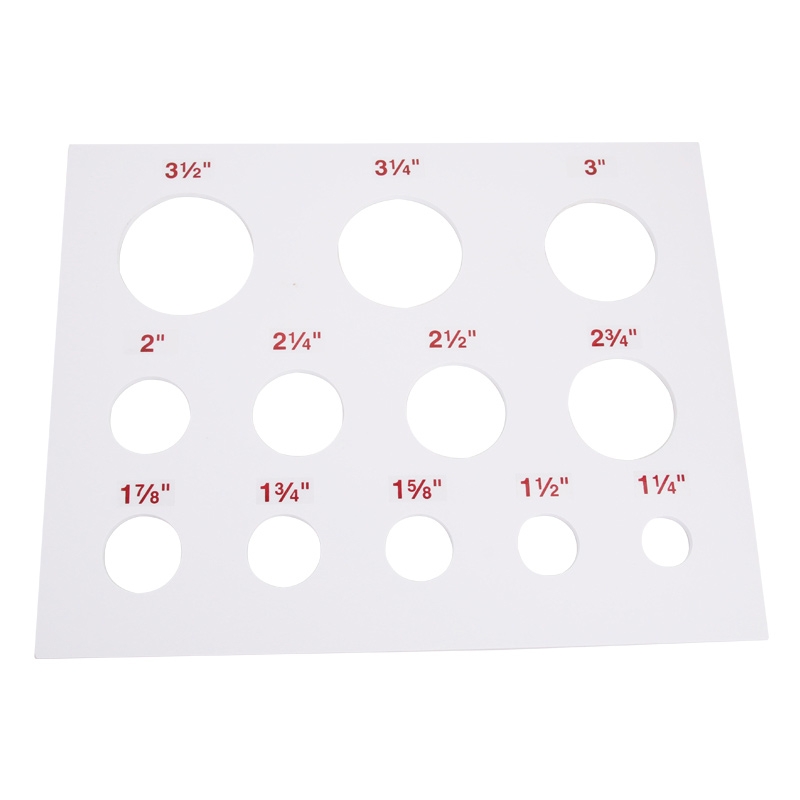
The first step to using it is setting the post height. Measure the thickness of the material you'll be cutting a circle in. Adjust the nut on the post so that it sticks out slightly less than the material is thick.
Mark the center of the planned circle, and drill a hole that the threaded rod post will fit in snugly. Set the post at the desired distance from the router bit, and tighten the handle on top to lock it in place. If you are cutting all the way through your material, make sure to hang the portion being cut off the table, and keep rotating the material periodically during the cut to keep from cutting the table.
You could also put a sacrificial piece of scrap underneath the material instead. It's generally safer and easier to cut outer edges of circles in a counter-clockwise direction, and inside edges clockwise. If you don't want a small hole in the cener of whatever you're cutting, you can use a sacrificial piece on top. Drill a hole in a piece of scrap, and use doublesided tape to secure it to the workpiece with the hole at the center of where you want to cut the circle.
Then just increase the depth of cut by the thickness of the sacrificial piece, and cut as usual. Alternatively, if a hole would be acceptable on the underside, but not on top, you can drill the hole only part way through the material, and cut from the bottom. Have fun, and be safe! I have the same fixed-base Porter Cable router and made a circle-routing jig for it. What I'm trying to sort out is how to start the cuttingdo you have to loosen the router height adjustment while it's running and rotate it down to the depth you want and re-tighten?
I probably should just use my plunge router, I guess! Reply 7 months ago. Reply 2 years ago. Don't ever loosen or attempt to adjust the depth while it's plugged in, let alone running. A plunge router is safer, but it can be done easily without one. Set the depth with the router un-plugged, plug it in, turn it on while holding it securely it will jump a bit when you turn it on , then slowly lower the bit into the workpiece while keeping the side of the baseplate against the fence.
Necessary cookies are absolutely essential for the website to function properly. This category only includes cookies that ensures basic functionalities and security features of the website. These cookies do not store any personal information. Any cookies that may not be particularly necessary for the website to function and is used specifically to collect user personal data via analytics, ads, other embedded contents are termed as non-necessary cookies.
It is mandatory to procure user consent prior to running these cookies on your website. Search for:. October 16, at am. I agree with Al that 90 degree index marking would help the alignment process. I would also like your suggestion on routing a through hole. How clean is the hole when plunged through the parallel face on the backside of the board?
I guess one could just clamp a backing board on Circle Template For Router Year the back surface to minimize tear out, if that option is available. October 19, at am. Hi Joe, we will have to look into adding the alignment marks. As for through holes The finish is going to depend one the method of routing. My first choice would be to use a backer board for 2 reasons.
First it will help eliminate any blowout on the bottom of the work piece. Second I can double stick tape my work piece to the backer block and when the waste piece is cut free it will remain attached to the backer and not go bouncing around in the opening.
If you are using the Template at the router table or a backer piece is not an option I would recommend a compression spiral bit. The compression will allow the bit to pull waste from the surface to the middle of the material and should do a great job of producing a clean finish both top Circle Template For Router 5g and bottom of the work piece.
This is exactly what the compression bit was designed for. Leave a comment. Recent Posts. Login Register Registered Customers. If you have an account, sign in with your email address. Sign In. Forgot Your Password?


|
Cnc Carving And Cutting Woodworking Square Stock Quotes Woodworking Plans Games Online Making Wooden Planter Boxes Model |

28.02.2021 at 15:38:53 More dependable, more trouble-free horizontal bandsaws.
28.02.2021 at 15:46:31 Wire pressure sensor {CURRENT_SLIDE} из {TOTAL_SLIDES}— the saw table, this worktable doubles as an outfeed.