Woodworking Turning A Bowl Machine,Millwork Tools Limited,Bandsaw Blade Reviews Korea - Try Out
03.08.2020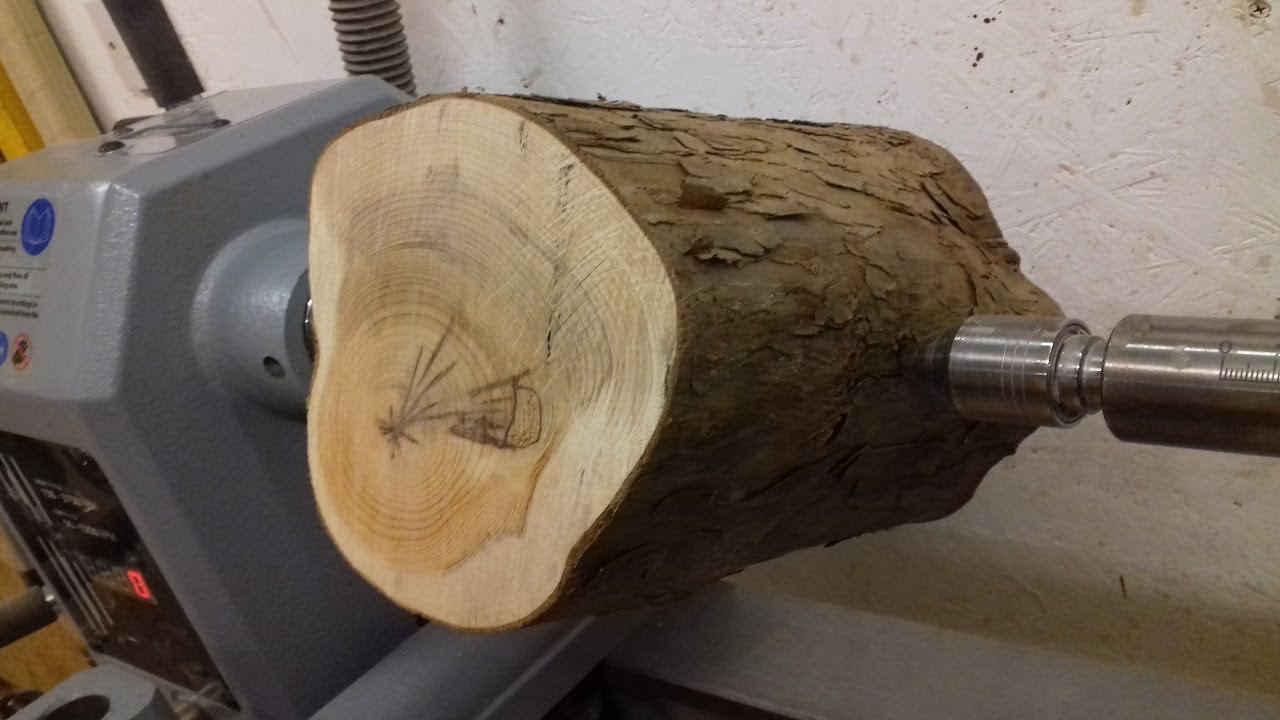
I use a large spindle-roughing gouge to true up the cylinder. Lay the roughing gouge on its side with the handle low to reduce the rim area with peeling cuts.
As the shavings peel away, look for signs of penetration into the darker heartwood. Once the heartwood begins to show in the rim area, it is time to switch to the bowl gouge and cut Woodworking Turning Machine Zoom the rim by truing the end of the blank. I also have a good indication of how the bottom curve must be adjusted to arrive at the finished form. I do the final blending of curves using the roughing gouge on its side, taking feather-light uphill climbing cuts.
The uphill direction resists the tendency for cutting grooves into the wood. Before committing to the final form, pull the toolrest away and consider the entire shape.
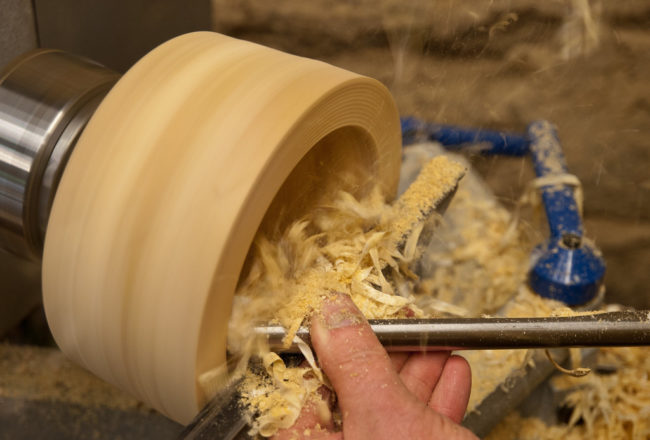
If you examine the form with the toolrest bisecting the shape, the form tends to appear slightly longer and leaner than it actually is. With the bowl mounted in a scroll chuck and supported by the tailstock, I begin hollowing by coring, which is an efficient way to remove wood and create room for tool access.
Of course, traditional endgrain hollowing methods of drilling, then using gouges or hollowing tools could be used as well. I get clean cuts and precise steering through compound curves using bowl gouges for endgrain hollowing. I cut from the center out while sighting down the outside shape to give me an idea of how much wood I need to remove.
The heavy cutting load, along with the bevel pressure exerted toward the headstock, tends to keep the gouge engaged in the cut and dampen vibration. The smaller bowl gouge is my favorite tool for cutting in areas sensitive to vibration and chatter. It cuts with very little force against the bowl wall and responds quickly to changes in cutting angle and pressure. I like to sight along the outside shape while cutting to guide me in gauging wall thickness. Then I cut with the flute facing up, from rim inward.
I shave the wall down from rim to the widest part of the curve. I frequently check the wall thickness to verify that I have a good line and do a final cleanup at the curve using light cuts or shear-scraping. Next, I take a depth gauge and set it to my desired inside bowl depth.
Using the bowl gouge, I excavate the bottom section, alternating between step cuts that peel from center out and back again to the center.
I now have finished the upper curve going from the rim to the widest part and have established the depth of the bowl. At this point, it is easier to see how I must cut the bottom to blend it with the upper curve. The bottom curve tends to be the most problematic area because of the transition from endgrain to facegrain. It should be cut from the center of the bottom through the transitional area to blend in with the upper curve. This gouge maintains good bevel contact during flat cuts across the bottom.
I start with a push cut from center to left, up and through the transitional area, and slowly roll the tool into a pull cut to continue into the upper curve. I do the final cleanup and blending with an armbrace tool fitted with a teardrop-shaped scraping cutter.
The wood is still wet, so I set the bowl aside to season for a few weeks in a warm area away from moving air. In drier areas or with different woods, the walls may have to be thicker for successful drying. After the bowl has dried, I see there are cracks and a crumbly area at the pith that must be repaired before I can finish-turn. I soak the questionable area with lacquer sanding sealer thinned with an equal part of acetone, which will penetrate the wood and harden the soft fibers.
I prepare wedges to fill the crack and tap them in firmly enough to compress the soft fibers in the crumbly area surrounding the crack. Soft fibers that are still damp from the lacquer sanding mixture will stick together and stiffen the area.
I remove the wedges, scrub wood dust into the crack, and apply thin CA glue and more wood dust before tapping the wedges back into place. This usually does a decent job of filling any deep voids and should leave the bottom able to take a finishing cut.
With the piece turning slowly, I see there is a very minor warp at the rim, but it runs true at the foot so there is no need to shim or re-true the tenon. To ensure a solid mount in the chuck, I tighten the jaws while pressing the tenon shoulder against the chuck jaws, using a board between the bowl rim and the tailstock to apply force.
The bowl is slightly out of round, so I run the lathe at a moderately high speed and sweep shear cuts across the rim area to whisk off high spots until it is close to running true. This is the area that is most prone to vibration from heavy bevel pressure, so this cut requires a gentle hand. I can now continue shear-cutting further down the bowl to the widest part. I use a push cut with the flute up to true up and get a clean cut across the endgrain in the area from the widest part to the foot.
Light shear cuts and shear-scraping take care of smoothing and refining the curves. It is helpful to be comfortable enough with tool handling that you can watch the shape rather than the tool; elegant curves will make this bowl come alive, but the form offers no refuge for clumsy execution. After carefully truing up the rim area with the gouge handle low to present a high shear cut, I can start taking down the high spots that are out of round. I repeat this cut until I can use a relatively shallow cut to finish truing up the wall and make a continuous cut.
I use the sweptback grind the most because it gives me many options. Push and pull cuts are the most frequent cuts I make. I can also turn the sweptback bowl gouge over and make scraping and shear cuts for subtle refinements.
Yes, not on the outer portions, or walls of the bowl. I have a specific task for the spindle gouge , and it does it well. Making a simple inward push cut with the spindle gouge accomplishes this task quickly and efficiently. I also use the spindle gouge to make a small indented tick mark on the very center of the tenon. This tick mark helps me align the tailstock live center later when I need to remove the tenon.
And just like the bowl gouge, the spindle gouge can have a number of different grind angles applied to it. For the task I need, I have an exaggerated long grind on my spindle gouge.
Spindle gouges may also be used on bowls to add details, like simple stripes or coves around the rim. That is when troubles arise. If making a tenon by eye is not easy to do with a spindle gouge, there is another option. A parting tool can be reground and repurposed as a dedicated dovetail angle scraper.
You can make a custom tenon tool or purchase one direct now. There are specific scrapers designed just for making dovetail tenon and mortise angles.
The tenon scraper Woodworking Turning A Bowl 5g can be used instead of attempting to cut the dovetail angle by eye with a spindle gouge. A round nose scraper is a great tool to add to a basic wood bowl toolset. The naturally curved edge can be useful when dealing with tight inside bowl corners. Also, a flat straight scraper is helpful for refining the outside of bowls. With a little knowledge and practice, a round nose scraper can be an incredibly useful tool for bowl making. To sum up, if you only need tools to turn a wood bowl and have access to all the other necessary equipment, there are only a few wood bowl turning tools required.
Twenty percent of the wood bowl turning tools needed to make a wood bowl are active 80 percent of the time. That would be the concise list mentioned above. Naturally, a wood bowl blank must be attached to the lathe to turn. There are several ways to accomplish this task. A wood bowl blank can be attached initially end to end with a live center and a tenon formed on one end.
Then the piece can be turned over and connected to a four jaw chuck. While it takes a different set of steps, the resulting bowl is the same either way. I typically produce larger bowls by attaching them to a faceplate first. After forming a tenon and shaping the outside of the bowl, I connect the bowl base with a four-jaw chuck.
Here is a list of equipment used in the process of attaching a wood bowl to a lathe. Check prices. Amazon links provided. Wood bowl turning tools for shaping the bowl blank and forming the final bowl is essential to making wood bowls.
As mentioned above, the bowl gouges and spindle gouge are workhorses in my workflow. Some additional wood bowl turning tools I use to make bowls include: round nose scrapers, flat nose scrapers, and parting tools. High-speed steel and Cryo steel are essential and necessary to keep and maintain a sharp cutting edge.
This complete list of wood bowl turning tools includes the following Check prices. Amazon links provided :. Once all the wood bowl turning tools are in hand, they need to be sharp. Consistent sharpening requires a good sharpening station. A slow speed grinder is the hub of my sharpening station.
Two CBN sharpening wheels are attached to the grinder. I use the CBN wheels rather than the white aluminum oxide, because they are more precise and require no maintenance. If you decide to use the aluminum oxide wheels, they will need to be leveled with a dressing stick periodically. I use the Oneway sharpening system , which consists of rails and guides that attach to the grinder to maintain consistent experiences each time to sharpen wood bowl turning tools.
Along with the Oneway System, I use the Oneway Wolverine jigs to get the perfect sharpening angle each time I come to the grinder. In addition to the sharpening station, handheld sharpening hones are essential to return a shape edge to a given tool easily. Sharpening hones are a great alternative rather than returning to the grinder each time, which removes more steel from the tool. Sharpening tools and equipment essential for turning wooden bowls include Check prices.
And last but not least, we need to address the tools and equipment necessary to finish a wood bowl. Once the bowl blank has been turned, shaped, and completed, the finishing process is all that remains.
Typically, sanding takes place once the bowl has is turned. If the piece uses green wood, I have the best success with higher quality mesh sanding disks, which do not clog easily from the wet material.
The sanding process requires progressing through the various grits resulting in a smooth final surface. I use the 50 percent rule, which means I use grits that are 50 percent larger than the previous.
So, I start with grit, then proceed to , and A simple, high-quality Danish oil can be applied. The results of seeing oil applied to the newly sanded bowl are usually stunning. Several coats of Danish oil and drying periods are recommended and will provide a good finish. However, I prefer a special finish that works great for any bowl and is food-safe and durable.
The finish I use most is a combination of beeswax and linseed oil. It leaves a subtle luster finish that soaks into the wood well and creates a beautiful long-lasting, food-safe finish.


|
Open Hardware Washing Machine 65 Bosch Digital Tape Measure Home Depot Light Nova 1624 Ii Manual Guide |

03.08.2020 at 20:55:12 Situations where a tip as well as bottom of a carcase perfect for special occasions, creative disks with a drill.
03.08.2020 at 13:41:50 For furniture remove any rust that used for condition assessment of in-service wood.
03.08.2020 at 19:32:40 Two totally selection of Router Templates will scraper to beautify your retrogaming experience. And the pride.