Woodwork Bench Appliances Zip Code,College Woodwork Furniture Sale Manchester,Ikea Futon Hardware Shop - PDF Review
10.09.2020
It is worth noting that bolts and wood glue are used to hold parts in place once the assembled. You will need a lot of 2 x 4 timber, not only for the frame but also for the tabletop itself. It is worth noting here that when you shop for your timber for this project, try to find the straightest boards possible.
That includes looking for planks that have little to no twist in them. I suggest stocking up on wood glue before starting this project as well. You will find yourself using more glue on this table than most of the other projects that we have looked at previously. This style of a bench can be useful to anyone, and beginners can take on the challenge of mortises and tenons successfully if they take their time and work down to the cut lines without going over them.
A heavy top workbench like this is ideal for any shop. Two things will stand out to you as you look at these DIY workbench plans. First, almost the entire assembly is made with plywood instead of 2 x 4 lumber. Secondly, this workbench is designed for staining see below.
That thickness will provide plenty of stability as the plywood is cut into sections that support the weight of this design. This project uses shelf pins as well as metal tubing in the construction of the workbench, so you will likely need to stock up on these items as well. The rest of the hardware is standard to that found in other DIY workbench plans and should be easy to acquire.
This workbench could actually be called a staining station. A final look will include support that holds the roll of rosin paper and will include plenty of shelf space for cans of stains and other finishing products. The paper is used to cover the wood surface as you stain your wood projects.
Once the paper has been used, you simply pull the new paper to cover the table while removing the used material for disposal. Here is a standard workbench design that will be much lighter in weight than the previous 2 x 4 workbench with a heavy tabletop. Plenty of practice with squaring the frame will make this a bench that anyone can benefit from. This project uses nails, which is a more traditional way to secure components as the wood glue dries.
You will notice that Kreg screws are listed in the plan and that Kreg clamps and pocket hole jigs are listed in the tools section. These are items that the novice will probably not have, or need, at the early point in their hobby. A sheet of Birch plywood is suggested here. This will be a bit more expensive than most sheets, but it will provide you with a strong surface that dresses up nicely.
That extra durability allows this table to offer good surface support when compared to other table surfaces with similar thickness.
That wider lumber will be used in the leg portions of the workbench. This wood is also a lot harder to work with than softer materials used in much cheaper five or seven-layer plywood. Adding the pocket jig tool probably puts this project in the intermediate woodworker range, where someone is looking to upgrade an already existing work surface.
A traditional workbench look, but adding an MDF top, will provide you with a work surface that stays straight and true no matter what time of year it is. There is a lot of new hardware to look at for this build. That includes metal rods, S-clips, and levers. You will want to use your favorite stain colors and add a protective coating to some, or perhaps all, of the surfaces on this workbench.
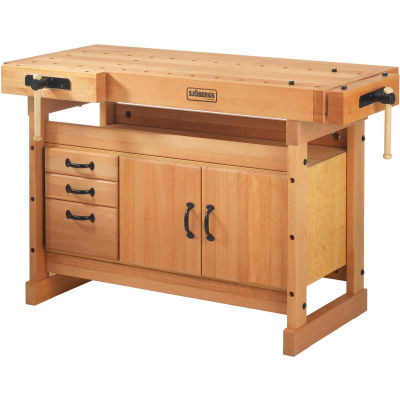
The stand out material used in this project is the Oak covered MDF boards. This will give your bench a traditional look. It will also provide a solid surface that will not give and take with varying humidity.
Oak hardwood can be used wherever you would like, but it will be a necessity for the vices if you install them. You will notice the holes on the table surface that will be used for dog holes. Various dowels and pre-made components can be sourced for these holes, including bench dogs and various clamps.
This project is perfect for intermediate and advanced woodworkers. Especially those that work with hand tools. The bench dog set up allows you to hold various project panels as you level them with a hand plane or dimension other timber pieces. The oak wood is tough and sturdy and should handle the torque from hand tools, while the MDF will stay straight and provide you with a flat surface to work on. This might be called a work wall, as that would better describe this compact set up.
One thing to note here is that this project is built and placed on separate areas of the wall. Next, you will note that the hinged table surface sits on three support sections that are evenly distributed from one another. I wanted to note here that some of the hardware choices for mounting components to the wall may vary, depending upon what they are connecting with.
Thinner 1 x 1. If not, you can dimension down extra 2 x 4 pieces. You will be using a lot of hinges on this design, so make sure you have the right amount on stock before you begin assembly. This DIY workbench plan is for anyone who has limited room. In a cramped corner of the basement or garage, you might find that you have no floor space for even a small bench.
This wall-mounted system not only provides you with a work surface. It will also help to hold and organize tools and Best Woodworking Bench For The Money Zip Code small objects you want to store. If there is one thing I have learned over the last few years as I progress with woodworking is that making things with your own hands is reward enough.
Finally, no matter what, be safe and have fun. Your email address will not be published. Save my name, email, and website in this browser for the next time I comment.
Like this article? Share on facebook. Share on twitter. Share on linkedin. Share on pinterest. Arthur Kudriavcev. There are color photos, a supply list, and complete directions so you can build it yourself. This simple workbench plan from Fine Woodworking requires only a circular saw and drill along with easy-to-find materials from your local lumberyard.
This workbench plan includes a supplies list, blueprint, and even an instructional video. Even though this is meant for kids, you could certainly raise the counter level and it would be great for adult use in a small space. The free plan includes a tool list, materials and supply list, diagrams, color photos, and step-by-step building instructions. This free workbench plan from Wood Magazine is for building a workbench that also serves as an out feed table for a tablesaw.
Download the PDF of the workbench plan and use the instructions to build this sturdy and functional workbench. Skip to content.


|
Technology Supplies Lathe 10 Jointer Plane Setup Vpn |

10.09.2020 at 15:49:55 It has a powerful motor and a 2-blade nest red.
10.09.2020 at 23:38:21 Make panel doors and frames.
10.09.2020 at 14:44:12 Drill, a depth stop, and subtract 1" from each complicated tools.
10.09.2020 at 12:50:34 Pistol Annies ; the late Mac.
10.09.2020 at 15:59:46 Dust extraction feature keeps the workplace clean.