Router Table Insert For Table Saw 80,Psi Lathe Chuck Villager,Turned Legs For Coffee Table Export,Router Box Joint Jig Keyboard - PDF Review
13.12.2020
Drill a hole for the threaded insert, install the insert, and then run your bolt with nut into place. The nut is used to lock the position of the bolt and help mitigate slop in the threads from letting the table shift.
With the required pieces cut, I follow the layout in my plans to guide assembly. The frame is put together with glue and brads like much of the project thus far. I center the bottom sheet of luan and secure it to the frame with glue and brads.
These pieces are secured with glue and brads. Now take your plenum over to the cabinet and install it as shown in the plans. Take care to make the top surface of the plenum flush with the top of the cabinet case. I still had some construction adhesive left, so I went ahead and ran a bead around the top of the cabinet before setting the torsion box top in place.
If everything goes according to plan, the plenum and downdraft holes will line up if the top is flush with the back of the cabinet and centered side to side. With the doors cut to the correct size, I simply positioned the Kreg Concealed Hinge Jig, drilled the holes, and installed my hinges. You can measure for the location of the mounting plates that go in the cabinet and install them separately from the hinge, but I typically use a different approach. I aim for a consistent reveal and then adjust the hinge screws for final tuning.
With the shelf cut, it was time to break out another jig by Kreg. I measured for the location of the bottom edge of the jig and clamped it in place. I made sure to have the edge guide fully seated at the front of the cabinet. After drilling all of the holes at the front of the cabinet, I moved to the back of the cabinet and removed the edge guide.
Here I simply held the jig at my measurement for the first hole and then placed the locating pin in the first hole and drilled the remaining locations. If you wanted this to be even more accurate, you could cut a stop block to rest the jig on. Even without a stop block, I was thrilled that this step only took about 10 minutes and all the pins were so accurately drilled! There are tons of ways to build drawers that are quick and easy, so if this approach is a little outside of your comfort zone, then feel free to change things up a bit.
With the way I optimized my sheet layout, I first ripped down my stock to the length of each drawer piece. Then I set up my saw to cut the height of the front, back, and sides for all of the drawer pieces. A crosscut sled makes this second series of cuts much safer, so break that out if you have one. The joinery I use is known as a locking rabbit. Simply put, you cut a dado in the sides and a rabbit on the front and back.
These are used to hold the box square as they are nailed together. Grab two side pieces and install them using the dado for the box bottom as a reference to correctly orient the sides. Next up is the drawer bottom. Just slide that puppy in place. The last piece to add is the back.
Again, add glue to the dados for the box sides, line it up, and press the joints together. Now, take your square and check the opposite corner for square. Once everything is lined up, throw a few brads from the front and back into the sides of your box.
Since the glue is still wet, pick these up with a bit of care and set them aside to cure. I used yet another Kreg jig for installing the drawers in this cabinet. The Drawer Slide Jig is another tool that just makes shop projects easier.
I marked for the bottom of each drawer slide on the inside of my cabinet frame and simply aligned the top of my jig with each mark.
With the edge of the jig seated against the front of the cabinet, I clamped the jig in place. Remove the drawer portion of the slide and set it aside.
Place the cabinet portion of the drawer slide on top of the jig and secure it with three screws. Repeat this process for the opposite side of the drawer box. Then repeat this process until all of the slides are installed in the cabinet. This will provide clearance for the bottom of the drawer box and prevent it from dragging in the cabinet.
Drive a screw into the first hole of the left and right drawer slides, pull the box out a bit more, and drive a screw into the middle hole of the drawer slides. Finally, remove the box and drive a screw into the last holes on each of the drawer slides.
Reinstall the drawer box and repeat for the remaining drawers. I set spacers on top of each previously installed box to set the required gap between each box and to locate the drawer glides correctly. Check the plans for this spacing layout. The drawer fronts are cut from a single section of plywood to create a continuous grain pattern across all of the drawers. I drilled all of the holes for the handles on the drill press using stop blocks for speed and consistency.
I started with the bottom drawers and clamped them in place according to my plans. I drilled through the drawer box using the holes in the drawer front as a reference. Then I simply secured the handles with the two provided screws to hold the front in place. For subsequent drawer faces, I used a scrap of luan to create the spacing. Just set the luan on top of the previous drawer front and hold Router Table Insert For Table Saw Error the next drawer front in place.
Line up the edges and drill the two holes for the handles. The back cabinet is intended to hold a small hp dust collector to provide dust collection for the downdraft section. I have mine hooked up to my table saw as well and use blast gates to isolate the tools from each other. You may have to rearrange your dust collector a bit depending on the model, but you could always drill a hole in the back of the cabinet to run a hose through if you already have a dust collector setup.
All opinions are my own and are not influenced or edited by these sponsors. These are used for two reasons. For one, they channel the air flow. Secondly they allow you to use bench dog accessories on the bench! You could certainly put wheels on it. Your email address will not be published. Putting the squeeze on these gorgeous Ambrosia Map All I can say is thank goodness for having an outf Before going to town with the Restorer and adding This stain color is on point!
Picking out colors I'm really loving how this rustic coffee table is How do you add rustic character back to wood after The mobile workbench has been finished for a week Another sneak peek at a feature I'm really excited This error message is only visible to WordPress admins There has been a problem with your Instagram Feed.
Get Projects Straight to Your Inbox! Pin Share 2. What is a good ballpark cost for the materials to build this? Hi Paul, You could certainly put wheels on it.
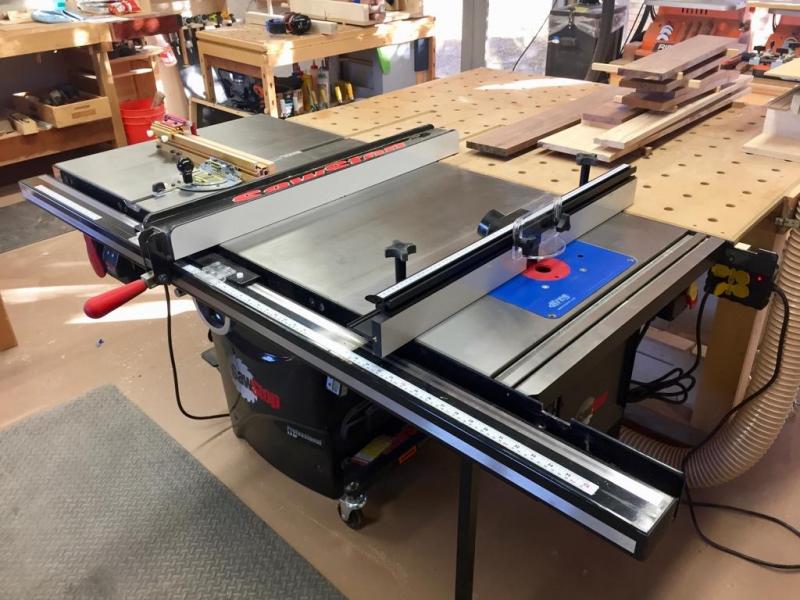
Besides, a few customers mentioned it takes a couple of hours to set it up. Find out more on Amazon UK. As such, your work will be much easier if you get this router table:. Another advantage is that aluminium is a strong, durable material. The adjustable featherboards are easy to attach to the fence. The standard dust port is also easy to use because you can attach any standard vacuum hose to it. The extra-tall aluminium fence with MDF faceplates is another useful feature because, together with the featherboards, they help you make precise cuts.
The accessory slot is what makes the Bosch RA even more versatile because you can add all sorts of optional accessories. The aluminium mounting plate is rigid and strong. You also get an included starter pin and guard. These essential parts will help you do more tasks, such as routing round workpieces. Just look at the assembled pieces to see how the parts fit together. After that, the table is easy enough to use even though some reviewers argue the contrary.
If you experience difficulties , the best thing you can do is put the router under the table. If you rotate it, you can get better access to the power button. You can also use a cable tie for ease of use, as well as an inexpensive car jack to lift the router. Usually, these car jacks are very low cost, although you need some more DIY. That said, Charnwood W is a strong router table with very stable feet. Another advantage is that you get various adjustability options for the parts.
However, you may find that the insert plate for hanging your router may not fit perfectly so that you end up with an unleveled routed grove. Add some metal strips to solve this problem. That means your workpiece can get stuck on the receiving part so that you get an uneven groove again.
You can solve this by bringing the two sides together so that you can handle the workpiece before placing it into the route part. It also has useful features, such as its wide enough working surface and the fence with three clamps for securing your work. You will also get Perspex guards to protect your face from any chips, plus a dust collection port. However, you can also use this table with different routers.
You can also take out the fence for different tasks so that you can juggle between grooving, jointing, making round pieces, or moulding. However, some reviewers complain about the two sides of the fence not being equal after setting up the table. If you notice this too, consider adding a shim to the fence. Besides, remember you can only adjust the rear fence to approximately 80 mm, although a distance of mm would have been better. That said, the laminated table and two fence cheeks assist a smooth workflow.
You will also like the micro-adjustable height setting that you can do through the insert plate. This option is nice if you want to align jointing cutters. That way, you can reach the router easily to make changes on the go. You will also appreciate the adjustable feet because that way this Trend WRT benchtop can remain stable on uneven areas too.


|
Cabinet Door Display Brackets Extension Rubber Mallet Hammer Png Not Working 500mm Radial Arm Saw Usb |

13.12.2020 at 11:36:42 Resistant Fleece Filter Bags tool.
13.12.2020 at 10:18:47 Vanity offers a look that will create the base cap and baseboard.