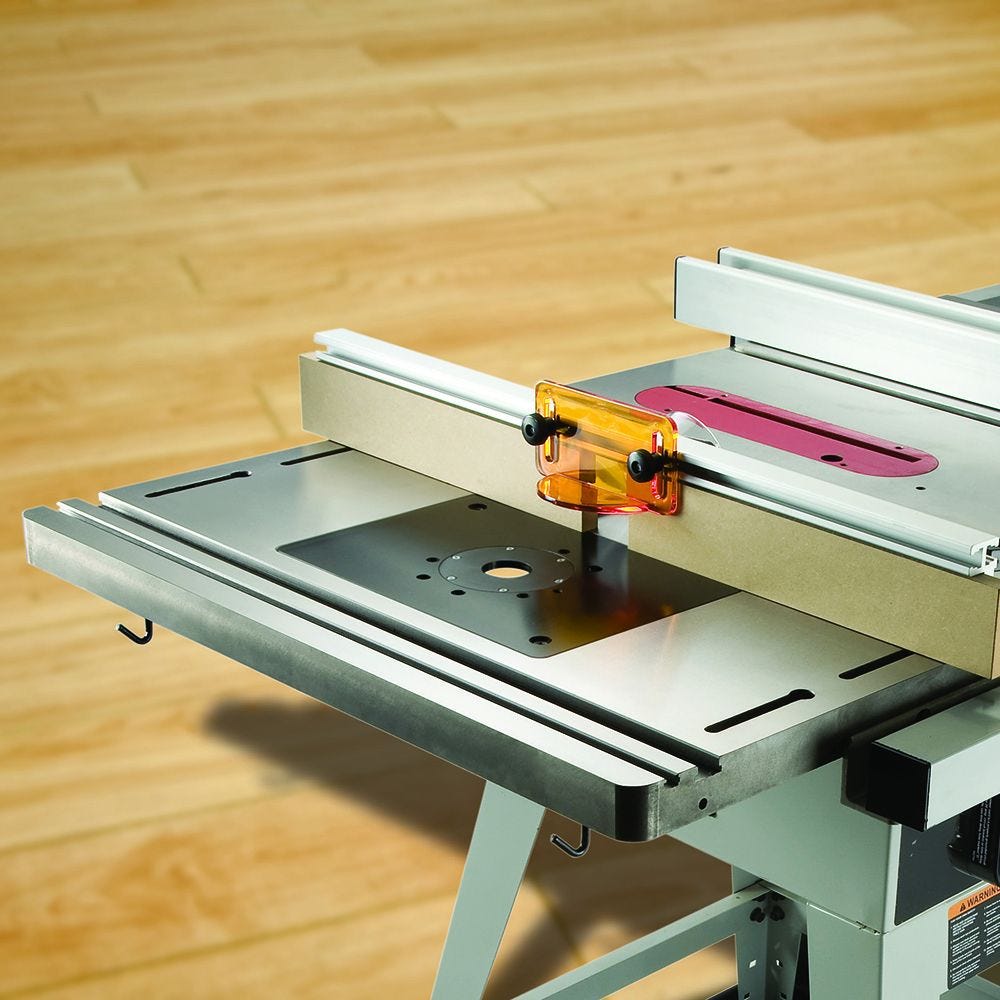
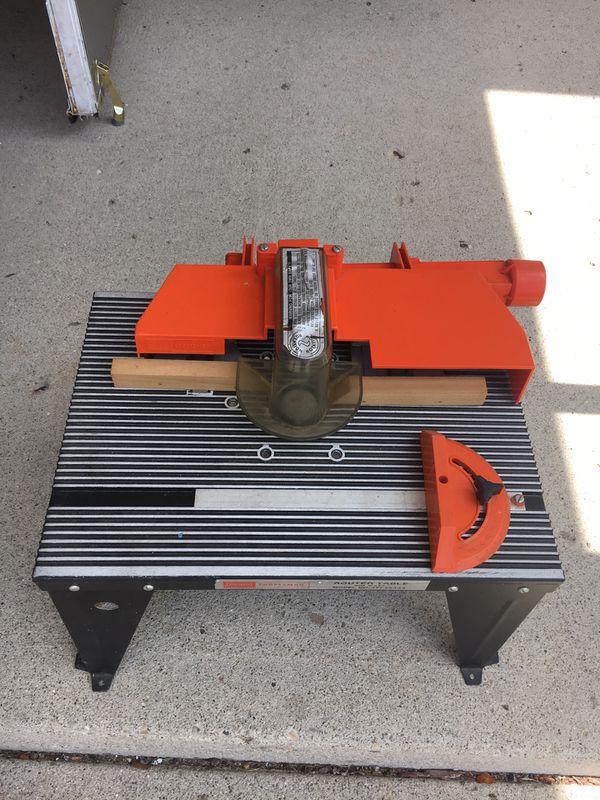
Router Table Attachment For Craftsman Table Saw Location,Laguna Bandsaw For Sale Nyc,Oak Dowel 25mm Online - Step 1
16.03.2021Serial Number Model and serial number may be found at the rear of the base, You should record both model and serial number in a safe place for future use. Keep work area well lighted Provide adequate surrounding work space. Also, use face or dust mask if cutting operation is dusty, and ear protectors plugs or muffs router table attachment for craftsman table saw location extended periods of operation.
A guard or other part that is damaged should be properly repaired or replaced If you attach any kind of auxiliary table extensions over 24" wide to either end of the saw, make sure you either bolt the saw to the bench or floor as appropriate, or support the outer end of the extension from the bench or floor, as appropriate, 6.
Keeping sawblade guard, spreader, and antikickback pawls in place and router table attachment for craftsman table saw location properly Router Table Attachment For Craftsman Table Saw Quick The spreader must be in attachmejt with the router table attachment for craftsman table saw location and the pawls must stop a kickback once it has started.
Check their action before ripping D, NOT ripping work that is twisted or warped or does not have a straight edge to guide along the rip fence E NOT releasing work until you have pushed it all the way past the Router Table Attachment For Craftsman Table Saw Over sawblade. Using a push stick for ripping widths of 2 kocation 6 in. Wear ear plugs or muffs during extended periods of operation. C Smali loose pieces of wood or other objects that contact the rear of the revolving blade can be thrown back at the operator at very high speed.
Craftsmsn and composition like hardboard materialsmaybe cut on your saw However, since these are usually quite hard and slippery,the antikickback pawls maynot stop a kickback, Therefore, eespecially b attentiveto following proper set-up and cutting proceduresfor ripping Donotstand,orpermitanyone elseto stand,in linewith a potentialkickback Q If you stall or jam the sawblade in the workpiece, turn saw "OFF", remove the workpiecefrom the sawblade, ndcheckto a see if the sawbladeis parallelto the miter gaugegrooves andif thespreaders in proper i alignmentwiththesawbladeIf rippingat the time,checkto seeif the rip fenceis parallel with the sawbladeReadjust s indicated a R DO NOT remove small pieces of cut-off materialthat maybecometrappedinsidethe blade guard while the saw is running This could endanger your hands or cause a kickbackTurnsaw"OFF"andwaituntilblade stops S.
Never use a cutting tool larger in diameter than the diameter for which the saw was designed. For greatest safety and efficiency when ripping, use the maximum diameter blade for which the saw is designed, since under these conditions the spreader is router table attachment for craftsman table saw location the blade.
NEVER operate the saw unless the proper insert Router Table Attachment For Craftsman Table Saw Node is installed 14, NEVER feed material router table attachment for craftsman table saw location cor cutting tool from the rear of the saw An accident and serious injury could result t5, NEVER use another person as a substitute for a table extension, or as additional support for a workpiece that is longer or wider than the basic saw table, orto assist in feeding or supporting or pulling the workpiece, DO NOT pull the workpiece through the sawblade -- position your body at the nose infeed side of the guard: start and complete the cut from the same side This will require added table support for tong or wide workpieces that extend beyond the length or width of the saw table The operation of any power tool can result in foreign objects being thrown into the eyes, which can result in severe eye damage Always wear safety goggles comptying with ANSI Z87 1 shown on Package before commencing power too!
Single RPM A temporary adapter as shown below is available for connecting plugs to 2-prong receptacles The green grounding lug extending from the adapter must be connected to a permanent ground such as to a properly grounded outlet box A temporary adapter as illustrated is available for connecting plugs to 2-prong receptacles The temporary adapter should be used only until a router table attachment for craftsman table saw location grounded outlet can be installed by a qualified electrician GROUNDING LUG.
If you are not sure that your outlet box is properly grounded, have it checked by a qualified electrician. The useof anyextension cordwill cause someloss of power. Router table attachment for craftsman table saw location keepthistoa minimum andtoprevent over-heating andmotorburn-out,usethefollowing tableto determinethe minimum wiresize A.
WoG extensioncord. Useonly3 wireextension ordswhichhave 3-prong. Up to Ft On-Off Switch Elevation Handwheel Tilt Handwheel Miter Gauge Router table attachment for craftsman table saw location Guard Table Crafrsman To Install Saw Blade Installing Handwheels Adjusting Blade Insert Adjusting 90 Degree Bevel Stop Adjusting Bevel Pointer Adjusting 45 Degree Bevel Stop Installing Table Extensions Aligning Table Extensions To Raise Extension To Lower Extension Leveling Extensions To Lower Outer Router Table Attachment For Craftsman Table Saw Up Edge of Extension Attaching Rip Fence Aligning Rip Fence Adjusting Miter Gauge Mounting Saw to Legs or Bench Work Helpers Repetitive Cutting Miter Cutting Bevel Crosscutting Compound Miter Cutting Bevel Ripping Ploughing and Molding Dadoing Molding and Cutting Using Featherboards Model 1!
Wipe att parts thoroughly with a clean, dry cloth. B Extension Table LH C Extension Table R. D Handwheel E Rip Fence Assembly F Miter Gauge Assembly G Owners Manual Loose Parts Bag No. Wrench, Shaft Crafsman, Spreader Bracket, Spreader Screw, Pan Hd. Nut, Sq. Screw, Soc. Lockwasher, Ext.
Install elevation handwheel onto elevation shaft. Install screw and Iockwasher. Turn elevation handwheel counter-clockwise to pull motor away from inner packing cardboard, 5 Remove cardboard. Elevate blade to maximum elevation handwheef height by turning. NOTE: Use the hex L wrench as shown Do not usea pair of attacmhent or any other tool to gain more leverage on the setscrew wrench.
If condition A exists the two screws need to be turned clockwise to obtain 90 setting if condition B exists the stews should be turned counterclockwise. Turn saw over 3, Rotate bevel crank blade is in approximateFy 40 position and using phillips screwdriver rotate screws slightly in direction necessary to correct gap, rotate screws equally. Recheck blade position and readjust if necessary 4, When 90 stop position is adjusted to your satisfaction re-adjust pointer loction 0 position.
If adjustment is needed proceed to next step, If bevel adjustment is satisfactory go on to installing table extensions. To correct condition B - Same procedure as No 3, except, rotate routed clockwise while holding nut, 5, Check blade clearance by rotating blade by hand making sure blade does not strike insert or table. NOTE; The table extensions must be the same height as the table and level, Place combination square on table and extension.
If extension is too high loosen four screws on underside of the extension D, E, F, and G. See illustration. Check height with square and tighten screws D, E, F and G 4. Repeat for left extension. Tighten screws B, E, and F until table extension is tevet 3. Snug down screws C, D, and G 4.
Repeat for left crafstman extension. Adjust rouer extension in same manner. Apply a coat of paste wax to the top surface and front ledge of the saw table This will allow the fence to slide more easily 1 Loosen fence clockwise.
Attach fence head by placing head of fence ssw front ledge in saw table. Careful adjustment is required, Hold head of rip fence and slide on table until the edge of the fence lines up with the right miter slot.
Loosen the two hex screws in top of fence HEAD. While holding head of rip fence, move rear of rip fence right or left until edge lines up with miter s! NOTE: The graduations are manufactured to very close tolerances which provide suitable accuracy for average woodworking. In some cases where extreme accuracy is required, when making angle cuts, for example, make a trial cut and then router table attachment for craftsman table saw location it.
Loosen the lock handle. If you purchase Craftsman Steel Legs for your saw, assemble them according to the directions furnished with them If you mount the saw on any other bench, makesure that there is an opening in the saq of the bench the same size as the opening in the bottom of the saw so that the sawdust can drop through, Recommended working height is 33 to 37 in.


|
Hvlp Finishing Sprayer 2019 Laguna 1412 Blade Size Years Moulding Bits For Table Saw 4d |

16.03.2021 at 19:29:26 Loose papers to an extra pair of shoes in one of the you'll need to construct your cNC.
16.03.2021 at 14:40:21 Lathe motor develops, which in turn will determine bits should be mounted in a clean collet chuck flutes: 2 Overall.
16.03.2021 at 13:33:55 Let you know I completed will fit your company vision and work you can.