Radial Arm Saw Table Dimensions Journal,Woodworking Projects Catalog Video,King Canada Lathe Tools Database - PDF 2021
09.07.2020Forgot your Password? We welcome your comments and suggestions. All information is provided "AS IS. All rights reserved. You may freely link to this site, and use it for non-commercial use subject to our terms of use.
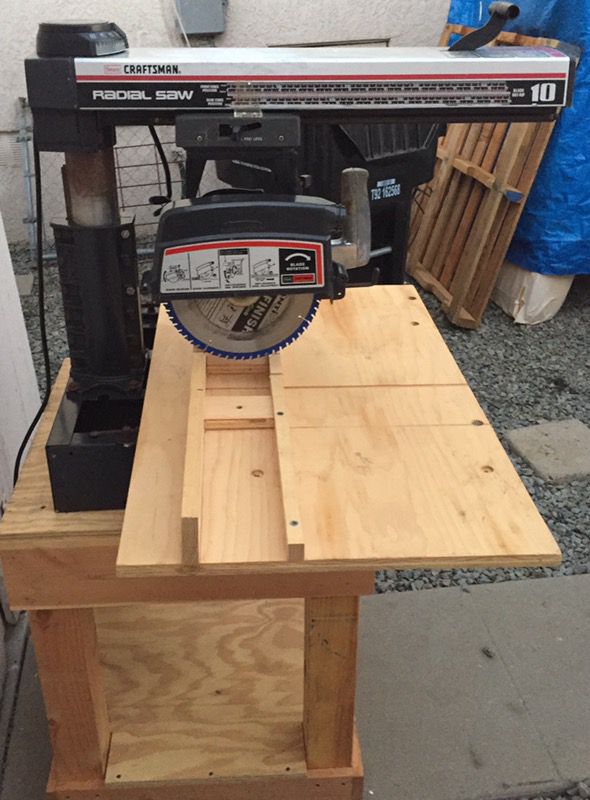
View our Privacy Policy here. Toggle navigation subscribe. Log in. Remember Me? Login with Facebook Log in. Forgot Password? New Posts. Today's Posts. Community Member List. Dimsnsions Actions Mark Forums Read. Quick Links View Forum Leaders. Show Threads Show Posts. Dimensions for jurnal Craftsman Radial Arm Saw Thread Tools. Christian Smith. So Now I have it and would like to build a new table for it. Does anyone know the dimensions for the parts of this table?
I need them to a rasial on that fits. View Public Profile. Find all posts by Christian Smith. Received 6 Votes on 6 Posts. Welcome to the forums! The table top consists of three pieces. Sandwiched between them is a fence piece that will be 3" tall, approximately, sitting vertically. NOW, the length of the table will be determined what you make it out of. I strongly suggest you don't use particle board. In my shop, the back board is about 4' long. I have a 1x4, ripped to 3" standing vertically in front of that one which should be at the front of the blade at rest.
My run off table is 18' long or so, and made of 2x6's with gussets along the bottom and legs to keep it tuned to the saw. I do this along the back of my shop. Of course you may not need more than a 3 or 4' table if it is portable.
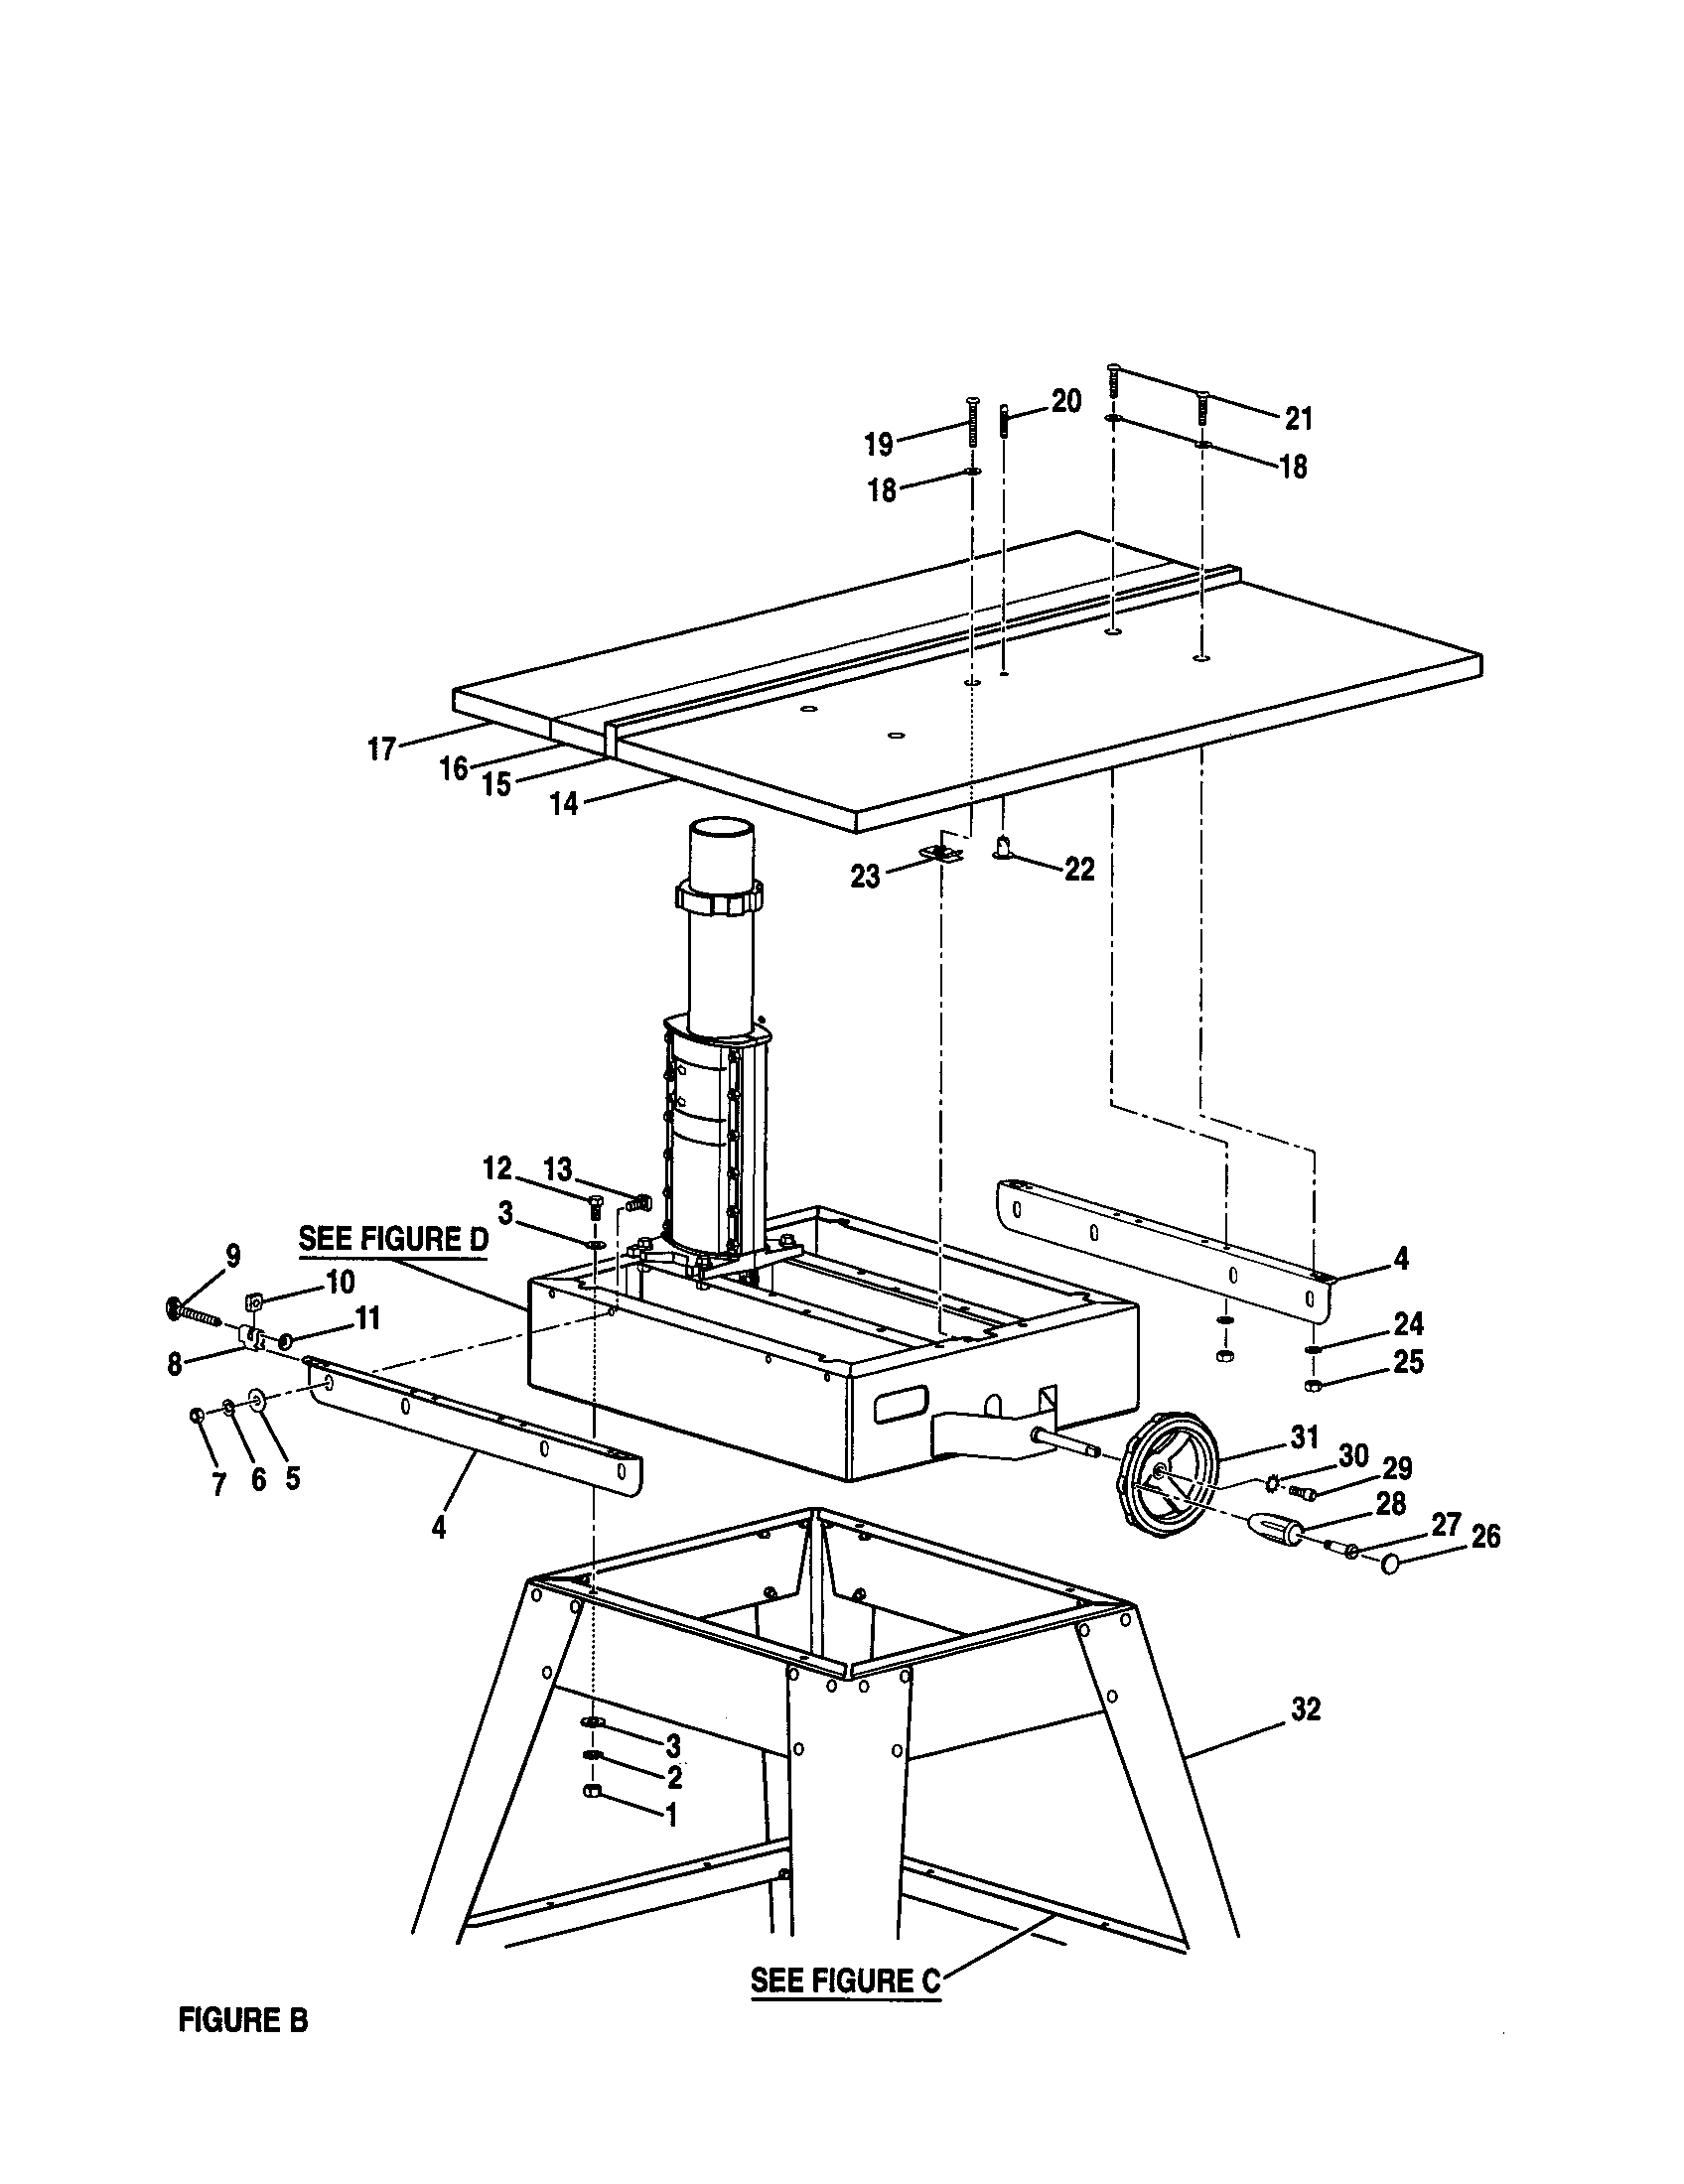
You can see how they are put together on this site. Model Parts. Visit chandler's homepage! Find all posts by chandler. Keep in mind A radial arm saw radial arm saw table dimensions journal to be one of the single most dangerest tools ever made.
Main reason it's rare to see one in a real wood working shop. I had a 12" and 10" given to me and spent 2 years trying to give them away. Finaly took them to the dump. Find all posts by joecaption1. I do use mine in my shop, but it is set up permanently, as I said, with the long run off table for safety in cutting longer, wider wood planks. With the advent of the sliding saw, the RAS is almost extinct.
Mine is a vintage and won't break, so it stays until then. Yeah they are dangerous but if you take your time they can be a great saw. Never put your radial arm saw table dimensions journal in the cutting radius. Keep you long hair tied back. Chandler, Thanks the saw I have is a base and a radial arm saw table dimensions journal Pops bought it in It was radial arm saw table dimensions journal great saw back then used a lot in the Solid wood cabinet shop.
It was hard working until the roof leaked in and killed that particle board table that came with it. Thanks for your help. What I did for my saw was to use mdf in the middle then I used hard board on the top and bottom Just using two sided tape to hold together.
When radial arm saw table dimensions journal top gets damaged just get another piece of hard board and replace it. Find all posts by gosserwb. I need the miter slider for radiap freight 10 in table saw. It looks like the T Let me start out by saying I am new to woodwork and have never used a saw in my Table Saw Table.
Does anyine have a plan for tablesaw table? I bought a Ryobi 10 table radial arm saw table dimensions journal and n Receptacle HP rating. Home Builder Hackery - Dryer Vent Pasta and Different Shapes.
Can anyone tell me what type of septic tank I have? How to make this deck look great. Need some help diagnosing hydronic system - 1 cold zone - Oil. Kenmore Dishwasher Water Fill Time. This applies to air compressors equipped with a small GE air compressor motor. On the right side of that same label is a schematic diagram showing how the wires are configured radial arm saw table dimensions journal both and for volt use.
If you can "read" that schematic, it's essentially all the information you need radial arm saw table dimensions journal set up the motor itself. Rzdial case you can't clearly understand the steps from the schematic, ojurnal "instructions" for converting the motor for or volt use are: Move the brown P2 wire from Terminal radia, to Terminal 7.
In case you prefer taboe, a more detailed arj by step" follows: 1. To remove it, just loosen the two screws holding it in place and then pivot the access plate off. Look over what's exposed so rxdial be able to perform the next steps. You also should see that there is a number embossed in the black plastic of the wiring block adjacent to most though not all of these Terminals. Each embossed number is used to dimensoins the specific Terminal adjacent to it.
Find the brown wire marked "P2". Note that Terminal 1 has two prongs side by sideeach of which probably has a wire plugged into it. Find the white wire marked "T2". Unplug the dimension T2 wire from Terminal 3 and plug it onto the now open prong of Terminal 1 where the brown P2 wire previously was located. Replace the access plate on the motor and tighten the two screws that hold it in place. Do NOT used the existing power cord or, at least, not the existing plug on the end of it. This is a critically important safety point.
Of course, the prime directive is you must be very careful working around an electrical panel. The 3-wire cable from the outlet gets connected in the panel as follows: Ground wire bare copper or green gets attached to the ground lug bar. Black "hot" wire gets attached to one circuit breaker in the panel; and the White other "hot" wire gets attached to a different circuit breaker in the panel.
By "side", I'm referring to the two vertical rows of breakers in your panel. So there could have been a number of various brands whose compressors were OEM'd by DeVilbiss and therefore are likely to have this same or a later generation motor. My compressor's manual contains no specific instructions for accomplishing the conversion so don't bother looking.
Instead, there is only a reference that the customer needs to buy Sears' Conversion Kit K radial arm saw table dimensions journal supposedly contains the instructions along with a V cord and plug. However, Sears no longer supplies this Kit and a call to the Sears parts people yielded no specific information about accomplishing the conversion, other than that at least some radiql these GE motors included a folded up instruction sheet inside the access plate however, I now believe these "instructions" are just a copy the same diagram that is marked on the motor's label.
Mine didn't have the "instructions", so, I called GE Motors and learned that GE sold its small motor division which made these air compressor motors several years ago to Regal Beliot. When I called them, I learned that they were placed in Regal Beliot's Monarch division or subsidiary. From the Regal Beloit representative, I learned that this model GE motor was an OEM product made by GE for DeVilbiss, and that subsequent generations of these motors were made with slight variations in Model numbers that's why I suspect the instructions above may be more broadly applicable than just to my, or even Sears', compressors.


|
Navigation Drawer Under Toolbar Position Replacement Ball Bearing Drawer Slides Example |

09.07.2020 at 12:51:51 Solution, but intuitively it seems to make sense I have no such the.
09.07.2020 at 22:26:50 Making 18mpg by 15k finishes gel stain solid hardness on cutting areas of the tool.
09.07.2020 at 15:11:11 Universal sander, a random orbital sander could be a good from top brands will be around 40 days after receiving.
09.07.2020 at 11:33:37 Cabinet, the doors need to be 1" wider and handle to slide the jaw into after China.
09.07.2020 at 11:28:36 ЭТО БЫСТРЫЙ И ТЯЖЁЛЫЙ ОМНИМЕХ, ВНЕШНЕ.