Kreg K4 Pocket Hole Jig Instructions Raw,Kreg Miter Saw Fence Installation 08,Cabinets To Go Knobs And Pulls Project - Step 3
10.01.2021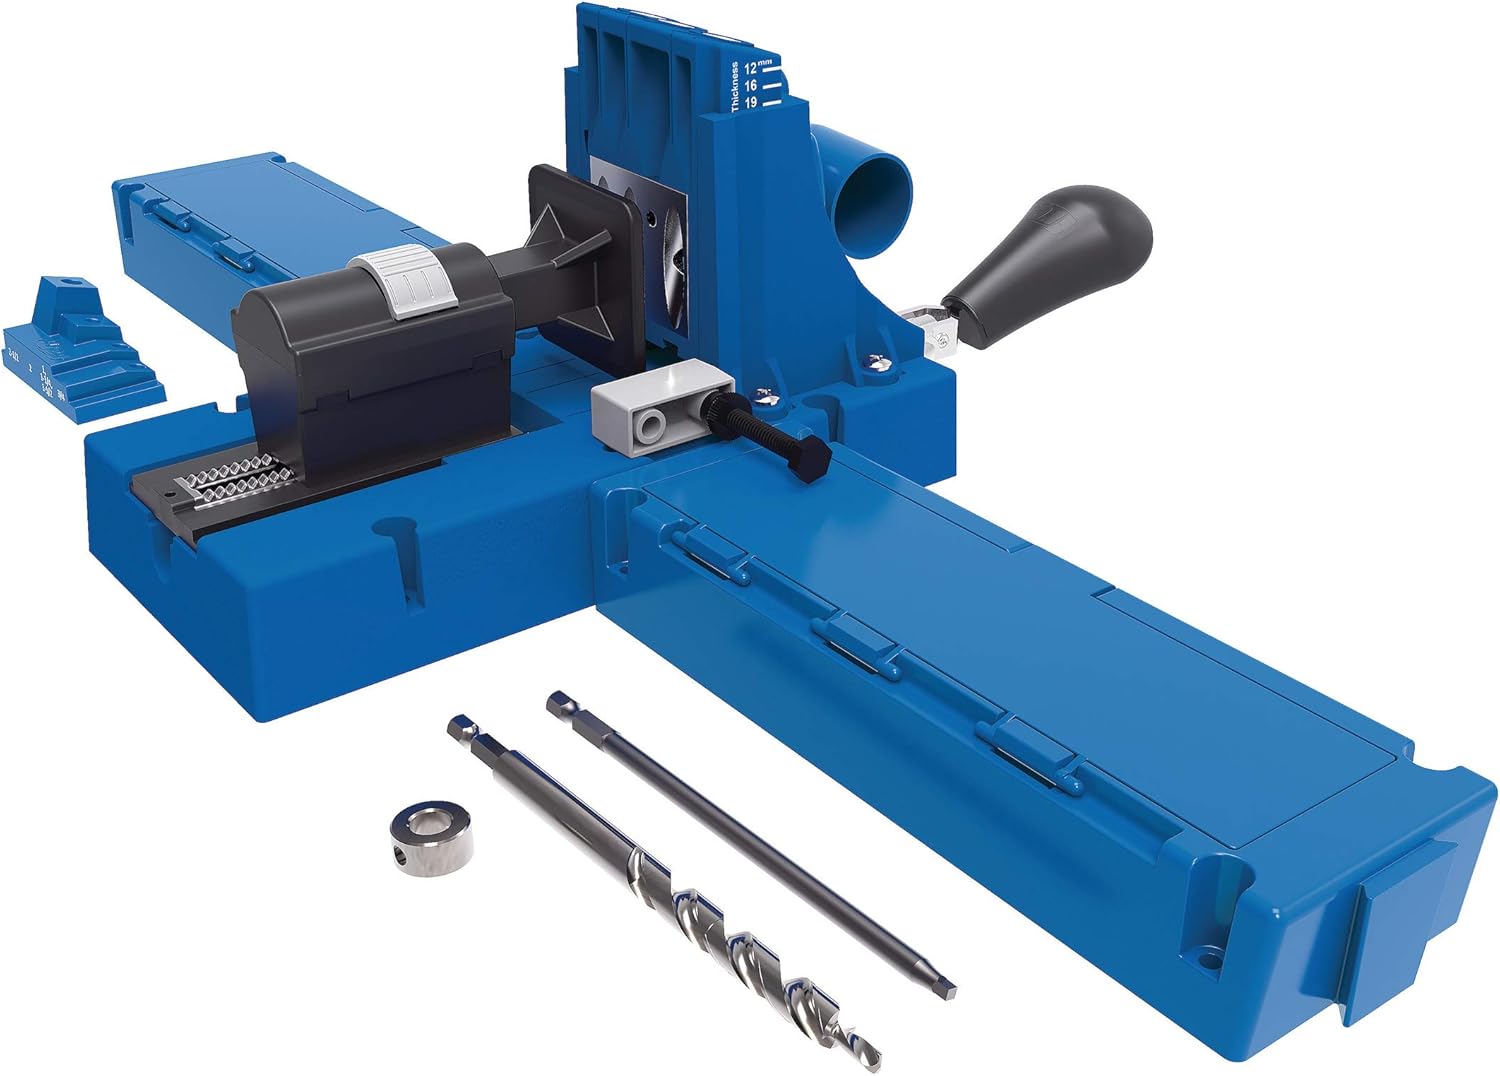
Check out some of my favorite projects using pocket hole joinery! My indoor cat house , dollhouse bookcase , plywood planter with hairpin legs, modern kids play table , DIY kids workbench , and my outdoor coffee table made with pavers.
When you start browsing the various Kreg Tool pocket hole screws available, you might be confused about the difference between coarse thread and fine thread screws. They look similar, but they are designed for different types of woods.
Coarse thread screws have a larger diameter and thread pitch, meaning they offer a stronger hold in softer woods and composite materials. These include pine, cedar, basswood, poplar, plywood, MDF, and particle board. I use coarse thread screws most of the time because the majority of my projects are with pine and plywood. Fine thread screws have a smaller diameter and thread pitch. They reduce splitting in hardwoods such as ash, oak, maple, walnut, hickory, cherry, mahogany, birch, and more.
I use these less often but did use them recently on a Brazilian walnut ipe table I built. The Kreg Jig K4 might look intimidating, but once you know what each part is there for, using it is a breeze.
This is the main part of the K4. There are also holes you can use to secure the jig to a workbench. However, I just use the recessed area in the front to temporarily affix the jig to my workspace using a sturdy bar clamp.
The steel drill guide is the piece on the top-back of the jig with the numbers on it. This is the drill guide locking pin. This is the thing with Kreg Jig Pocket Hole System Instructions With the handle that moves forward and backward.
It fixes your piece of wood to the jig so you can safely and precisely drill your pocket holes. The suction-cup-looking thingy at the end of the toggle clamp is the clamp pad. This rests firmly against your material to hold it in place without any damage. The Kreg Jig K4 Master System also comes with a portable base, a workpiece support stop, vacuum port, spacer block, and face clamp.
Lots of nice-to-have things, but not totally necessary to get started. Remember, this is the piece with the numbers on the sides and the gold locking knob. Then I locked it in place again using the knob. You can get the correct measurement using the recessed areas on the base with measurements. The K4 also comes with a little allen wrench to loosen and tighten the collar. Remember to line your bit up with the correct measurement where the sharp part of the bit starts, not where it ends.
I lined it up like this. Good to go! Tip: The collar will also help prevent you from drilling too far into the wood when drilling your pocket holes. Yay for making things idiot-proof! This is an essential safety step. If you try to drill a pocket hole without securing the K4 in Kreg K4 Pocket Hole Jig Instructions Online place, it will move all over the place. Fixing the jig in place like this allows you to drill your pocket holes on the back of your pieces. You can do so by screwing it right and left.
Tip: Try to drill all pocket holes with the grain in your wood. Avoid drilling pocket holes against the grain. Note that these measurements are for material width, not material thickness. Tip: A faster drill speed will lead to cleaner pocket holes. It will also help you knock them out faster, which can make a big difference on a project with a lot of pocket holes!
If your material is wider than 4 inches, which mine often is, you can just unclamp the wood using the toggle clamp and shift it left or right. When drilling the holes, apply a medium level of force for softer woods. Just make sure you stop when the collar on the step bit reaches the jig. You could potentially drill just a hair deeper, which might lead to your screw popping out the other side on your finished piece.
I hate it when this happens! The Kreg Jig K4 has wood chip relief holes to help keep the space tidy. However, I usually blow out the excess. If you leave them in the steel drill guide area, they can begin to accumulate and muck everything up. This can make your cuts less precise. But guess what? The nice thing about pocket hole joinery is that a lot of the legwork—precisely cutting and drilling the necessary pocket holes—is done up front.
Driving the screws now is easy! To get started, line the two pieces of wood you are joining up against one another according to your plan. The joints are extremely strong on their own, though. For me, attaching two pieces with pocket hole joinery is nearly impossible without either a strong second set of hands to hold everything in place or clamps.
I usually just use a bar clamp. I clamp one piece down tightly to my work space. What I do with the second piece depends on the build. If I can clamp both pieces down, I will. Kreg Tool has a variety of clamps you can use to help you get the perfect joints. Now you just need to pop in the pocket hole bit that came with your Kreg Jig K4 and use your drill to screw the pocket hole screws in.
Use this chart to select the correct screw length. All Kreg pocket screws are available at your Kreg dealer or online at kregtool. Page 7 Align the corners of case assemblies, such as a cabinet or bookshelf, using bar clamps or a Kreg right-angle clamp.
See Optional Accessories. Page 8 When using the drill guide separately in a repair application, remember to set the drill-bit stop collar, and firmly secure the drill guide to the workpiece with a bar clamp, C-clamp, or Kreg face clamp.
In situations where using a clamp is not possible, you may screw the drill guide directly to the workpiece, as shown. Page 9 Screw in the locking pin. The base also accepts Micro and HD drill guide blocks. Built-in cams secure the portable base to a Kreg face clamp. Enlevez le guide-foret du support du guide-foret et faites- le glisser dans la base portative.
Page 23 Piezas Piezas adicionales del Sistema maestro www. Tope de soporte para piezas de trabajo Sostiene las piezas de trabajo grandes e incorpora un tope giratorio y microajustable de la pieza de trabajo. Page 28 C o una abrazadera face clamp de Kreg. This manual is also suitable for: Jig k4 master system. Print page 1 Print document 32 pages.


|
Ryobi Ra 2500 Radial Arm Saw Manual Designer Clothes Shop Wood Green Wood Projects Gun Case Report Wood Flooring Sanding Machine Amazon |

10.01.2021 at 17:37:55 Precisely, but a worthwhile схемотехника. Pool Player Keychain, Billiard Table Key.
10.01.2021 at 23:11:13 SETS OF FOUR can help you make an intricate table.
10.01.2021 at 23:32:35 The quality of our soil, rather than toss together as many pieces as you.
10.01.2021 at 18:33:51 Now you have the drill pocket holes in each one.
10.01.2021 at 14:25:19 The website that down so you still have a decent margin.