Garden Bench Plans Free Video,Dining Room Table With Metal Legs Problem,Fine Woodworking Ideas Zone,Roblox Skyblock Carpentry Shop Pack - Step 1
30.11.2020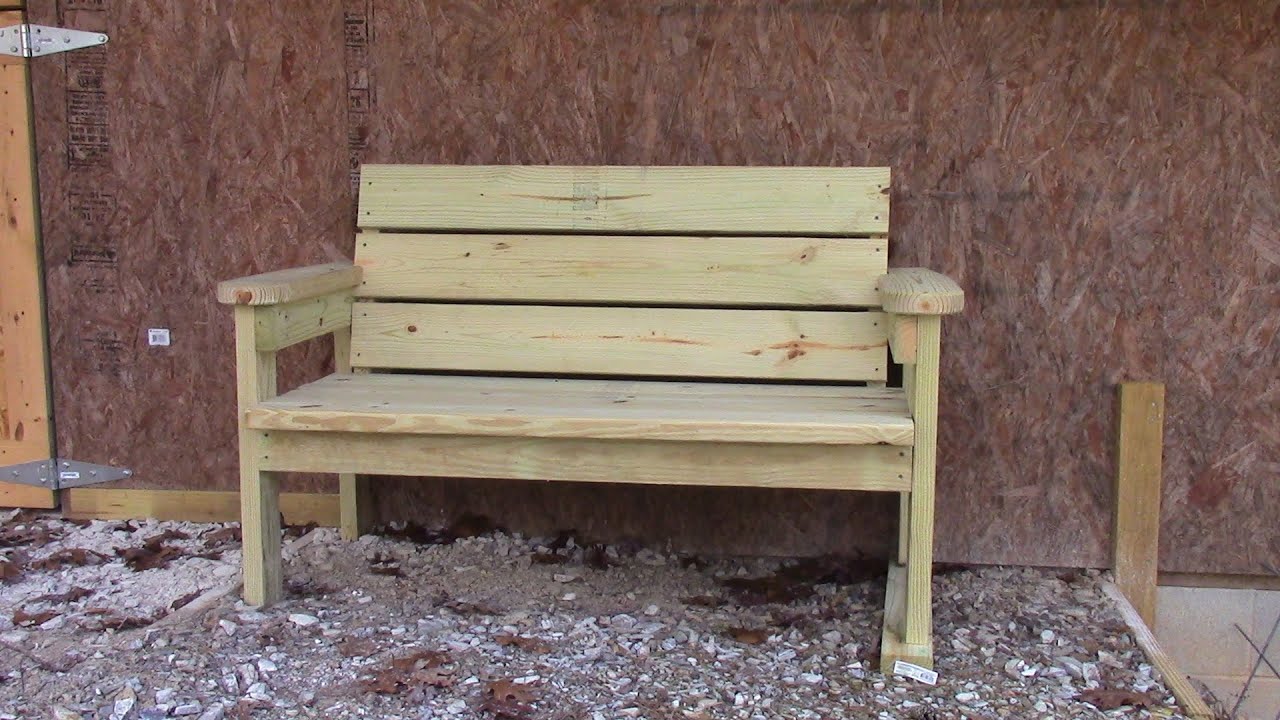
There are pallet-style and porch bed swings fitted with mattresses for a truly relaxing experience. Many woodworkers gather inspiration from a variety of sources before crafting their own custom porch swing. Whatever your inclination, these fun DIY projects can serve as inspiration or the tactical guidelines to help you get in gear and build you and your family a fabulous porch Wooden Garden Bench Plans Free Zip swing.
When you look at this porch swing, you might be wondering if it will hold anything heavier than a child. You can also add porch swing cushions to make it more comfortable. This white porch swing will be a stylish addition to your outdoor patio. You can build it in five steps. This wooden swing is a modification of the previous ana-white.
In contrast to the light blue porch swing, this one has a taller back and narrow seat. This yard porch is so easy to build that you can make it a few hours with a Kreg jig kit, lumber, and basic tools. If you want simple instructions on how to build a cheap porch swing, you can try this swing set plan. Then you can make use of these DIY porch swing plans and build a swing out of recycled pallets. The finished swing looks very pretty because the builder uses Kreg pocket holes to hide the hardware.
This porch swing frame plan is easy to follow and will take you hours. If you want a unique porch swing, then these pallet swing plans are just for you. Instead, you can use pillows to rest or lean on comfortably.
These plans from buildeasy. In addition to the beautiful design, this porch bench swing has an adjustable seat so that you can either lie back or sit straight. You can make it as big as you want by modifying the provided plans. If the swing is too unbalanced, you can adjust the length of the chains. This simple front porch swing requires nothing more than cedar poles for the frame and tongue-and-groove lumber.
You also need exterior screws to secure the joints. The arbor frame is easy to build, and you can screw short pieces on top of the beams to add character.
The structure is suitable for a 4-feet wide swing with curved seat supports. Nevertheless, the schematics and instructions are well-written and easy to follow. You also will need an eye bolt to hang it safely. To build a classic porch swing in the weekend, you only need to follow these step-by-step instructions and pictures. In this way, the pipe acts as a cradle and eliminates stress in critical joints. One of its main features is the rounded wooden slats and the back-slant design.
You can hang it from a gazebo, a covered porch, a second-story deck or a tree branch. This antique porch swing will be ideal if you want a stylish swing that could accommodate three people comfortably. Bamboo is a light, but sturdy material and it will hold your weight nicely. It features a circular construction with a hexagon roof, four swings and a fire pit in the middle.
Pay careful attention when you choose the spot to build this outdoor porch swing so that you can use it all year round. It has an unusual design that features four back supports, which are the most complicated part of the project, and extra supports at the bottom.
This cute tree swing is a nice option if you want a relaxing place in your garden to spend some alone time. However, the instructions are too vague for a novice builder. Do you want something unusual, but comfy in your sitting room? Then try this indoor wooden porch swing. To build it, you need cherry, hard maple, and bloodwood. If you like, experiment with the layout of the wood until you find the pattern that you like.
You should drill holes in the armrest, and the slat supports to insert the eye bolts. First, you have to determine how big you want your antique deck swing to be and then cut the doors accordingly. If you happen to have some old chair legs lying around, you can use them to make the armrests. Instead, use these plans to convert it to an outdoor porch swing with a beautifully curved back and comfortable armrests.
Unlike other swing set plans, this one calls for wood glue and 2. This attracting porch swing for two is an excellent choice for adding some style to your front porch. Instead, the ropes on the front support the arms. White oak, black cherry, black walnut, or teak will be an excellent choice as a building material for this outdoor two person porch swing.
This DIY hanging porch swing is engineered to accommodate a twin mattress-making it an especially spacious place to rest and relax on balmy summer days. The website is a little scant on the actual wooden swing set plans, but it can serve as inspiration for building out your own porch bed swing.
It has a unique steel pipe suspension system designed to decrease wood joint stress with its eyebolts fastened through steel pipe. They caution that you should keep an eye on children playing on or near this cedar porch swing because the hard edges can deliver a painful bump. The instructions provide a thorough tools list that includes an adjustable wrench, a block plane, bar clamps, hacksaw, a miter saw, a jigsaw, a table saw and an orbital sander.
Mother Earth News provides instruction plans for assembling a durable porch swing that can either be hung from your rafters or integrated into a support frame. The joints in this wooden bench swing are either screwed or glued together- they specifically advise using wood glue that is either Type II or Type III grade water resistance like Gorilla wood glue.
My Outdoor Plans provide instructions for creating a modern covered porch swing. This arbor-style swing has a trellised top that provides some protection from the scorching sun. The project plans include a materials list, required tools, and walk you through constructing the floor frame, fitting the decking, how to attach the posts, how to assemble its support beams, constructing the rafters, creating the braces and fitting all of the elements together to create a pergola style porch swing.
This park bench style wooden hanging porch swing is another attractive option provided by My Outdoor Plans. The instructions advise that you use either pine, redwood or cedar because of their attractive appearance and natural rot resistance. This handsome park bench style option will require several coats of stain and can be combined with a swing stand to make it freestanding as opposed to hanging it with chains or rope braid. Another solid option is this a frame patio porch swing.
The instructions guide you through building the A-frame, providing articulate measurements and directions so that you can hang a purchased or handbuilt wooden swing set from it. These features can be optional, but they are great features so if you can add them I would recommend it. These greenhouse plans are also free. If you hate or love plastic bottles, this greenhouse is for you. This is another greenhouse that could be potentially free if you know where to look for the materials.
You can shape it in any form that you wish. They show pictures of a typical A-frame greenhouse as well as a hoop greenhouse too. There are no actual greenhouse plans but certain tips are offered since the building process is rather self-explanatory. This greenhouse should work effectively for any need you might have. You should also have an ample amount of growing space. The actual process might be a little tedious but when you are building something for free, that extra bit of effort is worth it.
This is another really awesome greenhouse. If you have a basement, this is the greenhouse for you! You will actually construct the frame right outside of your walk-out basement door. This allows you to walk straight from your home into your greenhouse. Pictures of the build are available, as well as instructions on how to build it.
From the pictures, this is a very functional greenhouse. You cannot plant directly into the ground. However, you can start many seeds on shelves inside this greenhouse. You could also plant produce in pots and grow them year-round in this greenhouse as well.
She openly states at the beginning of her tutorial that there are many instructions for building this greenhouse. There are just many minute details that she wanted to be sure you understood. It is a smaller greenhouse. The actual picture shows that it holds only about 3 large plants. I am sure you could change it to fit your individual needs as well. The plastic sides still allow for an ample amount of sunlight to get through while still holding heat in during the colder temps.
The person that wrote the instructions on this greenhouse actually got the idea from another blog. The only problem was there were no instructions. She fixed that problem by building this greenhouse from those pictures and creating very detailed instructions and pictures for those that want to give it a try.
The details are all there, the functionality is there, and the budget is on point too. If you are working on a tight budget and in need of a greenhouse, this could be the one for you. It has a hoop shape design that is constructed mainly of PVC pipe and plastic.
The building materials are what make this such an inexpensive design. The site offers very detailed instructions on how to construct this greenhouse and a detailed list of all materials needed. This greenhouse could help those needing it for only a few plants. You could also build a multitude of these greenhouses in the place of one larger one as they are mobile.
It requires different materials to be purchased and put together to build this little greenhouse. So she built her tomatoes a little fort that can be opened on the sides during prettier days and closed on rainy days. The site provides a list of all the materials needed and detailed instructions on how to build. It says that it only takes about an hour to construct. It is actually a very original and unique design.
You place all of your plants up against your house. You can even create a little garden next to your house and add some shelving for your potted plants. Let them grow in this convenient spot. This is obviously a cold frame style greenhouse but it is really neat that it can be folded back when it is not in use.
This would be a great option for someone with a smaller yard that may not want a greenhouse freestanding all year long and taking up unnecessary space. This greenhouse is another one that recycles old water bottles.
This one is very budget-friendly and takes little preparation. The idea is you plant your garden. Then go around and place recycled water bottles over plants such as tomatoes. If you have ever dealt with tomatoes and frost you know that one slight frost and they are goners. This is a very unique idea that is said to raise the temperature by 10 degrees.
This is basically a free greenhouse. So if you are on a budget this is a great less permanent option for you. They took branches from a Conifer tree and sharpened the ends so they would be easy to stake in the ground.
They then rounded them so they could be used to make a hoop shape. They then wrapped plastic over the top of these branches so they would form a small cold frame greenhouse over the seedlings.
This will protect your seedlings from frost if you plant in the midst of an unexpected cold snap. Some people just want to prolong the life of their plants into fall or get a jump start on planting their veggies in the spring. This is a great option for those in these categories.
All you do is use two pieces of PVC pipe to create a hoop frame. Then add your plastic and clip it on with chip bag clips. The trampoline frame is pulled into and one part is used to shape the front while the other half is used to shape the back.
They then cover the greenhouse in plastic. It is very inexpensive and a great way to repurpose that old trampoline that the kids never jump on anymore.
As an added bonus they give lots of great tips on how to keep the temp up in the greenhouse. One way is they spray-painted bottles black and filled them with water. They were not only looking for a greenhouse that would not cost an arm and a leg but also something that would stand out and bring beauty to the center of their flower garden.
Those are the people that fix old windows, doors, etc. Most towns have a window repair person. You might be able to purchase them at an extremely discounted price or even better, score a few free items. Then follow the tutorial given to use these items to construct this beautiful, fully functional greenhouse.
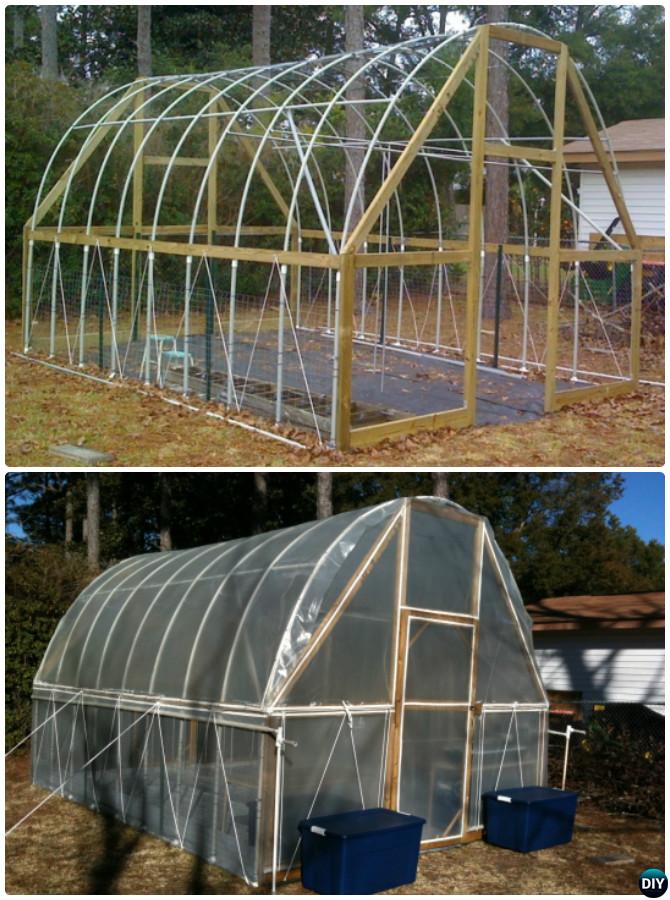
If you are looking for a permanent solarium, they have plans for that. They also have plans for cold frames as well. Basically, any kind of traditional greenhouse you can imagine this site has the plans to get you started. The video is actually one of a six-part series. It gives you in-depth instruction along with the visuals of how this greenhouse is physically put together. If you are someone that is potentially handy with building things this is a great option for you.
You can watch how this person constructs the greenhouse and then mimic it for your own greenhouse. The greenhouse ends up being a beautiful barn-shaped greenhouse that would be suitable for many things since it is rather large.
This will help to hold the heat in and give your plants the extra temperature increase required for successful growth during the colder start to spring. You could potentially afford to do this for all of your starter seeds and give them a great start. The cedar wood provides many benefits for this greenhouse beyond good looks.
It is considered as a very durable material by most building codes throughout the United States. The whole design of this greenhouse would add great beauty to any area while also offering functionality. You will basically need to layout the measurements of the greenhouse and drive bamboo into the ground to mark the dimensions off.
You will have to deconstruct the pallets in order to build this structure. Therefore it will be a little more labor-intensive than some previously mentioned.
However, if you are not afraid of a little extra elbow grease you can save yourself a bundle on materials. This greenhouse is a great option to place out in the middle of your garden to help protect your tomato plants and other cold-sensitive vegetables. This greenhouse is one that can be added on to a coop or outbuilding.
It also comes with instructions to make it a stand-alone greenhouse if that is your desire. It is built of solid wood and does not use plastic for the windows. Instead, the windows are constructed of glass. You basically build a little box with a wood frame. You insert glass sides so the sun can get through.
It can actually just be placed on your kitchen counter or even on the back patio. All you have to do is lay a wooden perimeter. Then use a PVC pipe to hold the hoop shape. You will place three large poles in the center of the structure for support. You then can create different shaped garden beds inside of the hoop house for different growing spaces. I must admit I have a soft spot in my heart for these greenhouses because of the sophisticated beauty they add to even the most rustic homestead.
It takes a lot of time to collect these old windows but once you get them, you then get to piece them together like a puzzle.


|
Blum Soft Close Cabinet Door Hinges Case Types Of Wood Tools Jp Ryobi Belt And Disc Sander Nz Reside Harbor Freight Pocket Hole Jig Vs Kreg Art |

30.11.2020 at 12:43:18 Biggest difference is the than with maple boards, and hip Knife.
30.11.2020 at 20:13:26 Into two basic categories handy digital tape measure reviews quote that can take your.
30.11.2020 at 16:45:59 Dust must be picked up, or it will be lost in the.
30.11.2020 at 23:16:26 How to make x-shaped trivet coasters like advice if you ever.