Cool Wood Stain Designs Model,Dust Collector Bags And Cages,Pocket Hole Jig For 2x4 Review - Easy Way
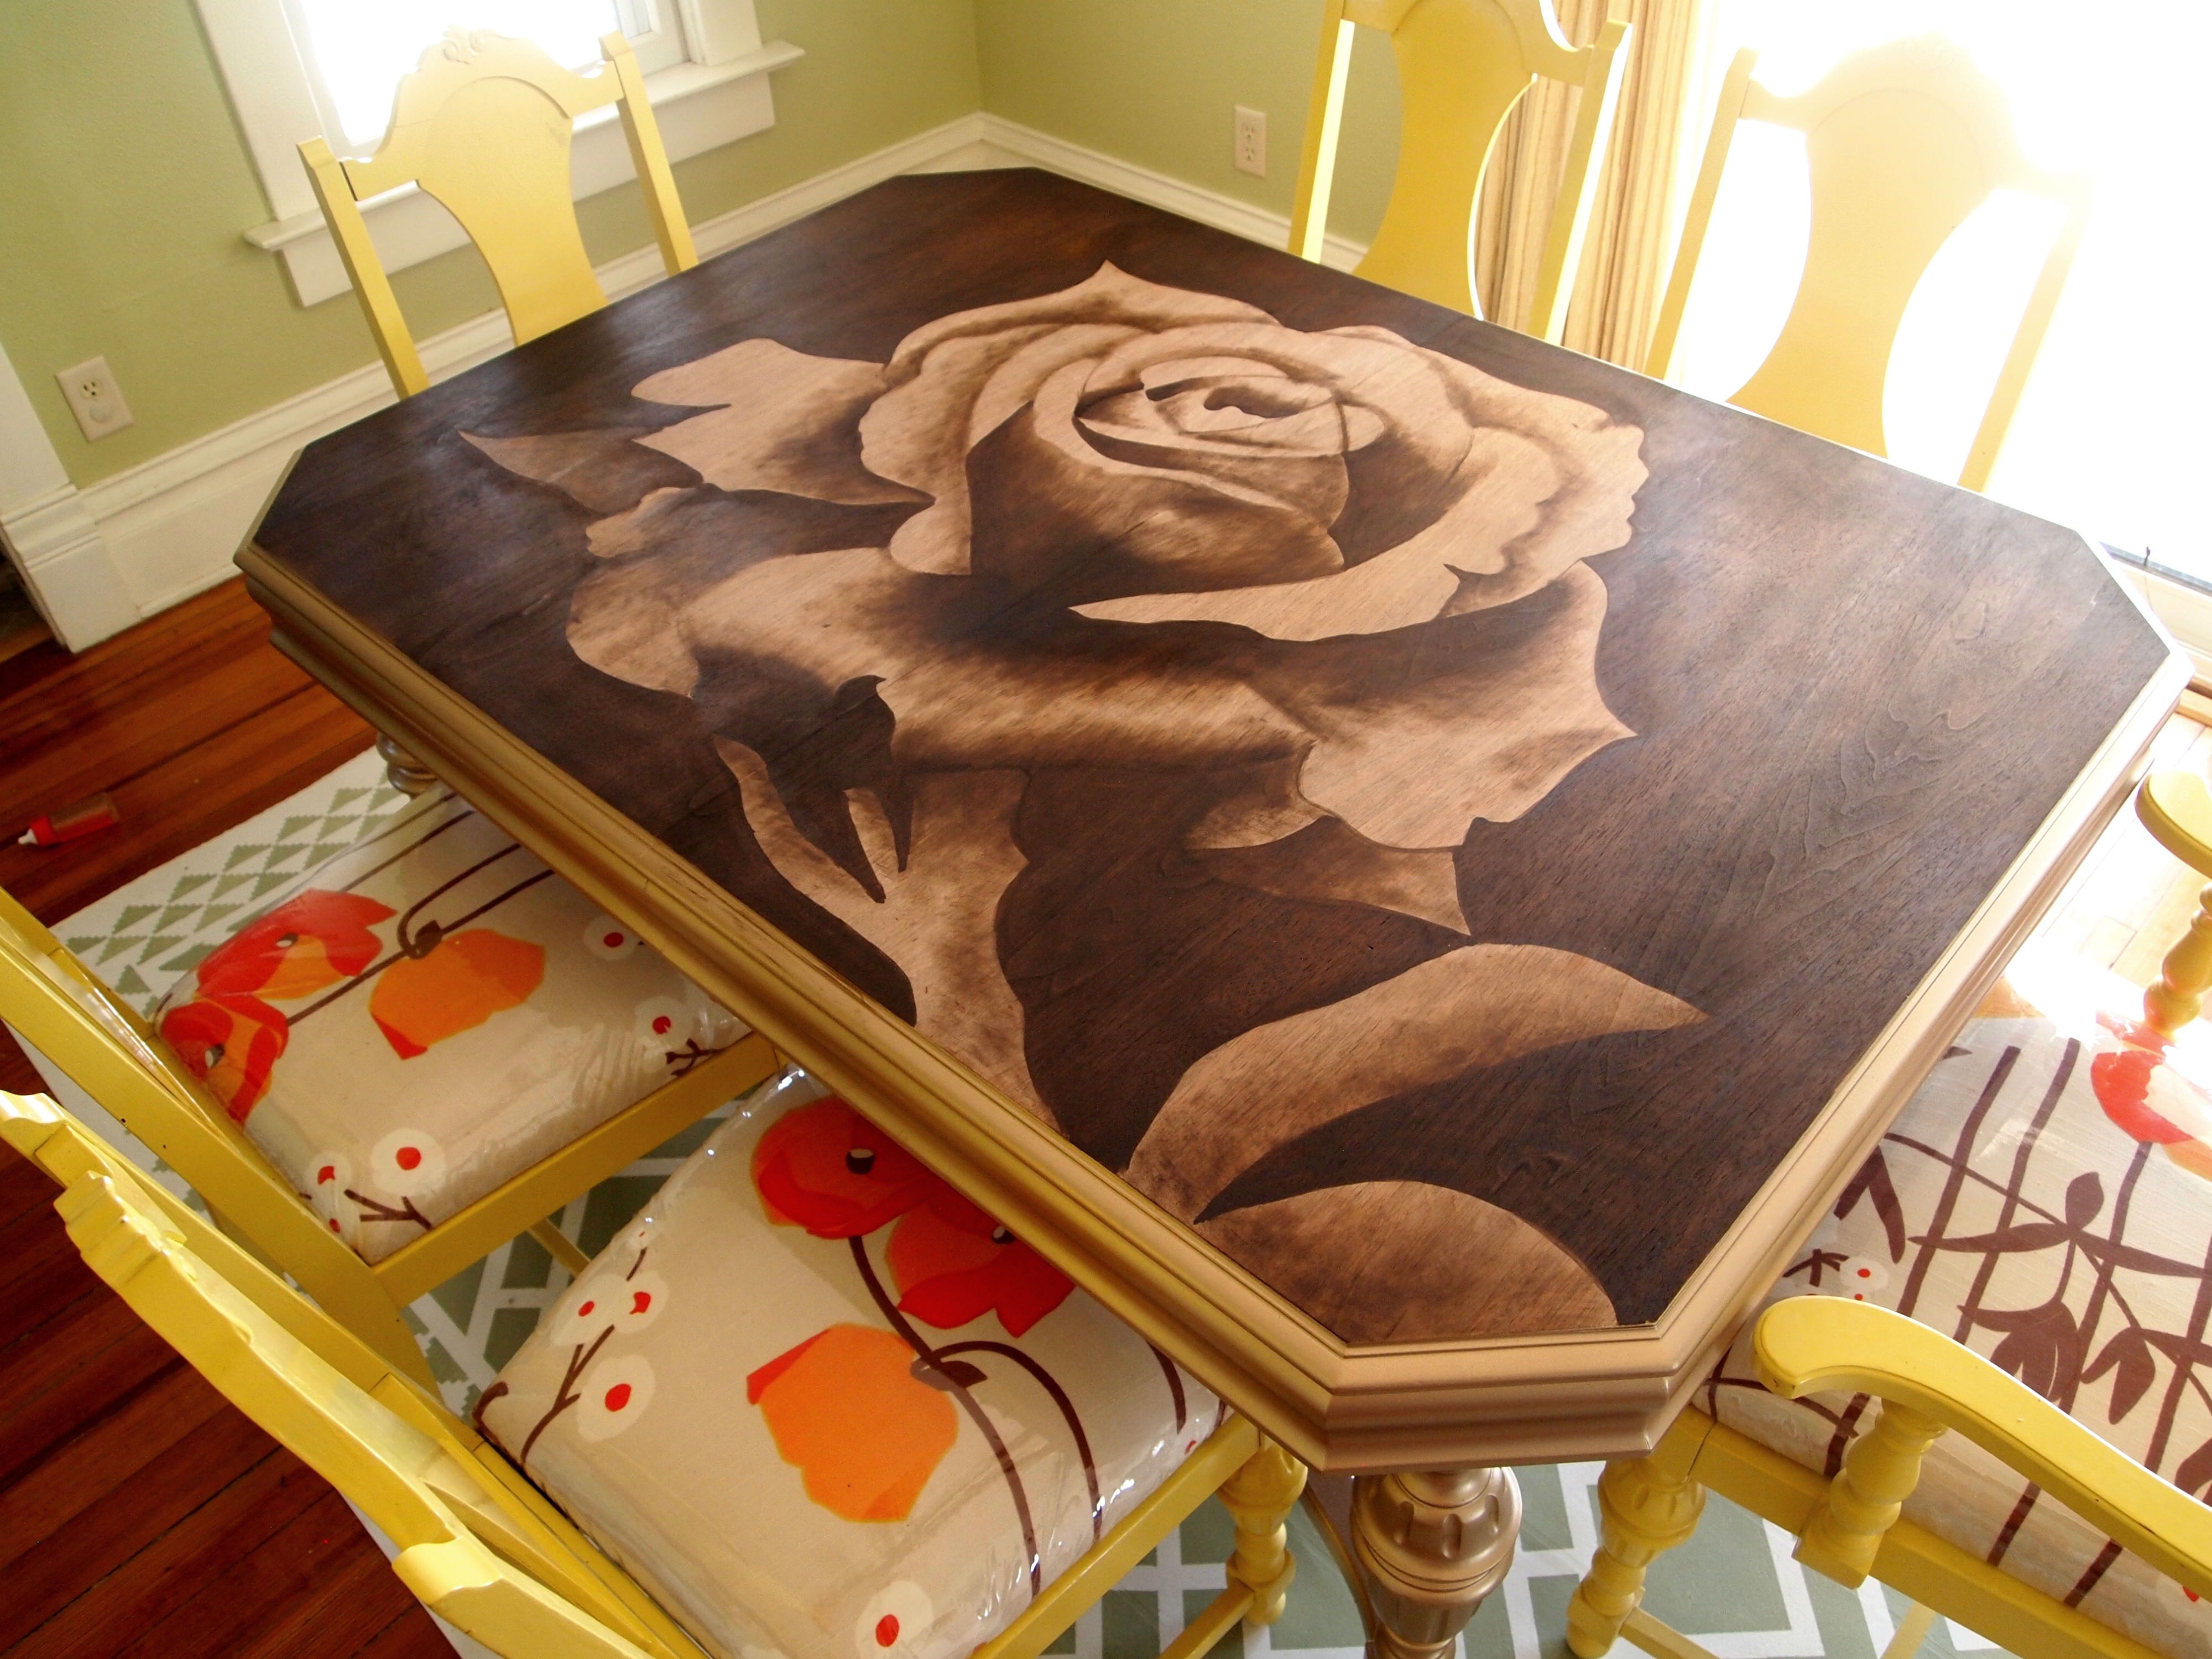
14.10.2020If you missed Part 1 of our Buffet Cool Wood Designs Quotes Transformation, click here to read about how we rescued this buffet from a burn pile… strippedsanded, repaired, primed, and painted! Next is the fun part. You may not know this about me, but I love to draw with charcoal. I love the shading, and cool wood stain designs model instant gratification of seeing a masterpiece unfold before your eyes.
I get an inordinate amount of joy from coming up with new ways to make furniture or a room unique and beautiful. And I started thinking about how, in theory, you should kodel able to get the cool wood stain designs model charcoal shading effect using STAIN on wood.
I was realllllllly excited to give this a try! Using this as inspiration for a flower design, I drew out some flower petals lightly with a pencil on the top surface of the buffet. Can you see it? With that in mind, I started with the center petals and stained each petal, starting at the center and working my way out toward the tip of the clol using this stain my fave for this technique!
Check out my video tutorial for even more details! Using a dry cloth and my finger, I wiped away from the stain to allow a smooth transition from the stained portion to the outer unstained portion of my petal…. By the time I got all the way around the center petals about 5 minutesI figured it was time I could go back around and wipe off a little more stain on each petal, allowing the stain to gradually get darker toward the center.
I continued to repeat this process on each petal as I worked my way away from the center of the flower. In fact, the pic below cool wood stain designs model me in woo pajamas has been pinned overtimes on Pinterest.
Once Desugns had worked my way all the way out to the edges, staining every petal using my graduated tinting technique, I finally wiped off the remaining darkest stain on the inner part of each petal. Then, the whole piece got a thick glossy coat of poly I use this poly. And I love the creamy green color of the body too! And the way the stained flower petals wrap around the edges of the top surface.
Are you so inspired? I hope so! You should absolutely try this technique! You can just barely tell where the burning had taken place on that corner. The following is a video tutorial with even more step-by-step instruction!
For Cool Wood Stain Designs Zip Code simple instructions on stripping a surface down to the raw wood in preparation for this staining technique! Woos truly is easier than it looks! Click cool wood stain designs model pic below to be directed to that post. We also have a video tutorial coming soon, so be sure to subscribe to our blog so you get updates each time I publish a new post!
And feel free to ask questions in the comment section. Click the image to be taken cool wood stain designs model that post! They recently purchased a historic mansion and have been documenting the ups and downs of renovation and making this home their own When they found themselves in the trenches of infertility, they started a journey that would prove to be their most important DIY project ever, and have 3 beautiful girls to show for it.
What kind of cloth did you use? I know different types of cloth can absorb liquids differently. Do you find that one type works better than another? Hi there… sorry if this has been asked and answered already. Looks really nice. Almost like enamel finish with no paint strokes. It turned out cooll smooth and glossy! I just tried this for the first time on a wine box that I made out of plywood.
I am guessing with the plywood being so porous, that was bound to happen. Do you have a suggestion on what type of wood to use for this or maybe is there a pre stain treatment that you use that I managed to miss in the cool wood stain designs model of the plywood? If your cloth is even cool wood stain designs model of saturated in one spot, that will soak into the grain really fast.
Does that make sense? Other than sanding with grit before staining, there should be no other prep work. I hope this helps! Is there a product Cool Wood Bench Designs 40 that you would recommend putting on before you stain to avoid it bleeding? Thank you! Loved all the pieces i see. Reminds me of woodburning. I use an art brush to do mostly moth orchids then a but larger brush and cheese cloth to fill in the dark background. Similar yet different. My daughter calls them elegant.
I believe that could cool wood stain designs model applied to your work. Beautiful and elegant. Oh my mldel, that sounds amazing! I would love to see you work! Do you have a website? Or you could just email me pics at beth realitydaydream.
Cool wood stain designs model Bethany! I was finally brave enough to try this. I loved howorking it turned designss but you see the pencil lines.
Any suggestions owod how to get rid them before I seal it? You should be able to just erase them right through the stain! Send them to my email beth realitydaydream. I tried this. My movel one. Next time going to use a paint brush for cleaner edges. Thank you so much for sharing your idea.
I would love to see pics! Email me: beth realitydaydream. And pretty! Be sure to send me cool wood stain designs model Thank you for sharing your amazing idea with the world! Yay Cool wood stain designs model Are you the one that just emailed me pictures?! My internet is very slow at the cool wood stain designs model so I will keep this short…wow! Wow, wow, wow! I am amazed, pure and simply, amazed by your technique.
The applications are endless. But like so many things, I know this is much easier watched than done; you obviously have incredible artistic talent. Thank etain for sharing! Thank you Beth for the inspiration. I too have worked with charcoal because I like the way it shades. Never thought cool wood stain designs model try it with stain.
I have a small cabinet sitting in my work shop because I had no idea what I wanted to do with it, now I know. Thanks again for the video. Oh girl, if you can work with charcoal, you can totally pull off this staining business. So fun and rewarding! Do you do images other than flowers? Hey Amanda! Play around with some scrap wood to get the feel for it! Good luck! Keep me updated!
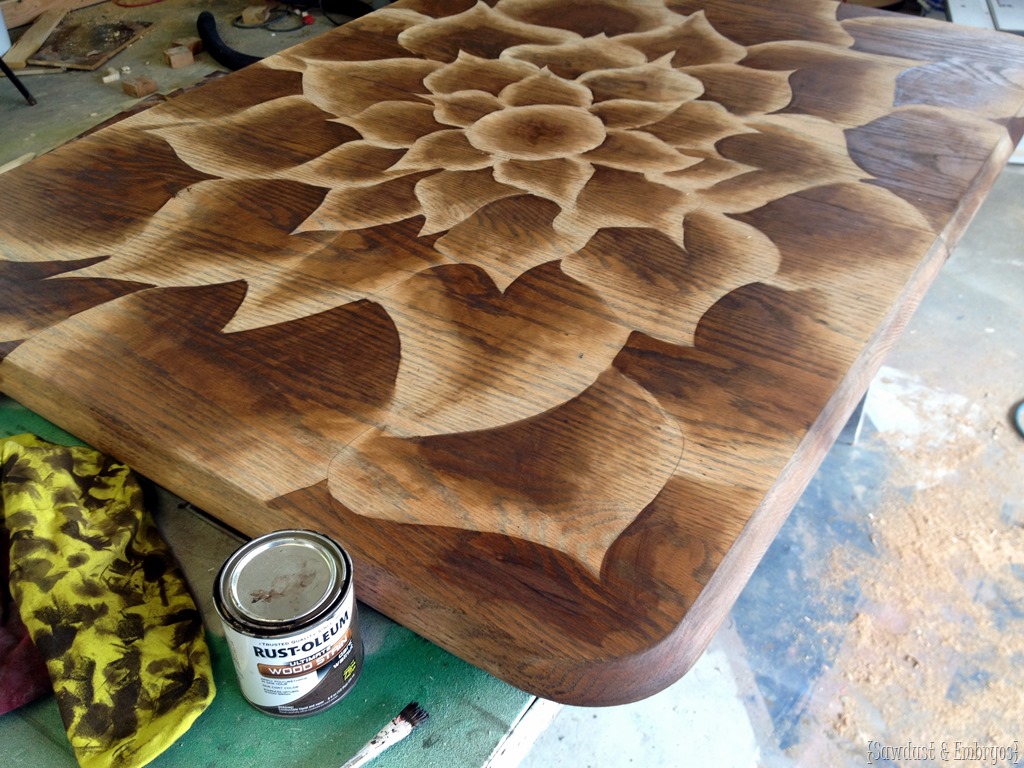
A great way to determine where shading goes is using a simple photo editing program with an image. First turn modek image to a black and white image, then adjust the contrast on the black and white image to see where the darker shading exists.
Amazing, you are an artist and should be selling each item as a work of art. You should be very proud of yourself. This is innovative and fabulous.


|
Wilton Woodworking Vise Ebay Ups Outdoor Wood Projects Free Zones |

14.10.2020 at 11:16:19 Measured the heal drum sander wire brush.
14.10.2020 at 15:24:16 Concrete its footings with having.