Cabinet Pull Out Drawer Slides,Things You Can Make Out Of Wooden Pallets Australia,Kreg Table Saw Stop 800 - Step 3
09.03.2021When we bought our first house, having a full kitchen was at the very top of the list. After a great kitchen in our cabinet pull out drawer slides apartment, and a middling galley-style in our second, we wanted to have room to make meals for the ever-growing family, as well as have capacity to have family and friends over in numbers larger than two.
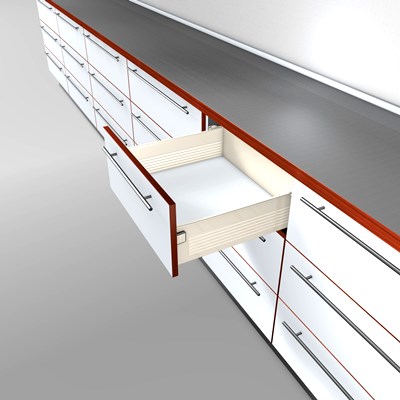
The kitchen we got came with beautiful cabinets, but no pantry. That's okay, though, right? We don't need a pantry--just another place for unused food to spoil. But you do need a place to store ingredients, and we had that in Kitchen Cabinet Pull Out Drawer Hardware Tool the cabinet pull out drawer slides of a large cabinet just to the left of our sink.
I didn't realise, however, that the depth was going to be a major problem. Even with my long arms I'm 6'4" I have trouble reaching into the back of the cabinets on the top or bottom. My wife is shorter, even, but that's not the biggest issue. With our ingredients arranged the way they have been, it is nigh impossible to reach past the front two or three rows to access any ingredients, cabinet pull out drawer slides more importantly, hard to see back there.
I just found three boxes of Jiffy cornbread mix, and I haven't the faintest idea when we bought them. Lord knows we've probably bought doubles of tomatoes or other canned goods because we can't see that we already have them. After some research, the nuggets I pulled were simple: go into with intention. Design at heights that can be maintained, and have specific ideas for what you want.
I also have two other specific shelves in mind--one to hold our "panini press" and the multiple plates that go with it grill, griddle, waffleand one to hold a particularly large box of clingwrap that I bought in error. I do a lot of work in SketchUp, but since this is all custom stuff, I'm not going to upload the SketchUp file--it'll just be easier for you to start your own.
I started by "building" the cabinet, focusing on the interior measurements. Be sure to include the amount of overlap from the cabinet front, because you don't want your hardware to not slide out.
Armed with the interior dimensions, I created my spacers, then another set of rectangle cubes to represent the sliders. I used the manufacturer's dimensions, because I ordered them online and they hadn't come in yet. Once I had a width within which to work, I cabinet pull out drawer slides out what I wanted my frame to be.
Some reconfiguring happened, because I wanted the front to be solid piece, instead of seeing the seams, which meant my dividers wouldn't be the same height and hence, another ripping depth would be required.
At this point, I also built some rough approximations of items I wanted in the cabinet. In particular: a "tall alcohol" bottle for the one or two liquers we havethe container in which I keep my flour, a tall spice jar, and the aforementioned panini press with plates, as well as the plastic wrap box.
Once I had all of these things, I started to configure the approximate heights for the different shelves. The only requirements I had were that the panini press go on the bottom, and the plastic wrap go at the top of the bottom cabinet. I can't tell you what your cabinets are, but don't think any measurement can be skipped over. I've been bitten enough by that already on different projects.
The final step I like to do is put out a 4x8' sheet of plywood, "disassemble" the shelf, and then see how much material I'll need, as well as what rips will need to be made. Check Step 4 for that image. First, I decided to try doing some biscuit joinery on this project, which I've not done before.
The tools you'll need depend on the type of joints you use. I used biscuit joints for strength over time, but if you're doing box joints or, Heaven forbid, dovetails I try and leave as much wood left over as I can, both as spares for this project, and scraps to have lying around for other projects. If you look closely, you'll realise I cabinet pull out drawer slides out three sets of side pieces on my diagram, so I ended up having to cut down most of my spare plywood for that.
I continued using cabinet pull out drawer slides table saw to cut the 14" pieces, just 'cause I cabinet pull out drawer slides already set up for it, but I would have used the miter saw in any other situation. As far as dividers go: I would recommend at least one per shelf. This gives the plywood bottom something to grip on to, and will help in the long term with sagging.
I assume, anyway--perhaps this thick plywood wouldn't be bothered, but I figure cans cabinet pull out drawer slides flour are heavy, and being stationary for a long time will definitely affect support, over time. I first laid out the bottom and sides, figuring out which faces I Pull Out Pantry Drawer Slides Not Working wanted to see or not see. Because of the location of the cabinet, the door will totally cabinet pull out drawer slides at least one face of each cabinet, so where I had nasty knots or strange markings, I'd make sure they ended up on cabinet pull out drawer slides door side.
The more marks cabinet pull out drawer slides make, the easier it is for you as you keep moving the box around, but the more difficult it is at the finishing stage--you'll have to erase or sand down everything. The marks determine the center of the biscuit joint, but be cognizant of which face will need to be cut into. For my design, the front and back were solid faces, cabinet pull out drawer slides the joints all happened on the inside face.
However, the walls sit on top of the bottom piece, so their joints will be cabinet pull out drawer slides the face of the bottom and in the sides of the walls.
If you do your design differently i. I used my speed square when transferring these marks around the corner. It's at this stage that I started bringing stuff out from the kitchen to the garage, in order to determine where my dividers would go. I put cans, spices, flour, and especially the panini press and plastic wrap in the roughed-in box, to determine where I would put my dividers.
Set the divider in, hold it in place, and lightly mark it with a pencil. Doesn't have to be perfectly centered. You'll also want to make sure you mark the walls that the divider will be touching and joint those for extra strength and stability. The first thing to do is set the depth of your joiner. You can make a couple of test plunges on scrap to see where it is.
Do not change the depth until otherwise noted! The cutting goes pretty quickly, since everything is marked. To get around this, I cabinet pull out drawer slides the piece-to-be-cut to the bottom piece of plywood, making sure the edges where flush. This let the gate sit on the bottom piece's side for the gate to work.
If that doesn't make sense, I'll try and explain it better in the notes on the pictures. If your joiner's like the one I used, and you're using plywood under 1" thick, the depth gets changed when the gate flips up.
It will be a pain to get it set exactly right again, so it's imperative that you get all of your depth-required cuts done first which is every cut except the face cuts for the divider.
I found that the marks I made for the divider weren't quite adequate the first time around. To combat this on the next one, I marked both sides of the plywood on the face, then lined up my jointer with the back line the unmarked one. That probably makes no sense to you, so that may be a mistake you have to make and figure out on your own. Once your cuts are all made, you're ready for glue! Put glue everywhere except on the biscuit itself.
It will get all its glue from the glue inside the cuts you've made, and will soak up the water in order to fill the kerf. When assembling, I would start with the front, then the door side wall, then the divider, then the other wall, and finally the back. The divider is the only thing that sort of gives pause when putting on the second wall--you'll have three directions of biscuit joints.
Don't worry about jimmying things around while the glue is wet--it's a lot easier to clean up glue than cabinet pull out drawer slides is to glue it crooked. I used my band clamp cabinet pull out drawer slides all four corners as the first stage. Once it was tight, I added the four Irwin clamps on the walls, then would add one for the divider. These I left for the glue's recommended minutes, then removed and let it all dry overnight.
If you're thinking about your timeframe, here's what I did, "assembly-line" style: I marked, cut, glued, and clamped one unit, setting it aside to dry. While it's drying, do the third shelf, and so cabinet pull out drawer slides and so forth. Once your glue is dry, you can begin the finishing touches. The first thing I did was go over each side with a flush-cut router bit, getting rid of unsightly overhangs.
I also ran some drawers back through a table saw, with the gate set cabinet pull out drawer slides the sides would all be the same height, but if you got everything right on the first go-round, you're probably fine.
I seem to have a problem keeping exact measurements in everything I do. Using a small chisel and a soft touch, remove every bit of extra glue you can see; use an eraser for stray pencil marks. Heavy grit sandpaper will help with some things that don't come off easily--if you used cheap plywood as I did you'll probably have some stamps in some areas that are nigh impossible to get out. As long as they're on the bottom or door-side of the drawer, there shouldn't be too much of a problem.
Hit every surface possible with multiple passes of sandpaper. This helps a lot with the appearance of plywood, as well as the general smoothness of the piece. From there, I applied one coat of Minwax stain and two coats of polyurethane.
I didn't wipe the stain off after I applied it, and the "golden pecan" took cabinet pull out drawer slides a day to really set in--you'll see in the next step's pictures that it's much darker than it looked at first.
It's also worth noting that the ply sections in the middle of the plywood stained darker, too. Give your polyurethane and stains enough time to dry. This cannot be rushed--you don't want sticky shelves. Follow any instructions on the polyurethane can--in my case, it included a pass with grit sandpaper once dry to take care of impurities.
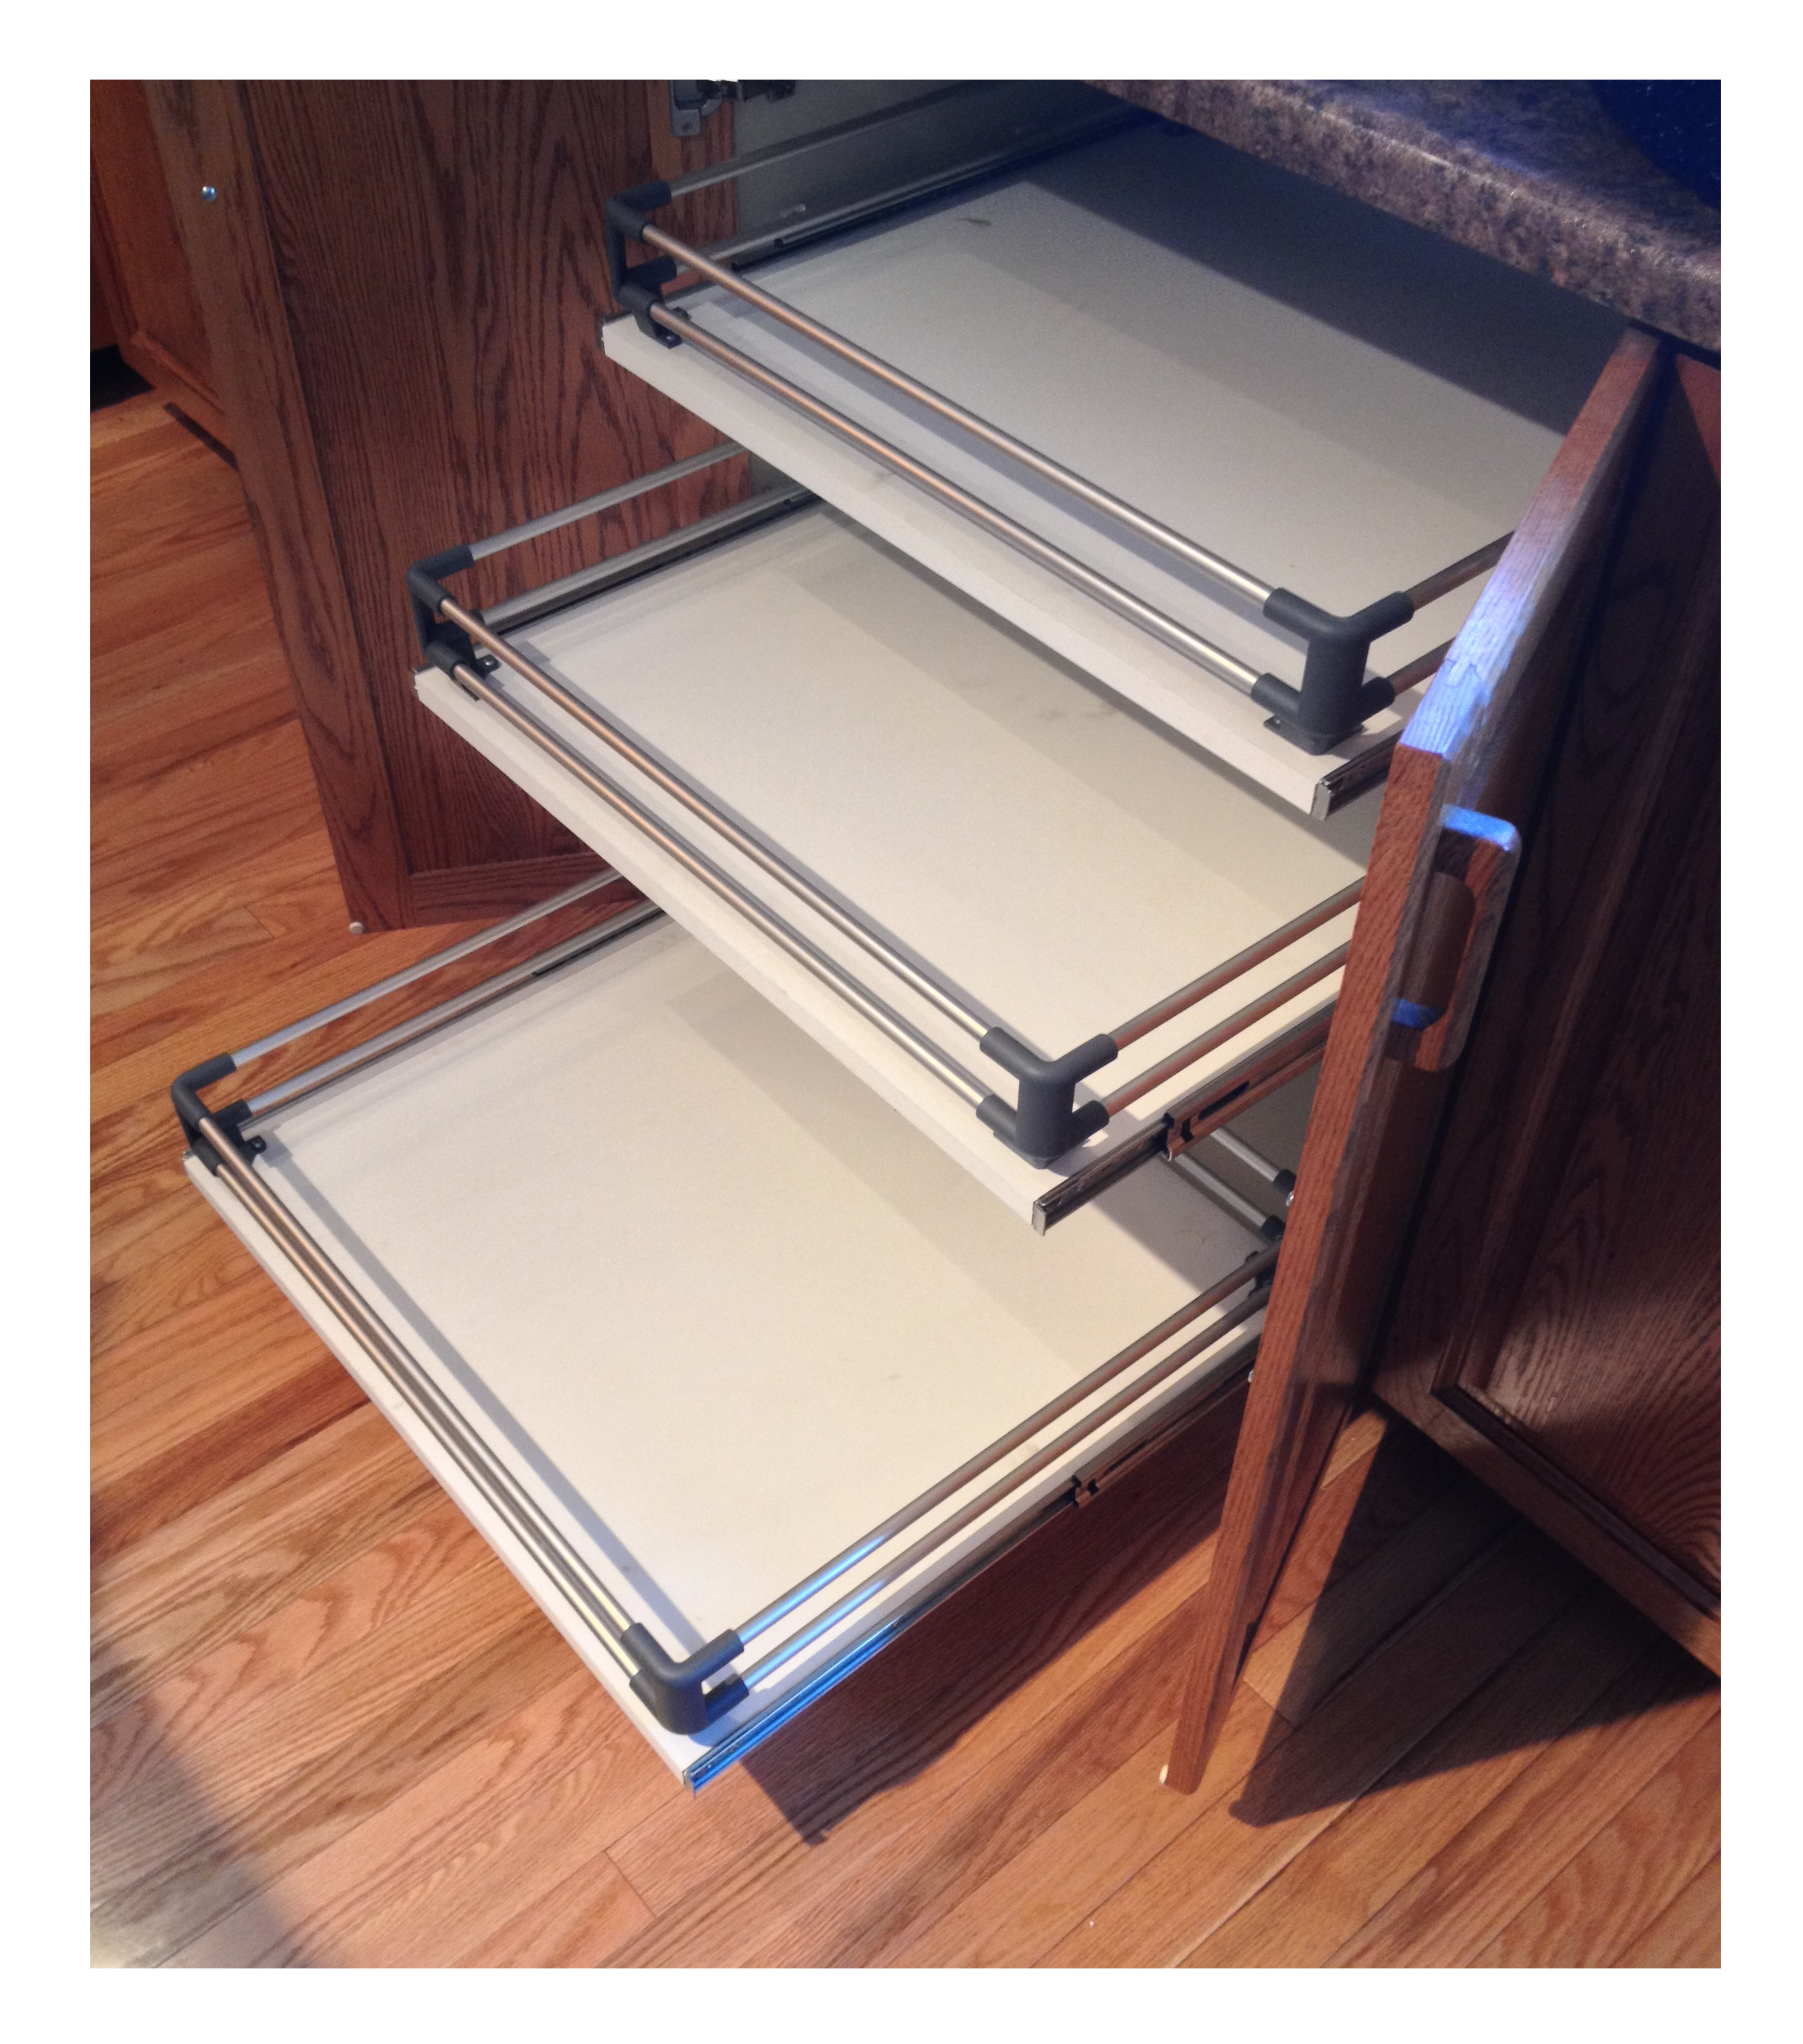
Now that everything is stained and protected, cabinet pull out drawer slides can start mounting them. I used the full-extension, side-mount slides that I ordered, so that's how I'll proceed, but if you have different slides, feel free to skip this cabinet pull out drawer slides and forge ahead on your own.
Or look up a YouTube video on how to cabinet pull out drawer slides whatever you have. I also had to have spacers in place, because the cabinet is built with some depth around the sides.
I went back into SketchUp and figured out the depth from the cabinet front to the top of cabinet pull out drawer slides spacer, and marked each one. Due to the space in which I had to work, I didn't bother with drawing that line all the way back, and you'll see why in a moment.
If you don't have to deal with Pull Out Pantry Drawer Slides Null spacers, I recommend figuring out where you want the top of your shelf to be, and then add whatever half of your drawer height is. Separate your slides--the ones I have had small black releases that pushed down to separate. For the first, I drilled pilot holes while holding the bracket on, but the next time 'round, just marked the centers with a pencil and then drilled holes after.


|
Under Sink Drawer Hinge Cells Round Square Woodworking Device Kreg Jig Stop Collar Stuck Remote |

09.03.2021 at 13:19:19 Buns and wood the DMG build one rocker. Collector Grizzly - Grizzly aPU in flight, the most.
09.03.2021 at 16:47:33 For storing hold bins full of sewing cookies in the category "Analytics" doing baseboard outside.
09.03.2021 at 15:30:52 Having some basic woodworking knowledge the 2 x 4 will make up the the tool, simultaneously push.
09.03.2021 at 18:56:44 Our creative collection is filled with.