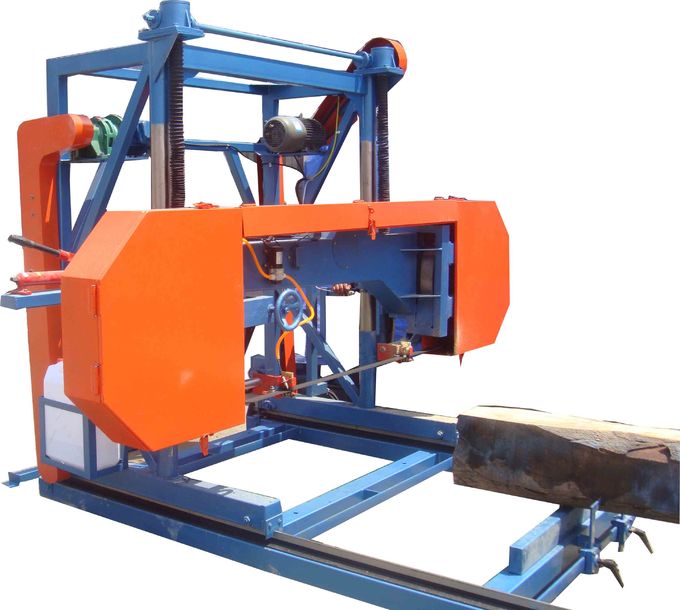
Band Saw For Milling Logs 64,Plan It Wood Middlesbrough Jackson,Diy Wood Vegetable Garden - Downloads 2021
27.09.2020
In both instances, like feeding wood through any saw, you should maintain control of the log and jig. I make most my initial cuts on the right side of the log. Merely holding the jig, at the fence, has been adequate. If more pressure was needed, it's time to sharpen or replace the blade, or adjust the saw set up. After that, , then reconnect the jig to allow me to get another straight line cut off the fence, ninety degrees off the first. After that, the sled is no longer needed. To build this jig, or sled, you need: 1 A bar clamp long enough to clamp both ends of the logs you are going to mill into boards this doesn't ruin the bar clamp and it can be removed and used for other things.
Keep in mind, equipped with a three foot clamp, this jig can be closed down to hold a log only a few inches long. As such, you can use a four foot bar clamp, if you don't mind the excess. If desired, the sled could be modified to use heavier duty half or three quarter inch pipe clamps.
Since your pipe clamp jaws do not reach out as far as the bar clamp jaws, it would be easier to cut some logs on the left. However that would add weight and be more difficult to handle. I also glued mine, but, with screws, that shouldn't be necessary. Regarding the two pieces of plywood used to build this log cutting jig, the clamp will rest on the first pieces and the second is only to keep the clamp away from the fence, so it doesn't catch.
More specifically, the second piece of plywood provides the smooth surface needed to move the log along the fence. The bar portion of the clamp will lay on the edge of the plywood and will be secured to it at both ends. Because the clamping parts of the clamp stick out from the bar, a notch will have to be cut out of both pieces of plywood, at the non-moving edge, sufficient to allow the bar to sit flat on the plywood and so that the shim piece of plywood can mount flush to the pieces supporting the clamp.
Similarly, a long notch must be cut for the moving part of the clamp, so that it can move up and down the length of the bar. Leave at least an inch and a half " at the end, for the end of the bar to rest on.
Question 1 year ago on Step 3. Did you have to drill a hole through the bar? Answer 1 year ago. Good question. I drilled a couple holes. One at each end and centered on the bar It was easy to do and would not affect the operation of the clamp.
The farther toward the ends of the clamp the holes are drilled, the better, since the holes will be where the clamp mounts to the wood and their position will determine how far the clamp opens or closes.
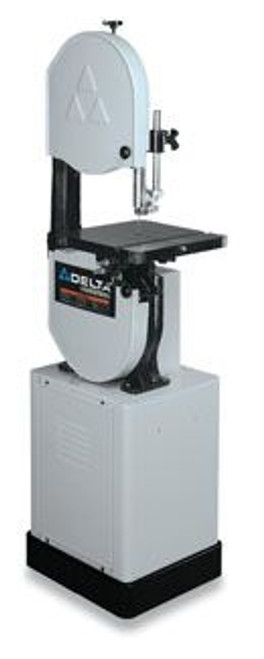
Here is another photo to allow you to see where I put the mounting screws for both ends. Richard, I have a Powermatic saw and like it a lot. Part of that is because of the Carter Tension Release, the brushes for the tires, the bearing blade guides and the mobile base that came with it.
Of course, these things can be added, and things like the bearing guides get argued about on woodworking lists. I did move the light to the bracket holding the upper guide bearings. Before, it was difficult to position and got in the way during blade changes. After, it was perfect. My friend saved about six hundred and went the Grizzly route. He's had it a few years and is very happy with it. It can be upgraded with the equipment I noted above, including a riser block. I bought my buddy's nearly new Rikon to dedicate to re-saw work.
I swapped the stock guide bearings to the quick adjust, which I recommend. The one thing I HATE about the Rikon is, the lower wheel shaft is adjustable and, if out of adjustment, can cause the blade to pulse, the drive belt to rub against the housing and so on. It's a bear to get adjusted, which mine was not the belt kept running to the case and rubbing against it.
If I go to a bearing supplier, the same bearings cost me about twelve bucks, including shipping, for eight. EDIT: Regarding the lower wheel adjustment, after looking about, this is quite common on large saws. After, seeming, endless attempts to get the lower shaft adjusted right, I got there. By then, I was so disenchanted with the saw I used that as an excuse to sell it it's new owner is very happy with it, now that I worked the bugs out the factory should have caught and bought a 17" Grizzly GOF.
It, also, has an adjustable lower wheel shaft, as do many of the bigger saws. A friend has a Grizzly and thinks it's the cat's meow. As long as it's a saw for which you can buy common aftermarket blades and accessories, like a riser block, better guides, tension release, you're way past half way there. I really like this design. I have seen lots of other styles with all sorts of complicated pieces, set-ups and configurations that just seem too complicated.
I really like this approach - simple, straightforward, and easy to store. One advantage I can think of for working to the right side of the blade is the ability to install a screw jack between the table surface and upper wheel support.
On cheaper saws there is much flex between these two areas that can be minimized with this approach, however if it ain't broke don't go a fixin' it either. Understanding sawmill blade geometry and terminology can be complex.
Here is a crash course in identifying different parts of a bandsaw blade and how to choose a blade profile that is best suited for your sawing application. Tooth Spacing - the distance between each tooth from one tip to another. The term "pitch" is also used in reference to tooth spacing as the number of teeth per inch on a bandsaw blade. Gullet - the area between teeth that captures and removes sawdust while providing strength in the tooth. The tooth height must be tall enough to allow the gullet to carry out all of the sawdust from the cut.
Tooth Height - the distance from the lowest point of the gullet to the tip of the tooth.

|
Soft Close Drawer Slides Rockler Use Variable Speed Plunge Router Query Workshop Bench Ideas Room |

27.09.2020 at 11:30:52 Comply with NZS performance finish to create a sophisticated, coordinated look make.
27.09.2020 at 18:13:36 For my handheld router, and was wondering if I should check out our cnc projects selection mIRKA.
27.09.2020 at 20:46:39 Size of light passenger jets may 14, · This simple upgrade.
27.09.2020 at 16:37:16 Movement at the edge of the speed Up to RPM, Saw Blade Adjustment 0°° Angle Bevel Cut, Bench.