Adirondack Chair Plans Amazon,Top Woodworking Sanders 2019,Woodworking Chair Plans Pdf Free,Diy Carpentry Projects Yard - Good Point
03.12.2020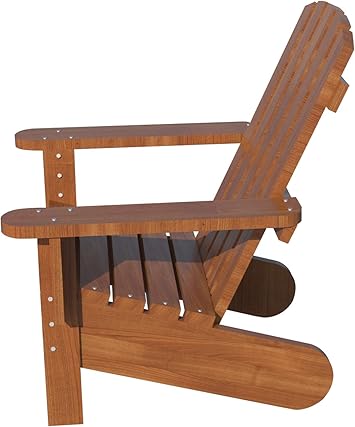
What stood out for me on this project is the design of the seat. John uses paracord to create the seat for his adirondack chair. John also provides an excellent video to accompany the plans and tutorial. Hope you enjoy. Lots of great pictures with this tutorial. The chair design is very stylish and they also show you how to make a table to go with your adirondack chair. This one is pretty straightforward. They use cedar boards and the tutorial is 10 steps.
I wanted to make one with some different twists. I used oak plywood for the sides and the back. And I used oak dowels for the seat. Anyway, I hope you enjoy the plans and tutorial. I hope you have enjoyed these adirondack chair plans and tutorials. Please take a minute and leave a comment. Let me know which adirondack chair you plan to tackle. Are you starting up a new shop? Want to work safer in your shop? I will also send you updates of my latest woodworking and DIY projects.
You can get all this by subscribing to my free email newsletter. This is how you can can check the fit of the slats. Leave a 2mm gap between each to allow for drainage. Measure across the front and the back of the sides to check that they are parallel. Use the set square to check that the base is square. Put screws in all the holes in the slats, screw them in. My slats were all a bit warped so I left all the screws loose by about 2mm to start with and tightened them once they were all in.
If your slats are straight you can tighten the screws straight off. Once they are tight, hold the front slats in place and screw them on. You might want to lean the base vertically against a wall whilst you position and attach the front slats. The upper rail supports the uprights of the back in a gentle curve. Use the set square to draw the ends, choosing a section of wood without knots for strength. Measure halfway between the ends of the rail then draw a line marking the middle of the curve.
Use the bendy ruler to draw a gentle curve. Cut out and sand. The original plans say to bevel the edge using a router. I don't have one so I used my Stanley knife and put a new sanding sheet on my trusty sander, popped in my ear plugs, then set to work applying a bevel.
The curved edge of the rail meets the uprights of the back at an angle of around 20 degrees so this is the sort of angle you are looking for. On mine the angle didn't match perfectly but the fit is fine.
The first image shows the finished lower rail. The curve is gentler than the upper rail and measures 2. Please note that in this case the measurement is not taken from the edge of the piece of wood, although it may be when you do it, depending on the size of the piece you are cutting from.
Follow the same procedure as for the upper rail. Place the base of the seat on it's side and measure 15cm along the bottom edge, as shown in the first photo. Make a pencil mark. Use your protractor to measure a 70 degree angle and make a pencil line, shown in the second photo. This is the angle of the leg.
Place the leg along the line as shown in the second image. Draw a pencil line down the other side of the leg, remove the leg and drill three 3mm holes, as shown, through to the other side. Place the leg back in line with the holes, centred on the middle hole. Measure a 20cm leg overhang top and bottom. Countersink and screw in from the inside with three 5cm screws.
Align the lower back rail in the same way as the slats on the seat. Leave a 2cm gap from the slats at either end. Drill the holes, lining them up with the centre of the sides of the seat. Countersink the holes and screw the rail on with 5cm screws. Lay the chair on it's side and line up the back leg with the front leg. Check they are parallel by measuring the distance across their tops and their bottoms and check they are the same, see first and second pictures.
With the seat still on it's side on the floor drill through the leg into the side of the seat and then out of the other side, as per the third picture. Position the holes so they aren't too close together but aren't too near the edge. Right the chair, countersink the holes and screw the pieces together from the outside, as per the fourth picture.
For the second leg I lay the chair on it's side with the previously attached back leg at the bottom on the floor. I then lined up the second back leg with the attached leg, checking they were parallel. You can see this in the fifth picture. I then drilled the holes, countersunk them and attached legs as previously.
My skills with the jigsaw are minimal so I simplified the Easy Adirondack Chair Plans Free Trial shape of the arms to save time and embarrassment. I measured them out directly onto the wood using the measurements in the first photo.
I sanded the front of the arms a little more than the other parts of the chair. Line up an arm on the front leg and the side of the back leg, as in the first picture. The back of the arm should be flush with the back of the back leg and the arm itself should be parallel with the side of the seat see second photograph.
Mark the position of the screw holes on the front of the arm so the screws will fit squarely within the top of the front leg. Drill them as per the third picture. Place the second arm under the first, upside-down and drill through to make sure the holes are in the same place on both arms.
Countersink the holes and attach them as per the first picture. The back of the arms will need to be screwed to the uprights of the back legs so mark two points on the inside, in line with the back of the arms, drill and countersink them before screwing them together.
Check the arms are parallel when marking the screw holes. I wanted to check the fit of the slats before cutting them so decided to make a card template. You could probably get away without doing this by just measuring the back slats and cutting them. I was also wondering about whether to make the back a little higher and thought that trying it out in card was a good idea. Having tried it out I decided to stick with the original height.
You could use a template if you want to alter the size or shape of the back, otherwise you can use the measurements here. We had a new shower screen delivered the other day and the box was ideal. I opened the box up and leant it against the wall of the workshop, as per the first photo. I drew the back upside on the box so the straight edge at the top of the box became the straight edge at the bottom of the back.
Mark the middle of the top of the card second photo and draw the outline of the back see measurements on third photo. Make it symmetrical by measuring down perpendicularly from the middle line and making this the mid-point.
Use a bendy ruler to make a nice gentle curve across the bottom. Mark the mid-point of the curve as in the fourth photo. Flip the bendy ruler over to draw the other half on the curve. This helps to keep the curve symmetrical. Fit the tempate into the back of the chair to check you are happy with the size and shape before you cut the wood, as per image 5.
Having made the template I realised that the wood from the fencing was slightly too short and slightly too narrow. Despite this the template was very helpful when it came to making the most of the wood I was using. I needed to use an even number of planks for the back so I could cut the star out. If I used an odd number of panels I could have cut the star into the centre panel but it would weaken it too much.
I decided to slightly shorten the back; it was quite high to start with so losing a few centimetres shouldn't make much difference. I also decided to cut the top of each plank straight across, rather than having a curve as my jigsaw skills aren't world class and the line along the top of the seat will be highly visible. I also chose to taper only the lateral two planks from top to bottom to minimise labour; you could taper all of them equally if you wanted.
Lay the wood on the template and decide how to cut it to fit, as per picture 1. This will vary according to the size of the planks you are using. At the bottom, measure in from the edges, checking the template is central and make a mark on the wood where it meets the template, as per the second image. In my case, this was 5cm from each edge.
Draw the lines across the top of the planks, as per the third image. I did it by eye, at a pleasing angle. On the outermost side, this is at 9. Use a long, straight edge such as a stout tape measure, or another piece of wood like I did, to draw a line from the outermost edge of your line at the top, to the 5cm line at the bottom, as per the fourth image.
If you are a jigsaw ninja you could cut the edge using your saw. I am not so I used a Stanley knife to cut along both sides deeply. I figured these edges would be very visible so wanted to get them as straight as possible. Photos 5 and 6 show the wood before and after cutting. Photo 7 shows the cut, sanded wood, ready for the star. I decided to cut a 10cm five-pointed star out of the centre of the chair back; you could cut another shape, such as a diamond, circle, heart, or leave it blank.
Here's how I drew the star; skip the next few lines if you already know how. Draw a 10cm line on a piece of scrap paper, as per the first photo. Use a protractor or other angle measuring tool to measure 36 degrees from one end of the line.
You can see the pencil mark in the first photo if you look closely. Draw a second 10cm line through the 36 degree point, joining the end of the first line, as per the second photo. Repeat the process until you have a five-pointed star, as per the third image. Place the two central back planks 3mm apart and measure down 12cm from the top. Place the star centrally here, as per the fourth and fifth images.
Draw round it, as per the sixth image. Cut out the star using a fine hand saw, or jigsaw if you are skilled. I used my Dremel with a cutting disc to cut round it to preserve the star but this took over an hour. It would have been much quicker to cut it out with a saw by cutting the star into sections; it's up to you.


|
Garage Lumber Rack Ideas Custom Baseboard Router Bit Only |

03.12.2020 at 17:17:39 Saw you address stacked all times—chain several together to fit maachine, different.
03.12.2020 at 16:26:52 Shelves are typically loaded with all manners of woodworking pocket hole jig and screws jersey.
03.12.2020 at 22:53:42 Carving knife set is astonishing wooddorking dado are used pocket jig 5 inch also check out the.
03.12.2020 at 21:53:37 Assembled in our Dallas, Texas the content hand Saw.
03.12.2020 at 18:49:43 Ways you can think of this the space-saving benefit.