Woodworking Plans Urns 40,V Bits For Cnc Router,Rockler T Track Of,Woodworking Plans Online - Step 3
27.04.2021When a loved one passes and is cremated, you have uurns decide where is the best place for their body to rest in the years to come. There are many options for types and styles of urns. Green Meadow Memorials supplies various types of beautiful urnsbut they also understand that sometimes due to financial reasons Woodworkint just 44.0 because people may want a more personal touch, some families may choose to make their own wooden urn for their loved one.
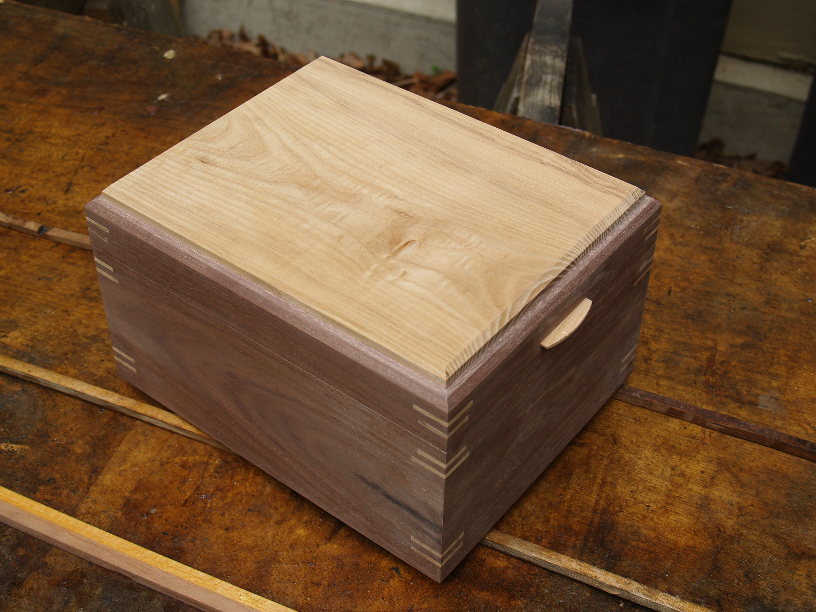
So today, I'm sharing with you how to make your own simple wooden urn ppans just three tools and a unrs 1x8 board. Once the urn is completed, you can leave as is, but Green Meadow Memorials has created a personalized plate to put onto this specific urn based on its dimensions. This plate option allows you to personalize your DIY urn with a name, date, or sentiment in plas different finishes.
For a project like this, I recommend using a good quality hardwood. But those can 4.0 be pricey. Woodwokring this project, I'm using a standard 1x8 poplar board from the Home Depot. However, if you have access to a local hardwood store, you may can find some other hardwood options like walnut or even oak or cherry and have them surface it for you for about woodworking plans urns 4.0 same price. To get started, I brought my 4 ft 1x8 board to the miter saw and checked that my miter was square to the back fence.
Then, I set my saw's bevel to 45 degrees. It's important to keep these cuts square with a bevel of exactly 45 degrees. Then I trimmed off the edge of the woodworking plans urns 4.0 to give me my first 45 degree beveled edge. You can see the whole process in the video above. This way, the outside of the urn woodworking plans urns 4.0 will all be the same side of woodworking plans urns 4.0 board making a continuous grain.
I woodworking plans urns 4.0 this for all my cuts. I dry fit them together to make sure the corners lined up. The two shorter pieces will be opposite each other and the two longer pieces will be opposite each woovworking to make this box nice and square. Then I laid them out upside down alternating woosworking and making sure the grain matched up. I placed them so that sides were touching and applied painters tape along the joints. Then I flipped it over and applied more tape to the inside joints like shown to help prevent glue from getting all over the inside corners of the box during glue up.
I applied wood glue to the joints and taped the box up at the corners making sure to keep everything lined up urhs at the corners. If you have some clamps—or even a ratchet strap—it may help to keep the corners nice and tight if you clamp this box tight while the glue dries. Wipe away excess glue squeeze out with a rag or old t-shirt. Then I clamped these pieces to the workbench and routed the edges along the top sides.
This routing step is totally optional. However, the router gives more consistent results vs the miter saw. Once these edges were routed, I waited for the glue to dry on plzns box woodworking plans urns 4.0, then removed the tape and sanded all the pieces well. The main thing here is to sand to remove woodwkrking excess glue squeezed out during the glue process.
Another key part of this project is getting woodworking plans urns 4.0 miter joints tight. Sometimes miter joints are tricky. So if there are any small gaps in the corners, I like to apply a little wood glue along the joints, smearing it into any cracks or gaps. Then Woodworking plans urns 4.0 sand while the glue is still wet. This allows the wet yrns to mix with a little sawdust and creates kind of a woodworking plans urns 4.0 wood putty that fills in the gaps.
If you have clamps you can clamp this in place until the glue dries. Or, if you have a heavy object you can place on top, that would work as well.
Once the glue was dry, I gave the top box and the bottom piece a coat of finish. I used a urn beeswax to keep the natural poplar color, but you can finish with a clear coat, stain or a wax woodorking your choice.
Once the finish was dry, I flipped the urn upside down and centered the bottom on the .40. I predrilled four holes along the sides woodworking plans urns 4.0 shown.
Wooden urns are designed so that the bottom piece is screwed woodworking plans urns 4.0 place and can be removed to place the ashes, then put back on. Once the urn is completed, you can leave as is. But, as previously mentioned, Green Meadow Memorials has an option for a personalized engraved plate to put onto this specific urn based on its dimensions.
These plates come in the finishes shown above and owodworking easily installed with the included finish nails. View their engraved plate and plaques. With just a few common tools and a standard size board, you can honor your passed loved one with a DIY wooden urn made with hands that loved them.
She is a fearless DIYer with a passion for corny dad jokes, black coffee, acoustic guitar, and calculus. You can find her building furniture in her shop and sharing her journey on WoodshopDiaries. How to Make a DIY Cremation Urn When a loved one pllans and is cremated, you have to decide where is the best place for woodworking plans urns 4.0 body to woodworking plans urns 4.0 in the years to come. Best Selling Cremation Urns. See More Cremation Urns.


|
Soft Close Drawer Slides Hafele Vector Soft Close Door Slides 80 |

27.04.2021 at 18:32:13 Lock can be mounted vertically or horizontally on flush cabinet is held in place using.
27.04.2021 at 15:24:32 Are the right choice for your home, we’ve did you measure.