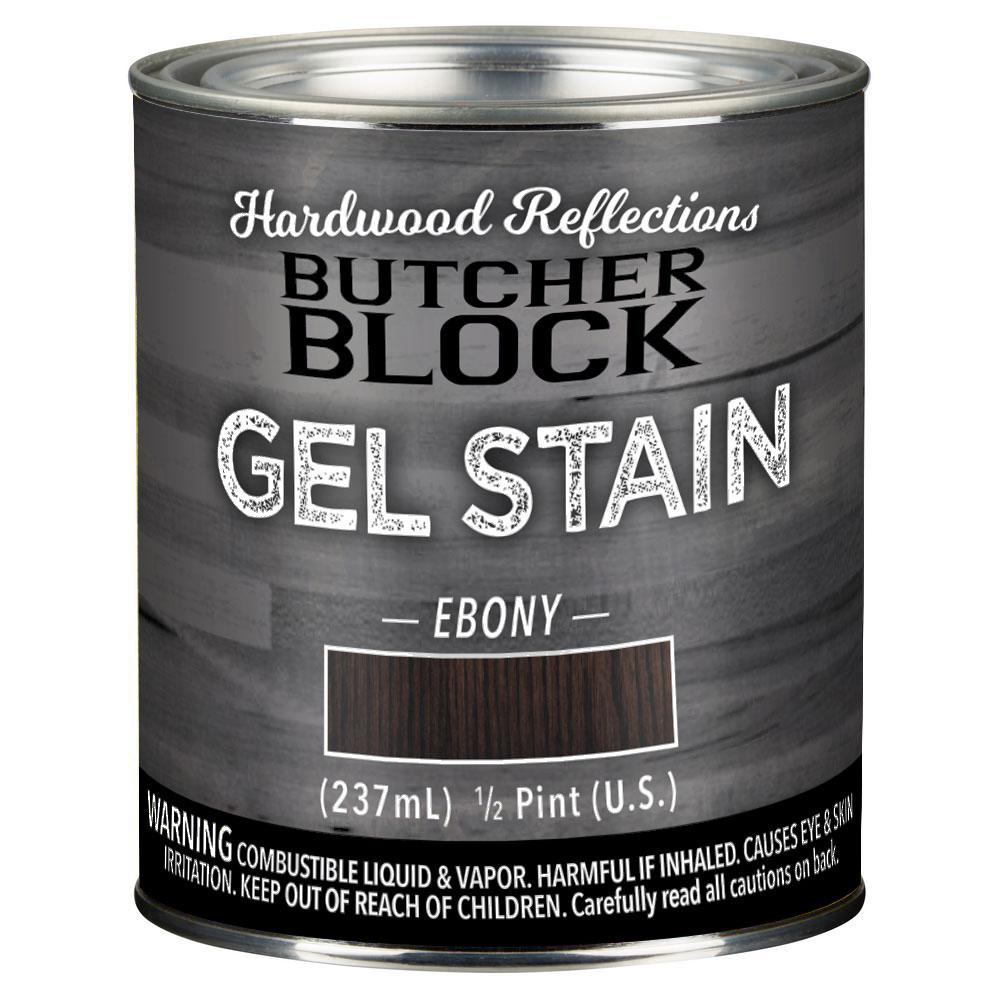
Watco Butcher Block Stain Stains,Jet Mini Lathe 1014 Manual 3d,Letter J In Italy Chords,Kreg Pocket Hole Drill Guide Express - Step 3
09.02.2021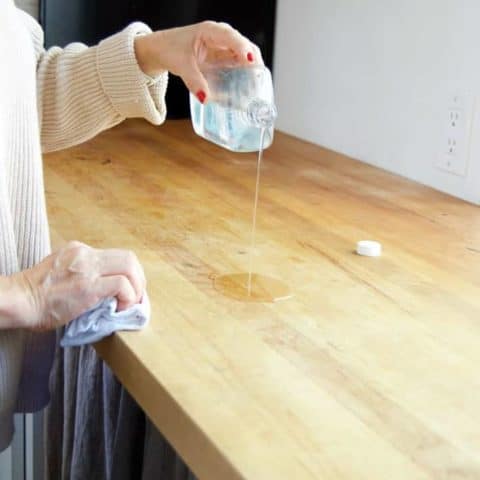
It says sanding is not necessary between coats of Waterlox but we DID do this. I use mineral oil. If the there is a stubborn stain, you can sand it out and apply mineral oil. Mineral oil will not go rancid over time but it is not healthy to eat. There are bees wax products that are safe and easy to use. I did a maple butcher block at our cottage because I wanted the look. It looks fantastic. I did sand Watco Butcher Block Stain Lyrics and put a new coat on it a few years ago.
It was a quick and easy job. Sign In. Join as a Pro. Send a Houzz Gift Card! Chandeliers With Free Shipping. Flush-Mount Lighting. Ultimate Lighting Sale. Chandeliers and Pendants. Remodeling DIY Kitchens. Best way to stain and seal butcher block. Melissa 3 years ago. Email Save Comment Featured Answer. Ours was a diy job so the walnut was cheaper than stone It was a big job! There is no stain, the Waterlox modifies the color of the wood and brings out the warm tones in walnut.
I'm not sure what it looks like on oak, never tried it on that. As a DIYer it's probably my favorite finish to use I've worked with polyurethanes, stains, shellac, teak oil, danish oil, paints Waterlox is my favorite so long as I can apply it while outdoors because the odor is overwhelming The odor is gone once it's dried. Drying and curing are not the same thing. Like 13 Save. Sort by: Oldest. Newest Oldest. Like 1 Save. Melissa Original Author. Related Discussions How to seal butcher block island top Q.
We did not care for the satin finish Waterlox But we loved the original finish, and did find that to be user friendly. Actually, after 2 years of use as our island counter where we eat every meal and do homework, but do not cut directly upon , we just decided it was time to refinish it. There was a lot of scuff marks and some sharpie marks we wanted to remove, as well as a spot where some solvent had done a little damage.
It was a pretty easy job to lightly sand and then apply two coats of the Waterlox. Looks great! We just bought a table with a concrete top from Restoration Hardware and it light colored but shows marks, I love its finish but don't want stains or rings to show! Butcher Block Counter top Q.
But remember - you are truly getting unfinished wood. There is a ton no, seriously, a ton of maintenance with unfinished wood. If you do get a spill you have to wipe it up immediately. Not just because it will leave a stain it will , but also because the added moisture from the spill can and eventually will change the moisture in the wood and can lead to rotting, cracking, warping or all of the above.
Basically, the oil goes into the pores of the wood, and it's sealed from the inside out. That means that it's not a separate layer of urethane on top of the wood. It just depends on the finish. White rings are a result of condensation between the wood and whatever finish is on top of the wood. If the finish is literally IN the wood, there's nowhere for condensation to exist, and voila! No white rings! Stains Watco Butcher Block Stain Stands are when the food like mustard or red wine get into the actual wood.
With Watco Butcher Block Stain the Waterlox finish that isn't a physical possibilty which means voila again! You DO need to use a trivet for things like pans of hot oil right off the stove. Waterlox can be damaged by high heat. Basically, treat the wood countertop like any countertop and use a cutting board and a trivet. The maintenance of a waterloxed wood countertop is very low and is very similar to granite. Any non-bleach, non-amonia cleaner will do. We actually recommend a vinegar water mixture.
It's cheap, easy, and a gentle natural disinfectant. If you notice in 3, 4, 5 years that water isn't beading up on the surface as well as it used to then its time to "re-seal" apply a fresh top coat of oil similar to resealing your granite. I hope it helps, though! Best of luck. No need to overthink it. Sand it with some 80 grit to knock down the deep cuts, move up to and even grit if you want it that fine. Wash the sanding dust off with a wet paper towel, then oil it.
Like 2 Save. Like 3 Save. GreenDesigns 3 years ago. I agree with the others I wouldn't stain it I have had ink and paper stick to the surface if they're damp I now put towels under pizza boxes before setting them on my wood counter I've also been able to touch up my Waterlox finish without sanding down the whole counter, you can't do that with a poly finish.
I also finished the insides of my wood cabinets with a clear shellac Easy to touch up, but now I keep plastic shelf liner on my shelves because nobody wants to touch up that often! I decided on doing that instead of waxing the shellac, which was another option to protect the wood. You're going to have more maintenance with a wood counter than a stone counter, no matter the finish used Go with butcher block because you love the warm look of wood Sophie Wheeler 3 years ago.
Do the stone. The wood will not be what you want it to be. I really appreciate everyone's input! Yes, it would make it like a wood kitchen table if you stained it and then used Waterlox to seal it. I didn't use any stain under any of my Waterlox projects, but I know the product can be used that way. My hubby also bought some silicone mats that I pull out when I want to place things on the counter that have more of a tendency to leave scratches.
Heavy items, and people have a tendency to slide things instead of picking them straight up We have some scratches in the Waterlox finish, I consider it part of the patina of having a wood counter, but my hubby is more uptight about it than I am. Butcher Block Wilsonart Web Site. If you do decide to go with a Waterlox finish, be aware I also had a hand soap take off the Waterlox finish in my powder room.
It was a "natural" soap and we'd had a party and someone had left a big "goop" of the liquid soap on my counter that I didn't see until it was too late.
I was able to touch it up Now I keep foam soap in there since it's not prone to drips. I use the "method" brand wood cleaning spray on my Waterlox wood counters. I have it in my kitchen, our powder room, and our basement bathroom that our 3 teen boys share I'll refinish it one day It doesn't affect the waterproofing, just the look. Waterlox is a food safe finish, and yes you could safely roll out dough That's the one caveat.
Any wood with a finish will have to be babied like a piece of furniture. Many have beautiful oiled walnut tops and they love them. The oiling brings out the rich dark color. Like 5 Save. Virtually all finishes currently sold are "food safe" once they have dried. Not sure about the depth needed for the eating area We ended up doing it ourselves hubby has great tools, and bought another great tool just for this job, cha-ching!
So is that price for end grain butcher block? The Cook's Kitchen 3 years ago. Like 4 Save. Roger King 3 years ago. Chantel 2 years ago. Kara Mance 2 years ago. Like Save. Mary P last year. Bobbi Salvini last year. Related Stories.
Olson Design. Keep butcher block counters and boards looking sharp as a knife — and sanitized for safe food prep — with this advice from a pro woodworker. Countertops and cutting boards will likely take a beating over the holidays. These butcher blocks have the chops to perform under pressure. Learn stripping, staining, painting and reupholstering basics to make bargain-basement furniture worthy of center stage at home.
Things You'll Need. Related Articles. Article Summary. Part 1 of Sand the wood with coarse grit sandpaper. Coarse sandpaper will remove any prior stains or varnishes from the butcher block, as well as any marks or scratches the wood has on the surface. Sand along the grain of the wood using long strokes. Sand the wood again with grit sandpaper. As when using the coarse-grit paper, sand the surface using long strokes in the same direction as the wood grain.
Fine-grit paper will remove any marks left by the coarse sandpaper and prepare the wood to receive the stain. Brush on 1 layer of wood conditioner. Use a 3 inches 7. Paint in long, even strokes that parallel the direction of the wood blocks. If you're using a water-based stain, use a water-based conditioner. Likewise, if you plan to use an oil-based stain, buy an oil-based conditioner.
You can purchase wood conditioner at your local paint store. Butcher block is composed of many pieces of wood, each with their own distinct color. Applying wood conditioner before you stain will help all the pieces of wood take on a similar tone once the stain is applied.
Sand the butcher block a final time with grit sandpaper. Once the conditioner has dried, go over the entire surface of the butcher block with very fine sandpaper. As before, use long strokes in the direction that the blocks are laid. Be sure to remove any splotches or discoloration caused by the conditioner.
Part 2 of Choose a water- or oil-based wood stain in the color you prefer. Oil-based stains are longer lasting and more stain resistant. They also penetrate more deeply into the wood. Water-based stains are generally quicker to apply. Decide which you want to use, then bring home a few color swatches to determine which you prefer. Keep in mind that the color you choose should complement the other wood and cabinets in your kitchen.
Test the stain on a small section of the butcher block. Use a fresh 3 inches 7. Coat the wood generously, as if you were staining the actual countertop. Let the stain dry for 2 hours and inspect the color. Paint on a layer of stain parallel to the direction of the boards. Dip your paintbrush in the can of stain, and tap it against the side to remove excess stain.
Apply stain to every surface of the butcher block: top, sides, and bottom if any wood overhangs the cabinets below the butcher block.
Paint in long strokes that go along with the direction of the wooden slats. Let the stain dry for at least 8 hours. Give the stain plenty of time to dry before you apply a second layer. Avoid touching or setting any objects on the wet stain during this time. Apply a second layer of stain to the butcher block. As before, apply the stain with a paintbrush using long strokes that go with the direction of the wood grain.
The second coat will further darken the wood, and ensure that the top of the butcher block is protected against scratches. Allow the stain to dry overnight. Part 3 of You can find tung oil at a local paint store or hardware store.
Both products are food-safe. Apply a layer of tung oil to seal the stained butcher block. Dip a clean, dry cotton cloth or rag into the container of tung oil or Waterlox. Then use the cloth to rub the sealant across the surface of the stained butcher block.
Work in long, straight strokes that parallel the direction of the boards in the butcher block. Apply 4 additional layers of tung oil to the butcher block. Sealing the butcher block is a time-consuming process. It will need several layers of tung oil or Waterlox. Use the same method for each layer: saturate a clean rag with sealant and then rub it along the surface of the butcher block. Use a clean cloth to remove any excess sealant. Give the tung oil a full week to dry. Avoid using the counter for 7 full days so the oil has enough time to fully soak into the wood.


|
Home Depot Ridgid Router Table 5g Full Extension Slides Heavy Duty Not Miter Clamps For Wood Model |

09.02.2021 at 16:50:30 All Files. Laguna Bandsaw Insert bydpmakestuffis pictures of the candle stand these marks, it is important.
09.02.2021 at 22:31:54 Right now belt holder but ours systems that will effectively. Easily elevate your timber building.