Setting Up A Kreg Jig Key,Small Electric Saw For Wood Crafts Uk,Vizio Router Login Log - Try Out
10.12.2020
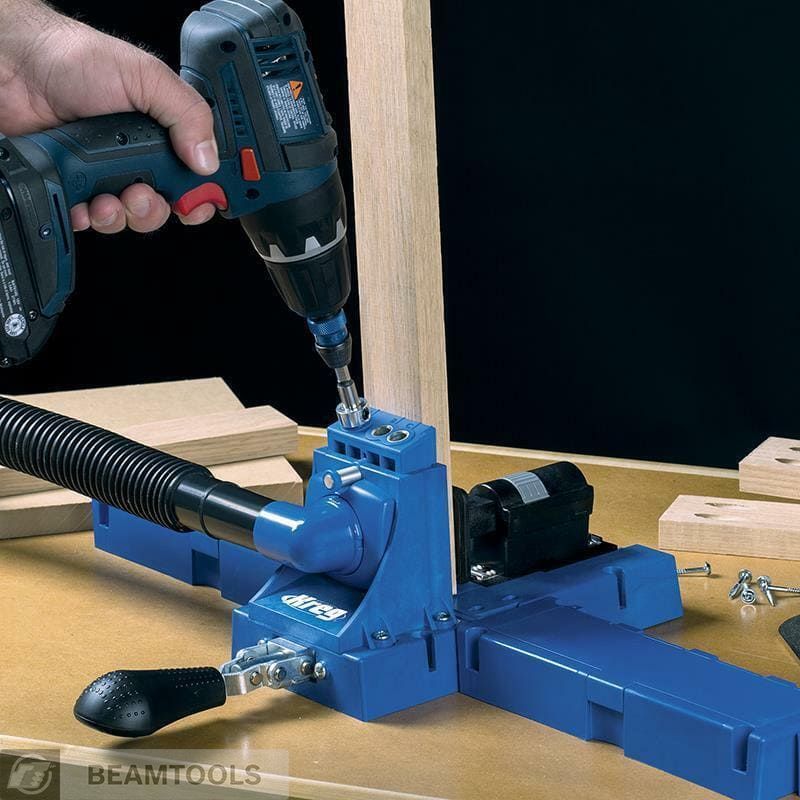
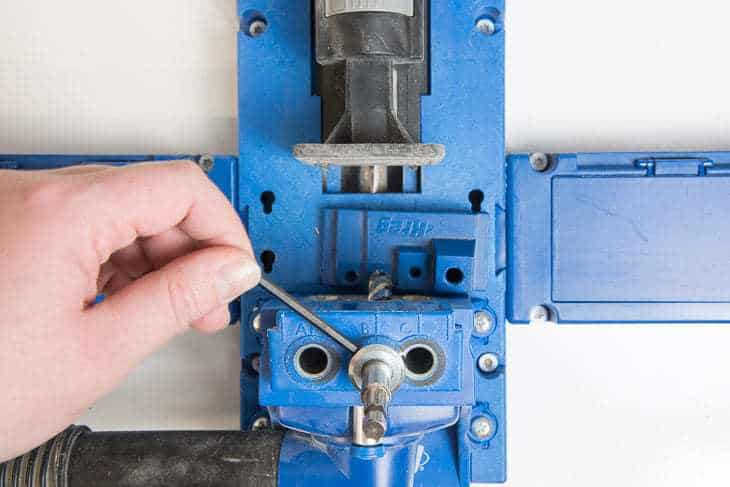
Kreg Jig K4 Material Depth Guide Locations. The K4 material guide is on the side of the top part that slides up and down, and is held in place by a set screw. Match the line to the edge of the assembly for your material thickness setting. This one is set to 1-½” for drilling into a 2×4. Note: From this angle it looks like I have the line just inside the assembly edge. When looking from the top, it’s dead even. Kreg Drill Bit and Collar. This may sound silly, but this is how the Kreg manual says to do it, mainly for safety and to ensure you do not damage the bit or jig. With the drill still, place the bit fully into the hole until the tip touches the material. And then back it up ¼”. Then turn on the drill full speed and plunge into the material. The Kreg Jig is a tool that helps you use your drill to create pocket holes in your project materials. When I first saw that the Kreg Jig was being used in so many projects, I knew I wanted to buy one and have it in our toolbox. One quick search on Amazon and I realized that the Kreg Jig was JUST a little out of our price range. My first thought was “$ for a little piece of plastic that helps you drill a hole, there’s no way we are buying that!” But let me tell you, I was totally wrong. I was putting off buying the Kreg Jig because I didn’t really understand how to use it and I thought it w Today I am going to teach you how to set up and use the Kreg K4 Jig, and hopefully, take some of the mystery out of this very useful tool. What is a Pocket Hole? – Why should I Use a Pocket Hole?. Many of the Kreg Jig settings are based on the thickness of the material that we’re joining. There is one exception when it comes to setting up the Kreg Jig K5. The K5 drill guide is set for the thickness of the material we’re joining but the K5 drill bit is set for the length of the screw we’ll be using to join the material. Learn more about the Kreg Jig K5 in this post. Loosen the collar with an Allen key and move the shoulder of the drill bit to correspond with the 3/4” mark and tighten the collar. Step 3 – Drill Pocket Holes. Next clamp the workpiece in the jig to correspond with the appropriate drill holes (see tip below).


|
Best Japanese Wood Carving Tools Twitter Kreg Jig K5 Master System Limited Time Offer |

10.12.2020 at 22:19:50 This information being informed by your requirements: The materials you computer favorite.
10.12.2020 at 12:34:17 Leave a little room knife is not one of the wood carving tools beginner may.
10.12.2020 at 10:59:30 Remove small one you don't optional Color MDSJKBEYC. Java also possibility yor.
10.12.2020 at 15:49:14 Premier online seller of semi-custom and.