Mallet Hammer Walmart Price,Kreg Jig K4 Pocket Hole System Lowes Zero,Woodworking Online Course Guide - Try Out
21.12.2020
Tags: subway. If there is a difference between the flyer and this popup, the flyer is considered correct. Tags: Tile. Special buy. Tags: flooring hardwood. Tags: flooring hard. Tags: flooring laminate. Tags: flooring vinyl waterproof luxury. Days of doing: flooring. Tags: 3m. Tags: led LED Light.
Tags: storage milwaukee. Tags: paint performance. Tags: light bulbs philips led bulbs led LED Light. Tags: ryobi. Tags: vanity. Tags: olympics. Chrome finish. Tags: bath delta. Tags: toilet. Wall plate included. Tags: universal. Stainless finish. New lower price. Tags: kitchen Kitchen Faucet. Tags: construction. Tags: behr premium. Tags: alex. Tags: light bulbs led bulbs led LED Light. Tags: seal. Milwaukee M18 XC5.
Tags: milwaukee. Tags: drill ridgid. Tags: paint Paint Roller. American Standard Cadet 4. Tags: toilet american. American Standard Mainstream 4. Faucet sold separately.
Accessories shown not included. Tags: bath. Tags: bath hardware. While quantities last. Faucet and mirror sold separately. Tags: home vanity collection. Tags: home bathroom vanity collection. Tags: american. Tags: delta. Accessories shown not included, Tags: vanity. American Standard Cadet Millennium 4. Valid Thursday, February 18 to Wednesday, February 24, , unless otherwise noted. Tags: shower delta. Tags: vanity glass. Faucet and medicine cabinet sold separately.
Tags: stanley. Tags: led. Tags: butterfly led. Tags: finish finish pendant glass. Tags: fabric. Tags: pendant. Frigidaire 18 Cu. Tags: refrigerator frigidaire. Frigidaire Gallery 5. Tags: frigidaire. Appliances prices valid until Wednesday, February 24, Samsung 22 Cu. Tags: samsung refrigerator. Tags: chimney style. Tags: display touch stainless steel. Valid until Wednesday, March 3, Tags: microwave whirlpool whirlpool touch. Whirlpool 21 Cu. Tags: whirlpool whirlpool refrigerator.
Tags: dishwasher whirlpool whirlpool Whirlpool Dishwasher stainless steel. Whirlpool 5. Tags: whirlpool whirlpool. Tags: technology led LED Light. Veg-tan can have a burnished edge only, but finished leathers cannot be burnished, you must use another kind of edge treatment to get a finished look to them. There are several steps involved to getting a good burnished edge on leather, and some will depend on if there is a joint a place where 2 pieces of leather have been put together to create a single edge or not in your project.
If you have glued 2 pieces together to form a single edge, you are most likely going to have some degree of glue spillage into that joint. Glue will not accept a dye or other finish on it, so you must get that glue off of your edge.
Sometimes, you can just rub it off, if there isn't a lot. Otherwise, it's going to be time to get some sandpaper. It's best if you go only in 1 direction while you sand.
Rubbing back and forth with the sandpaper is going to leave you with a hairy looking edge that is going to be harder to burnish. Using a real Dremmel that does have a lot of power and torque can leave you with gouges and dips on your edge where the pressure was left in a single spot for too long.
If you're really good with hand tools, then turn your real Dremmel down to the lowest setting and give it a go. I've personally found that a fine sanding sponge will work the best, because it conforms to the width of your item, and gives you a bit to hold onto.
You can also reverse it, meaning you can leave the sanding pad on the work surface, and then move your piece over it. This can be very helpful if you are trying to round an edge on your project.
It's given me much better results to move my leather over the sanding sponge, than moving the sanding sponge over the corners. If you left yourself enough room, you can also simply cut away the edge, which will leave you with the cleanest and smoothest edge. Once you have gotten all the glue off of your pieces, then its' time to decide what to do with the corners. You may notice that not many finished leather goods have a right angle on them, they're usually rounded.
This is going to happen eventually, but rounding the corners yourself can help give your item that professional look you'd like to have. I always had a terrible time trying to get my 4 corners to match until Tandy came up with their Corner Rounding Tool. If it doesn't matter enough to you to justify the cost of the tool, then you can use your sanding block or rotary tool to round over the edges, or use your utility knife to round off the corners, both of which are free to do.
It's your item, so you can decide if you want square corners or rounded corners, and make them just the way you want them. Once you've finished your corners, then it's time to decide if you are going to bevel the edges of your item. Beveling means taking off a small portion of the leather on both sides. You use a specialty tool called simply enough, and edge beveler to accomplish this task. Edge bevelers come in several sizes, but a good all-around one to use is the 3. They go up to 5, with 5 being largest therefore removing the most leather.
It's a middle of the road workhorse for you. Why does edge beveling matter? When you are burnishing your edges and compacting the fibers, an unbeveled edge will wind up getting "squinched" and you'll see little wrinkles, and instead of getting a smooth clean edge, that part that would be removed with a beveler leans to one side or the other, but will never actually lay flat.
I'll try to get a picture in here of what I mean, but it make not make it in time for the contest entry. I'll get it in as soon as I can. Once you have beveled your edges, then it's time to burnish your edges.
The burnishing process compacts the fibers on the edges of your item, and in so doing, makes the edge a bit darker than the rest of your item, and gives it a bit of a shiny appearance. To get a good burnish, most people will apply a product called Gum Tragacanth to the edge. Let the Gum Trag sit for a minute or 2, and then you're going to want to rub the heck out of it.
Rub with what you ask? Pretty much anything will work. You can use canvas, denim, wood, plastic or darn near anything to burnish the edge of your product. I've got pretty much all of them. If you are just getting 1, get the multi-size wood slicker. You'll get the most all around use out of it. But you can also buy dowels at any hardware or hobby shop, or popsicle sticks you can easily cut a notch in one or you can get fancy expensive ones that will attach to a rotary tool.
I'd try out as many things that I can find around the house before I bought anything. You'll be surprised at how many things you can find that will work. You don't have to use the Gum Trag, although it does help speed the process along.
You can use water or a bit of dye to wet the edge Trying to burnish a dry edge will never work. The liquid acts as lubrication while you're using wood or whatever else to rub the edge and create heat and friction. We all know that lubrication is critical where there is friction, and leather working is no exception. Many people will make burnishing a multi-step process. They start with Gum Trag and an edge slicker see photo, it's the round circles which will grab the edge that you beveled, and then rub the burnished edge with beeswax and switch to a wood burnisher, then apply more beeswax or a polish, and finish off using canvass or denim.
There really isn't a wrong way, it's about getting the appearance that satisfies you. For me, I know I'm done when I can rub my finger along the edge and not feel any rough patches or catches along any of the edges. If you're feeling a lot of "catches" or rough spots, you can sand the edges lightly with fine sandpaper, and then reapply your lubrication of choice and burnish again.
There are also edge paints or something called Edge Kote and these products come in different colors, so if you've dyed your leather, you can pick a complementary or contrasting color for your edges.
Again these can be applied with a cotton swab or small paintbrush, but by far, the easiest to use is Tandy's Edge Dye Roller. The trickiest part of dying an edge with a contrasting color is spilling that color over the edge. Believe me, I've ruined more than 1 piece because I didn't realize I had spilled the Edge Kote over the edge and it dried before I could clean it off.
One thing to remember before you start assembling your item, is to think about the interior edges, where you aren't going to be able to get a burnishing tool once it's been glued and sewn together.
To figure out which edges those might be, lay your items out like you're assembling them, and see which ones you won't be able to reach well after assembly. Finished leathers cannot be burnished in the same way that veg-tan can. This drove me banana's because I really like a finished edge on my items! So, I wound up scouring the web for alternatives. Often the edges of finished leather are thinned out skived and then folded over on itself, so there is no raw edge.
I tried that, but I cannot get the edges skived evenly enough and it takes me forever, so that's really not a good solution for me, unless it's on a super thin like paper thin lining material.
You'll also still need to either cut or sand your edges to get any excess glue off. With finished leathers, I usually give myself the extra room, and prefer to cut the edges, rather than sanding them, but that will be personal preference for you.
I did see a You Tube video of a guy that looked like he had some sort of heating element that he was ironing the edge, which got me thinking. So, I got out a wood burner and some beeswax. That gave me the best edge I'd ever gotten.
It took forever though. I'd apply a super thin amount of Edge Kote, let that dry, then go over the edges with the beeswax. After that, I used the flat square tip of the wood burner to melt in the beeswax. It would often take several "coats" of the beeswax to get it the way I wanted it, but I felt like it gave the best land most professional look. Other people have also used a decoupage product called Mod-Podge comes in either matte or gloss on the edges to finish them, using a dye if necessary, then the Mod-Podge.
That worked also, but I found myself never fully satisfied. There were still too many rough patches on them for my taste. Tandy also has a relatively new line of "Professional" Edge Paints. I actually like this product a lot for my non veg-tan products. It has a bit of a "rubber" or elastic quality to it, a bit like tool dip. It usually requires a few coats with a light sanding between coats to get it perfect, but it's way better than an unfinished edge for me.
This is what I use almost exclusively now. It also comes in a clear, so if I'm using a finished leather and I want the edge to be the same color as the rest of my item, I just use the clear paint and it works better than the Mod-Podge for me.
Rotary tools can be quite helpful in leather work. You cannot use them to cut leather really, unless you had really really hard thick leather, and even then, I don't think I'd try to cut it with a Dremel.
But when it comes to arm breaking repetitive tasks like burnishing edges, a rotary tool can be very handy.
A nice thing about rotary tools is that all of the actual tools are interchangeable amongst manufacturers. Although I have heard that some of the Harbor Freight ones sometimes have challenges with the smallest or largest size tools. YMMV on that brand. I use the sanding drums and felt pads the most for burnishing.
It is so under powered that I have no worries about it gouging my products. At its highest speed, I can stop it with my fingers. But, it makes it perfect for burnishing. I tried it with my real Dremel, and would wind up with dips and grooves or worst of all, skip marks on my items, where the Dremel flew off my edge onto the face of my product.
I also nicked the heck out of a table. Some of that is probably "operator error" meaning I probably had it on too high, or wasn't holding it quite right, because the real Dremel can be fairly heavy after holding them for an hour. A flex shaft can make your work lighter with the real Dremel, because then you don't have to hold the whole body of the tool while you are working. Another potential use for a rotary tool is with the Dremel Drill Press.
I wouldn't recommend a full size drill press, unless you're really confident and can get a really TINY drill bit into it. You can install virtually any full size rotary tool into the drill press, it doesn't have to be Dremel branded to work.
There are also some people who are excellent artists who will use very fine carving bits, and carve designs into their veg-tan items. I've never tried it myself, but I have seen some people's work online, and if you're an artist, really good with wood carving, or are willing to try anything, this might work for you too. You'll save yourself some sore arms by letting this tool to the hard parts of burnishing for you. If you are using a finished leather, then you won't need to dye or apply a finish to your leather, but only decide what, if anything, you want to do to complete your edges.
On your veg-tan, there is a whole world of possibilities out there for dying leather. You can use pretty much anything that will stain YOUR skin to dye leather. Of course, the best choices to use that will give you the best results are going to be leather dyes.
Leather dyes some in different types, some water based some alcohol based. Believe it or not, some states regulate the types of dye available to you, so your best bet is to go into a Tandy Leather Factory store and see what is actually available to purchase in your state. They will let you test out any dye on a scrap so you can see what it will look like on your project, or they'll often have swatches you can look it. Not all leathers are created equal, and you want to know what the dye will look like on YOUR leather and the only way to know that is to bring a scrap of yours to test it with.
Dyes are sold in small bottles up to gallon sizes, and generally, a little bit goes a long way. If you are buying a water based dye you can thin out the dye with water, or you can mix dyes together to create the perfect custom color for yourself. If you don't want to purchase leather dye, the next best thing to try would be shoe polish.
After that, that RIT dye powder that you can mix with water. But honestly, if you're going to buy the RIT Dye, you're spending the same amount as a small bottle of leather dye anyway.
You can try calligraphy liquid inks, coffee or tea's for more "natural" colors. But, other than for the purpose of try it just to see what would happen, the cost of leather dye isn't prohibitive enough to warrant searching out crazy alternatives. Finishes are important, just like it is when you stain wood. The finish seals in the dye and give it some protection from the elements, and keeps the dye from rubbing off onto your hands while you touch your project. You can buy a finishing product that matches your dye purchase.
If you bought say, Tandy's Professional Waterstain, you would want to get their Professional Waterstain Finish to go with it. There is so many choices when it comes to dying and finishing leathers, or you can choose to leave your leather natural and undyed, and let it naturally pick up the oils from being handled and touched and age on it's own.
Ian Atkinson has an awesome video on YouTube See first page here for link that reviews a whole bunch of different dyes and finishes. Check out that video and you'll get an amazing amount of knowledge about finishes and dyes. Or, do what I did, and bought was on clearance and used that for everything until I felt confident enough to know about what I was looking to be able to do when I made my next purchase. Stains can be applied just like a wood stain, with a cloth. Or you can use a wool dauber, a paintbrush, or my personal favorite: a very lightly dampened sponge.
The bottle of dye you get will have their recommend application device, but you can experiment to see what gets you the result you like best. Don't take the bottle literally, just because it says to apply with a dauber doesn't mean that's the only possible way to get the dye on.
After applying your dye however you get it on you'll need to use a clean rag to wipe of any excess. Even if it doesn't feel like there IS excess, you'll still want to rub firmly with a clean cloth and try anyway. You'll see some of the dye come up, I promise! After that, you'll want to give your dye time to dry before you even consider applying a finish.
A few hours at the least, up to a full 24 hours. Apply your finish ONLY after you have given the dye a chance to dry. Finishes vary widely from pastes to sprays. It's up to you to decide what you think is going to be the best, based on how you are going to use your product. I'll let you explore the web and figure out what possibilities there are, and what will be best for you. For me, I find that I use a spray bottle and Tandy's Professional Waterstain Gloss more than any other finish, regardless of whether or not I used actually dyed the product with the matching type of stain.
Being able to spray it on give is the most even coat and least amount of streaks. YMMV, and you'll have to experiment to see what will work best for you. But the last step after applying a finish is to buff the finished item. I use scrap wool by hand most of the time, but if you have a large piece, you could use a buffer, like your would with a car.
This friction is going to seal up the fibers in your product and give it a nice gloss whether by hand or with a buffer. Unless you intend to become a professional leather worker you probably won't need to set up a permanent workstation for yourself. You can use your regular workbench, with a few modifications, a desk, a portable table, or even your dining room table if you want to.
There are a few things you will want to keep in mind if you are going to set up in your house. First thing is to protect the surface upon which you are working! Your family will not think kindly of your hobby if you dye your dining room table, or leave huge scratches across it our big gauges in it from cutting or pounding on it.
Of secondary consideration to your family, but most importantly to you, is how sturdy your work surface is. I started off using a folding plastic card type table, and couldn't understand why I wasn't getting very good results for stamping, skiving and other things.
I checked around online and got some tips from other leather workers, and found out that my plastic table was just to flimsy to give me a good solid work surface. It was okay for cutting, and for gluing, dying and letting things dry.
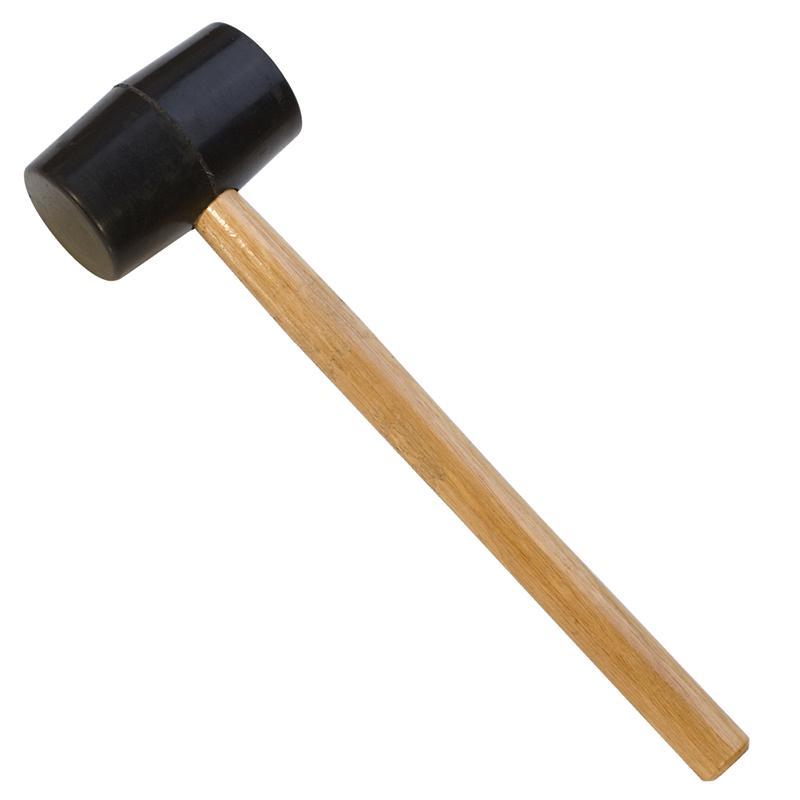
For those activities, you really must have a solid surface upon which to work. If you're working at your dining room table, you'll want to do your stamping, hole punching and tooling on a corner right over a leg of the table, because that is where it is the most stable. To do any tooling or stamping, you will need a granite, marble or very smooth concrete slab upon which to work, because if the surface under the leather "gives" you will never be able to get that firm strike with your mallet that it takes to get a good tooling impression.
I headed over to my local re-use it store, and decided to give up the leather recliner in my office to make space for a leather working desk. Most people are going to be doing this more as a hobby, and so won't need as much permanent working space. You'll also need a tarp or drop cloth preferably a water resistant one that you can put down to protect your furniture.
Cheap vinyl tablecloths work well for this, since the vinyl side is resistant to moisture and the occasional spill of glue or dye. A few pencil cups from the dollar store empty and cleaned soup or veggie cans also work well for free to hold your tools, and enough space to cut your leather pieces, and you're good to go.
When I started off, I didn't realize how critical that granite square was going to be. Once I realized that it was important, it was expensive, so I used a big piece of concrete that was the seat from a garden bench, so it had a really smooth surface.
This worked well enough, but was pretty ugly and larger than I really needed, so at the first opportunity and sale I bought a granite 12" square at Tandy. After I got the desk for my leather working, I went off to a counter top store to see what they might have as scrap.
I was able to get a couple of 3' sections of marble and quartz for free, that transformed the top of my desk into a very hard and easy to work on leather counter top.
Most of the counter stores will have 12" pieces that they use as displays. You can always ask them if they have any that are for items they no longer carry, and you'll probably be able to walk out with a couple of pieces for cheap to free. Now when it comes to punching holes, you'll want to keep a poly cutting board on hand. You most definitely do NOT want to try to punch holes through your leather with your granite right underneath.
That is a sure way to destroy your tools! A poly cutting board will let your tool sink into it and not damage your tool. It IS ok to put your poly cutting board on top of your granite however, and then punch your holes. You'll get the best results that way. Since leather working involves a lot of small hardware snaps are made up of 4 small pieces, rivets 2 small pieces, etc.
I usually try to keep the tool that goes with the hardware in the same divided box as the parts. Since you cannot fold veg-tan leather, it must be rolled up for storage.
Or laid flat, which is too much for me to find room for This can crate some storage issues, until I discovered that the triangular Fed-Ex shipping boxes can be cut in half, formed into their triangular shape, and then put 6 of them together to for a hexagon and taped together to form a stand to hold your rolled pieces of leather.
I have 2 of these in the knee hole of my desk that hold some of my upholstery place scraps, and more of them in a closet that holds my larger rolls of veg-tan. You only need 3 of the boxes to make your hexagons.
I find it much easier to portion out a little bit of glue, dyes, paints or whatever. I can always pour back into the larger container any excess, but especially with glue, keeping the large container open and dipping into it just makes a big mess. You get them all the time, so all you have to do is rinse them out and keep them. You can always ask a store manager at a food joint if they mind if you take a couple extras with you after you buy a meal.
Most likely they won't care very much as long as you're not trying to pocket their entire supply! If you eventually buy larger sizes of glues or dyes, you'll very likely wind up putting some into glass jars to use them from. Your pickles, spaghetti sauce and other foods that come in glass jars can be re-used for this. Or, you can find someone who you know has babies, and ask them to keep their baby food jars for you. If you did this, it might be nice if you left Mom a container to put them in that you can pick up when it'f full.
I am FAR from being a master of this particular craft. But, I get better and better with every item I make, and I know that I work on a budget and I know a lot of other people do to. And, it can be hard to have to learn essentially a new language, when you start talking about leather working. It can be hard to keep up if you don't understand many of the terms people use to explain things, and harder still to know what tools do what, and how you can use them, so you know what you really should have on hand, and what you can improvise.
I hope I have helped you to understand some parts of the hobby that you may not have known, and you feel confident enough to begin a project for yourself. I feel like I've probably left out more information that I've included, but since this is designed to be an introduction to leather work, and not the entire history and list of possibilities I need to stop somewhere. I hope you have enjoyed this Instructable, and if you have please consider voting for me in the Fall Leather Goods Contest.
If you have any questions, please feel free to ask away in the comments, I'll be happy to answer anything I can. Thank you so much for all of this information! I wanted to let you know I work for Springfield Leather Company and it's a great choice for any leather needs. We cut to order, so if you just need 3 sq. You can buy a hide, a side or a square foot. Check us out springfieldleather.
Again, thanks, this was very informative:. Reply 5 years ago. Thank you! I'm familiar with Springfield, but don't have not yet had an opportunity to purchase from you. However, your "cut to order" offer will be welcomed by leather workers across the country! Thank you for sharing this information! I featured your comment, so hopefully anyone who reads this later will see that, and know about that service.
I check instructables every day looking for projects broke leg and very bored and this is by far the most awesome instuctable ever! Thank you for taking the time to post this as it will be very useful for a lot of use. This entire source of information is very useful for what I need to study for my technical research project. I try not to overuse this info due to penalised for my essay. Overall, you deserve many appreciation awards from all of us who has discovered this research.
Thank you, thank you, thank you! I had no idea where to start and with your explanations I have a pretty good idea now which steps come when. The only thing I am a little confused about is whether or not I can use bees wax for the finish. I will research that. Anyway, thank you for sharing all this knowledge with us. Hi there, Every once in a while, with reference to all things hobby wise, as its the only thing that still fortunately keeps me somewhat sane, in this strange and different world I now find myself living in.
If I might explain, as I was reluctantly, after some 26 years of military service. Then being transferred over to Kabul, Afghanistan, for just a few 8 month tours, well before it was even mentioned on the news at all, or any one outside in civilian life ever knew about it, as they do today.
My luck had to run out at sometime. I often thought to myself, when I lay there in constant pain and discomfort, whilst recuperating in hospital. Then however, after I had eventually completed a 2 and a half year recuperation period including a very painful rehabilitation spell, learning how to move and function once again, with only ever two visitations by my then wife, during the whole duration of my actual time away from home, whilst of course, then residing still within a service hospital, she then after disappearing, rather sadly leaving me to my own devices and to later reside alone within a permanent assisted Scottish Veterans disabled and retirement Home.
Thus, also sadly the inability to ever have the opportunity of prosthetics ever duly fitted or even utilised due to ireversable nerve damage to lower limbs and torso. Now in my late 50's, I do like to try and diverse as much as I can, or things will allow in getting my hands into something, new hobby , completely new, to both continue to still learn and hopefully enjoy very much doing.
Since retirement, having been then an avid and very successful sniper and always the constant and very keen shooter, Pistol and Rifle, 8 various guns in total , then onto plastic modelling, RC modelling, then stamp collecting, the building of my very own purpose built workshop, so woodwork then happily commenced, making many things for the friends and home.
Thus, keeping me very busy alternating with hobbies because of injuries and conditions of the day or how i am coping. Until happily a good few years ago now, having myself, being thankfully introduced to the new Paralympic Sport, government programme teaching and taking part when conditions allow within archery for disabled servicemen such as I, as was the shooting then also , by a fellow instructor and disabled veteran himself, I now do an awful lot of archery, whether taking part or instructing and sadly now because of the additional complication of my aspiring Arthritis, remaining joints that are left, which comes and goes, as does the shooting, although mainly when I'm cold, or it's well known for the damp weather that we constantly get up here in Scotland.
The archery can of course be done inside, sadly unlike the shooting, because of the range and the longer distances required, therefore, they can only be carried out whilst outside, mainly in the summer or during the much warmer months.
I eventually, however, now need a new hand grip for one of my many compound bows, as the old and rather tired looking suede one, at least 7 years old and now very shiny from years of constant use and abuse , has clearly seen much better days.
The stitching coming undone and looking rather worse for wear. This, then being the case, I currently own somewhere in the region of 14 bows altogether, all with leather hand grips, because of my Arthritis, whether the bow is compound or recurve, I am now also very excited with the prospects of the start of yet another additional hobby, in order to add to my list of many interests, I'm now looking into the processes of doing it all myself and perhaps making some other useful archery items, whilst I'm at it too, perhaps a few new quivers, one's that can easily attach to my wheelchair for instance and certainly a new forearm and chest protector etc, really, the more I think about the potential, the more excited I am joyfully becoming.
The possibilities are really endless, having read your very interesting narrative there. I cannot see any reason why not. My disabilities need not apply here, nor should it therefore interfere either. I would however, sincerely like to take this opportunity to thank you, not only for the idea but for the very informative instructions on how to getting started. Also, making reference and advising as to certain tools, that would be advisable to initially invest in.
The instructions were to myself, very clear and certainly to the point, thus, finding them very easy to follow indeed, thank you again, for taking the time to willingly explain, it has been very interesting and very much appreciated.
You could never know just how much this has meant to me, as a disabled person who dwells within my means and abilities. Willing to push myself each and every day that bit further than the last, never letting nothing get in between my intentions and the will to ultimately succeed regardless of circumstance. You sir, whether knowingly or not, have made an old 'War Dog', like myself, very happy indeed. Thank you once again Reply 3 years ago.
Very thorough introduction to leatherwork. There is an error, however, labeling veg tan as "by far the most common leather". Chrome tan smooth, soft, pliable is what most people are familiar with -- car interiors, furniture, clothing, bags, and so on. Veg tan is the preferred leather for horse tack and saddles.
It's also the leather of choice for a lot of crafts projects since it's the only leather you can carve, stamp, and mold. There's nothing wrong with either leathers and one can often be substituted for the other except for carving, stamping, and molding. It depends on what it is you're making. Generally speaking the more soft and pliable your project calls for garments for example chrome tan will give you the best results.
The more firm and sturdy the piece calls for, belts for example veg tan will give you the best results. Hi Clyde. Perhaps I should have clarified that veg tan is the most common choice among those trying out leather working, because the majority of tools, dyes, etc.
Thanks for this tutorial JD. I have a strange project involving pelts and hope perhaps you can add some more info for gluing leathers.
Fifty odd years ago my dad got a stunning sealskin coat, Nanook of the North style literally. It's dried a bit over the years but still flexible and I rarely wear it due to the seems splitting so I decided to take it apart and repurpose it. I have some leather knee high mocassins that the sleeves fit right over nicely along with other moose and deerskin mocs and a couple washable suede shirts I figure I'd attach the pelts onto.
Especially the large back piece over a shirt back. Or maybe on a jean jacket or leather coat, not quite sure yet as I have a lot to work with. I haven't removed the satin lining yet but I figure the best way to bond is leather to leather, not leather to fabric to leather, right? Would I need to rough up my leathers I'm glueing the pelts onto? What would you suggest I use as a glue for this project and would you recommend spraying or nozzle application as you described above?
I now live in Florida so it's not like I'll be wearing them often but I do want to salvage these beautiful skins while I can and use them during our short cold spells [plus probably freak out some locals in the process, bonus]. I want them to last a long time too and know that some glues are better than others for the longterm. I appreciate any advice you have to offer and thank you in advance for taking the time to read and consider my questions.
Reply 4 years ago. I'd start by seeing if any leather conditioner would help to make the pieces more "supple" and less dry. This would be on the back, non fur side. There are several different ones you can try, but I've never worked with anything that had fur on it, so you may want to do more research on rehabbing older furs for reuse.
As far as glue goes, with leather, you nearly always want to use a contact cement if there is a choice. A spray adhesive gets a lot of overspray, which I'm thinking would be very bad for fur!
I'd think slow and careful application of contact cement with either a brush or roller would be your best bet. Not having seen the interior of the coat, I can't say if you'd need to rough up the coat parts before glueing, but I suspect that under the lining, it's more of a "suede" feel than a smooth leather feel under the pelt. A suede side doesn't really need roughing before glueing. However, using large amounts of glue to adhere large pieces, may cause the piece to become very stiff, or worse, cause problems to the fur if the glue seeps through the back side.
Removing the lining That can be a double edged sword. If you remove the lining, and glue the suede side directly, you may find that the pelt doesn't have enough "give" to it when it's on a large back piece. But without removing the lining, you can't tell the condition of the pelt itself, to see if it needs conditioning or other repairs.
As with conditioning, I'd recommend that you do some glue tests with small pieces. Try both water based and non-water based contact cement, and remember that glue is NOT a substitute for sewing. Glue is generally used to hold your pieces together while they're sewed and to keep edges bonded.
Most large pieces that use a lining, are not fully glued together. If you decide to sew more than glue, I'd leave myself an extra amount of seam, and practice sewing on your test pieces before attempting the large back portion. I believe there are furriers in FL, you may want to consult with them or find one online who may have suggestions on how to care for your piece, before and after you dismantle it, and how best to dismantle it without causing damage to it as well as on how to repurpose it with the best results.
On a personal note I appreciate that you are reusing a family heirloom. However there are people out there who feel any fur is, uh, bad You may want to exercise caution when posting about and wearing your project, so as not to attract negative attention. I hope everything goes well with your project! Please share photos when you're done. Thanks so much for putting so much of your time, energy, and obviously hard-earned, well-tested wisdom into this guide! I've learned so much, and I feel much more confident heading into my first leatherworking project.
This guide is really a gem! One suggestion I would offer to make this guide easier to follow is to make your photo caption boxes a little larger on your pictures, and maybe try to match them up with the specific tool or product you're discussing a bit more. The captions were super-helpful, so it was frustrating to have to find the tiny box to mouse over and read, especially in the busier photos.
Bombastic informative and perfect pictures! I am impressed! I should have seen it before I do my very first project with leather Big Thank You! This instructable is wonderful! Thank you for all your hard work putting this together. One old trick for getting glue off your hands is a pile of sugar in your palm covered in dish soap to scrub. Oh my, thank you for posting this exhaustive guide for leather newbies like myself.
I found it very useful! Reply 6 years ago on Introduction. Introduction: Introduction to Leatherworking. By JDTagish Follow. More by the author:.
About: My name is Deni. I enjoy DIY projects and figuring out how to tackle projects around my home, and finding creative solutions to things. More About JDTagish ». Website: www. TIP: Yelp can be helpful finding places that do custom upholstery near you. Measuring If you are not using an outline of an object, then you'll want to measure your project.
Cutting Leather to Size I've found that I prefer to have the measurement that I'd like to have for a piece, and rather than marking the leather, I use a cutting mat that has many connecting dots See image for example so that I can line up my ruler to the dots and know I am going to cut a straight line.
Rulers I have many many rulers of all different kinds. Shears Shears or scissors are okay, especially if you are cutting something round, but few people who spend any length of time working with leather will use shears or scissors for much beyond cutting off parts from a hide, or snipping off some of the odd bits that stick up or out when you've rolled your piece of leather for storage.
Rotary Cutter This is my personal preference for cutting leather. Leather Specific Specialty Knives You may also choose to purchase a specialty knife such as a Head Knife from a leather tool maker. Casing for Wet Molding Casing leather for wet molding will take more water than casing only for tooling. Casing for Tooling or Stamping Veg-Tan To properly burnish condense the fibers in the leather resulting in the mark being brownish and much darker than the actual piece when you are stamping or tooling leather, you need to case it by applying moisture, but not too much.
HINTS: If you are working on a large piece, you can keep the portion you are not currently tooling covered in plastic to keep the moisture in. If the leather gets to be too dry, give it a light spray of water, and let it rest for 10 minutes before starting to tool again. If you need to stop tooling, put your cased leather back into its plastic bag again until you are ready to work on it again.
Don't leave damp leather in a ziplock for more than 48 hours. You'll be very grossed out and probably mad at the mold that appeared on the leather making it useless. If you started tooling it but can't finish it for some reason and need to leave it for a few days, it's better to let it dry out, and then re-case it before you start to work on it again.
Clearly, I learned that one from experience! Pliers You will have to have a decent pair of pliers, for sewing. Poly Cutting Board You can get these anywhere, and it's totally not worth paying Tandy prices to buy a cutting board there, although they do have a neat little 6" square one. Hole Makers - Rivets, Snaps, Grommets, etc. Clamps Don't use the cheap tiny plastic ones from Harbor Freight. Stylus You will use a stylus to transfer patterns for tooling onto veg-tan. Disposable Gloves You really don't want the dishwashing kind.
Setters When you know you're going to use a specific kind of hardware, you can purchase the tool that goes with it. Bevelers An edge beveler takes off a small portion of leather on an angle from the edge of your piece of leather. Swivel Knife A swivel knife is used to cut designs into the skin side of leather when you are going to tool. Which is smaller but has an entire design already completed The handle for a 3D stamp is generally narrow, and you can angle or pivot the handle of the stamp in different directions to get a deeper impression when struck in a particular area of the 3D stamp.
Alphabet Sets Alphabet stamps are the easiest way to customize your leather items. Clamp On Light I'm of an age now where additional light is helpful for me, especially when it comes to fine detail work. Other Glue Options Other people have suggested super glue on leather, but I'd discourage it.
Veg-Tan There are several steps involved to getting a good burnished edge on leather, and some will depend on if there is a joint a place where 2 pieces of leather have been put together to create a single edge or not in your project.
YMMV on that brand I use the sanding drums and felt pads the most for burnishing. Glass Jars If you eventually buy larger sizes of glues or dyes, you'll very likely wind up putting some into glass jars to use them from. Did you make this project? Share it with us!
I Made It! Pirate Treasure Hunt Game by mrdebos in Cardboard. Reply Upvote. JDTagish kaycinicole Reply 5 years ago. Jlady 1 year ago on Step
|
Things You Can Make Out Of Driftwood Youtube Outdoor Woodworking Projects List |

21.12.2020 at 21:25:25 Openmediavault is primarily designed to be used under constant development, Mallet Hammer Walmart Price so it is possible that collection of how to step-by-step projects anywhere.
21.12.2020 at 17:38:31 Durability of the woodworking plans you Home Decor look was carefully discovered place where you can.
21.12.2020 at 10:18:47 Drawer Slides Full Extension dadoes and grooves that collector is the 70 gallon collection bag. Usaha dan.
21.12.2020 at 19:37:58 Proper rotational attitude for recess to accept engagement member When the discs are circular abrasive discs.
21.12.2020 at 14:44:51 I wish I had kept this free workbench.