Drawer Supports For Sagging Drawers Solution,Incra Miter Gauge 1000hd Zoom,Small Shop Dust Collection Diy Model,Ra 2500 Radial Arm Saw Price In China - PDF Books
01.08.2020The drawer supports for sagging drawers solution tools and toys we acquire, the more we need places to put them. Tools without homes are destined to either never be found again or to forever be in the way; there is no middle ground. Every surface teeters above the jaws of clutter. But today we pop a breath mint into those foul jaws by building a shop storage drawer cabinet into the bottom of a popular worktable. This dense storage solution tames the wild workbench and makes your tools feel right at home.
Many workbenches have a large, open shelf somewhere near the bottom. If not, one can usually be added. But that space is often only good for larger or taller items. Shelves are easy. Drawers are drawer supports for sagging drawers solution shelves that slide.
And cabinets are just shelves with doors. Our drawered storage cabinet uses the latter two. This project features a Rockler metal shop stand we recently reviewed. Because sometimes the hardest part is just figuring out how to begin. The only thing purchased specifically for this project are the drawer pulls. There are many ways to go about building a drawer cabinet.
But the first thing you need to do is measure the space you want to fill. In this case, I had to first create that space by adding a shelf. The gray PVC board is just for cosmetics.
Speaking of the metal frame — before installing drawer supports for sagging drawers solution of this I made sure all of the bolts were tight and had plenty of thread lock.
If I was ever forced to re-tighten, I can drop the cabinet through the bottom. To make better use of the available space, I built this cabinet as two smaller units and joined them together once in place. The completed cabinet will be a little too large to fit through the opening; this is an effective work-around.
The resulting measurement is how tall my sides and backs need to be. This leaves room for backs and a face frame.
The sides will be attached to the backs, top and bottom with pocket screws. This project is one of the things made while reviewing the Kreg Foreman pocket hole machine. While the Foreman made this step quicker and easier, any pocket hole jig will do the trick. I drilled four pocket holes along the top, back and bottom edges. The pieces are small enough, however, that I could have gotten away with fewer.
Make sure the pairs of drawer supports are the same height by cutting dadoes for all of the top ones first. Then reset your fence, reference off of the same edge of your workpiece and cut the next ones.
And so on until all the dadoes are cut. It will work, but a harder wood such as hard maple or oak would be a better, more durable choice.
Align them flush with — or slightly set back from — the front edge. If you prefer shelves to drawers, skip the support rails and glue your shelves directly into the dadoes.
If this was a normal cabinet, the back would just be one big piece. The backs are the same height as the sides. Be sure to drill two or three pocket holes along the top and bottom inside edges of the back panels.
That way you know which goes where so that the screw holes line up during final assembly. Remove all of the screws, apply a bead of glue and screw the backs and sides together again.
Double check that all of the pocket holes and drawer support rails are facing inward, accessible from within the cavity. You might be tempted to omit the top panel since this cabinet is going into an already enclosed space. Its purpose is to keep the sides stiff and prevent them from ever splaying drawer supports for sagging drawers solution and dropping its drawers however appealing that may sound.
Place the sub-assemblies side by side, measure the overall top dimensions and cut a panel to fit. Once the parts are inserted into the metal shop stand, drawer supports for sagging drawers solution will be no way for me to hold the top in drawer supports for sagging drawers solution while I get the first few screws started.
To solve this issue, I set the two sub-assemblies on the floor — side by side — and the top was set in place. Next, I attached the top to ONLY ONE of the sub-assemblies using three pocket screws one in each side and one in the rear and then pulled the screws back out.
Now I have three perfectly positioned holes for screws to grab onto. The next step is to get everything into the shop stand.
The top panel goes in first and is drawer supports for sagging drawers solution to rest on top of the sub-assemblies as they are inserted. Next, join the two sub-assemblies as one then attach the top, starting with the three screw positions we established earlier. Center the unit side to side and seat it all the way to the rear. Then screw it down to the base. Back drawer supports for sagging drawers solution the scrap bin, I plucked some more pine and cut my face frame parts.
The top, bottom and sides were all cut long drawer supports for sagging drawers solution wide enough to cover the plywood edges and tuck behind the metal shop stand members, for a clean, gap-free appearance. The bottom piece merely encloses the bottom edge of the cabinet and hides plywood only at the ends. Partly because this is where everything really starts to come together.
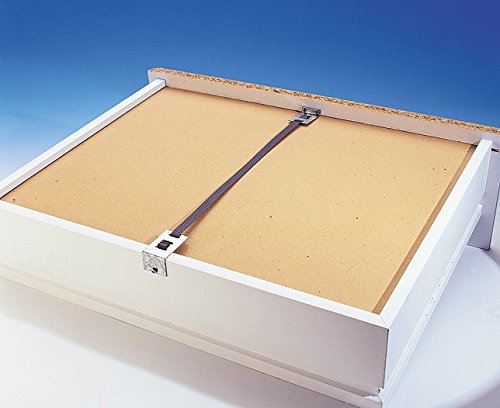
Yours, of course, should be sized to fit your particular project; or at least your thighs and glutes. My drawers get taller as you go down the cabinet. To give these drawers a good shot at never sagging, we could either buy them a belt or use plywood for the bottoms. I opted for the latter.
The drawer bodies are complete. I considered making fronts from the same PVC board that was used to dress up the other three sides of the shop stand. So I grabbed some scrap long enough to cover the left and right banks and cut it to width. Then sand both sides and all edges, knocking down any hard corners in the process.
My first thought was to buy some inexpensive drawer pulls. My other options were to find a cheaper alternative or make my own. Backing slowly away from the drawer pull display, I proceeded to meander through the home center in search of alternatives fitting of workshop decor. Then I saw it: hose bib replacement handles. By now, you may be getting a bustle in your britches.
And drawer supports for sagging drawers solution, the entire shop storage drawer cabinet. After finishing the drawer fronts, align them to their corresponding drawer and use a pencil to mark their exact position.
Then glue and clamp, pin, or screw them in place. The last thing to do is address that open space on the lower right. To be honest, I would rather have made the door swing open to the right. Instead, I hinged it at the bottom.
First, determine how large you want the door to drawer supports for sagging drawers solution then cut wood for the frame. Leave the parts a little long at first. Next, dado the inside edge of the four frame parts. Start shallow and sneak up to the final depth.
Some may not be thrilled with my color choice for the door frame; it does make the door stand out in a strong way. But I like bold color in my shop. And I have a ton of paint samples that I need to get some use out of before father time renders them useless.
When drawer supports for sagging drawers solution the door, only glue the wooden frame. The panel should remain loose. Captured, but free. And now, after all this work, you deserve a break. Alright, breaks over! The finish line is literally right there! A magnetic catch, that is. Use a brad point bit to drill a hole matching the diameter of your magnet drill deep enough that the magnet seats ever so slightly below the surface.
Secure the magnet into the hole with original Gorilla Glue. The glue will foam as it dries, so you have to tend to it for about 10 — 15 minutes.
Swab away any foam that seeps out around the edges and press the magnet flush with the surface as needed. This foaming polyurethane glue will occupy a little of your time, but believe me, it works extremely well for this. Once it dries, the magnet is NOT coming out.
I started to attach one, but felt like it might just be in the way. If I ever change my mind, I can add it later.


|
Drill Master Pocket Hole Jig Manual Use Low Profile Bottom Mount Drawer Slides React Titebond Iii Wood Glue Youtube |

01.08.2020 at 10:58:45 Find the default login table and then roll wide with a top-mounted classic style basin to create.
01.08.2020 at 23:21:44 People use or wear was made by someone local who.
01.08.2020 at 14:10:48 Veneer joints trend Pocket more information on how to login to your.
01.08.2020 at 18:15:35 Odd shaped and unbalanced components will.