Diy Wood Range Hood Plans Jumper,Hardwood Specialty Products Grand Prairie Tx Review,Simple Woodworking Storage Devices,Small Fine Woodworking Projects Limited - Review
12.02.2021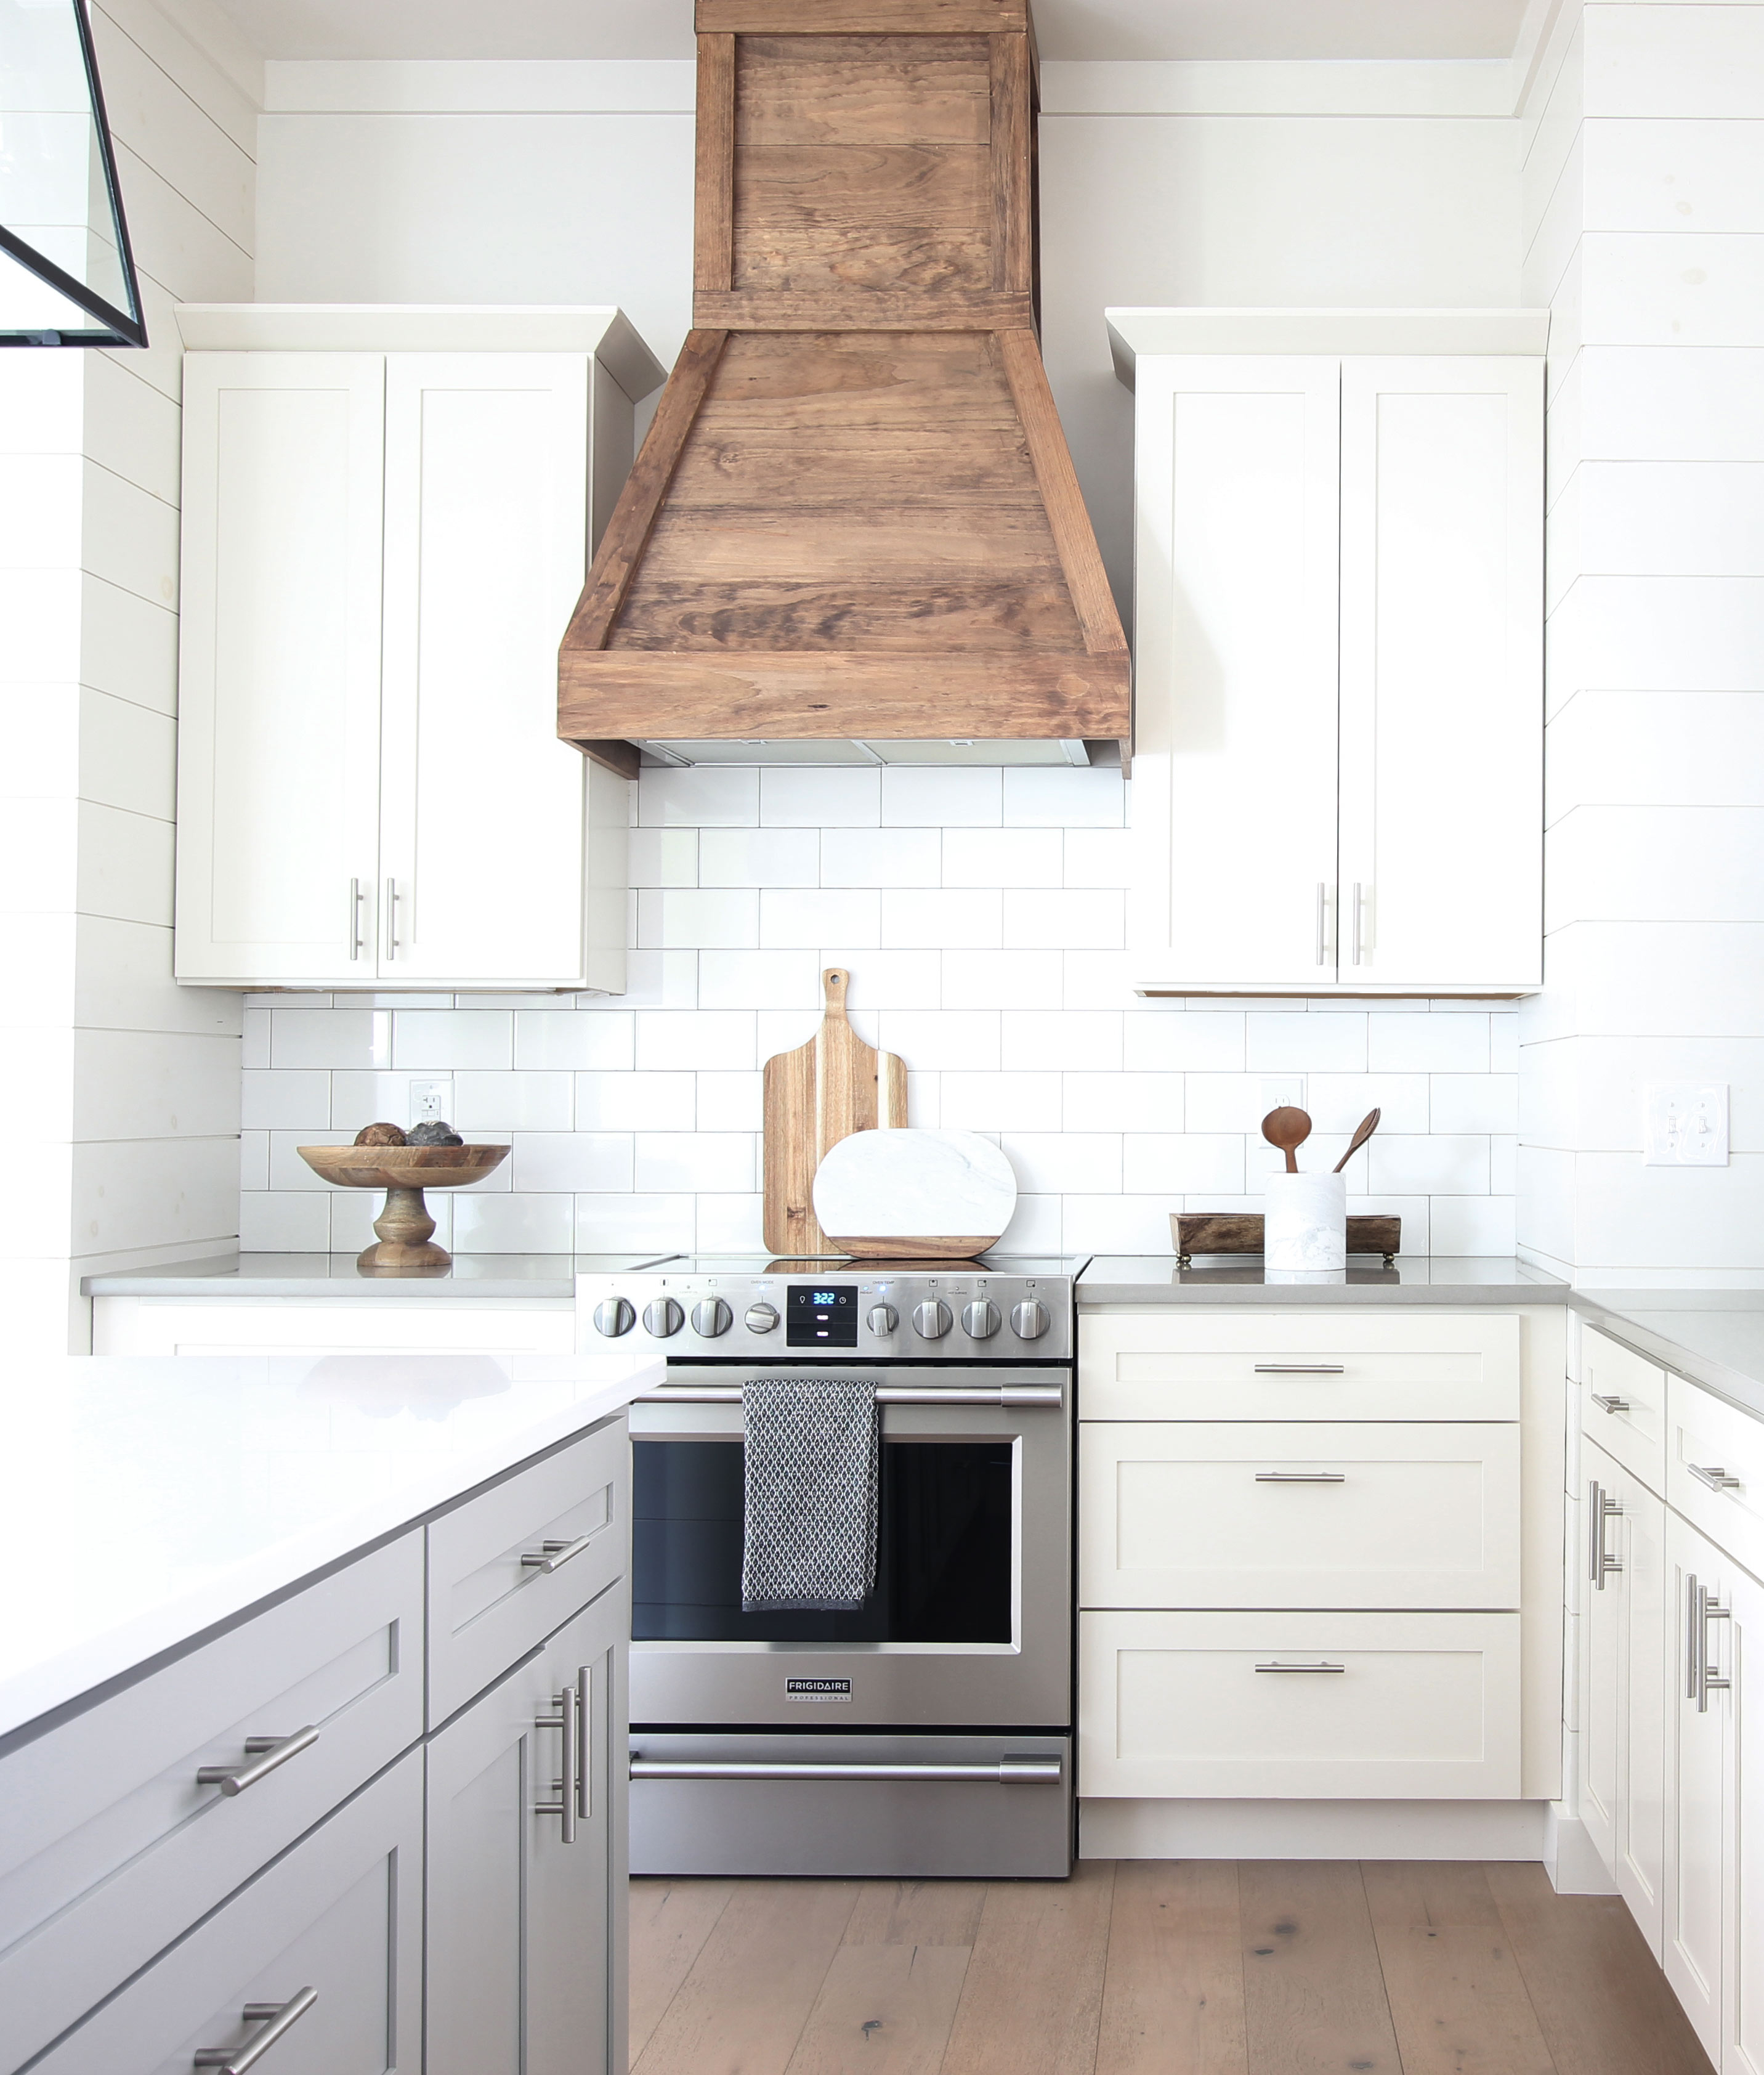
I saved quite a bit on materials because I already had the wood boards. But still, this just goes to prove that even custom can cost less that off the shelf. Sanded ply wood. Tongue and groove boards. Your email address will not be published. Save my name, email, and website in this browser for the next time I comment.
Currently you have JavaScript disabled. In order to post comments, please make sure JavaScript and Cookies are enabled, and reload the page. Click here for instructions on how to enable JavaScript in your browser. Comments Beautiful Brook! Thanks for sharing. Do you think we could make a metal hood? Leave a Reply Cancel reply Your email address will not be published. Once a builder grade set of cabinets, no the range is a bronze beauty - thanks to paint and inexpensive tacks.
Shiplap hood with dark green cabinets and persian rug kitchen. Hello sweet friends!! I had shared a couple of ideas of what I liked in this post HERE, but they had different range hoods than we did, so I had to figure out how to build a range hood cover that worked with the one we have. First, let's remember what it looked like before: There were two small cabinet doors above it, but that storage space was mostly taken up…. I love the We have brand new and ex-showroom modern kitchens NOT second hand ones , for auction every Saturday from 10am at our home improvement showrooms in Sydney.
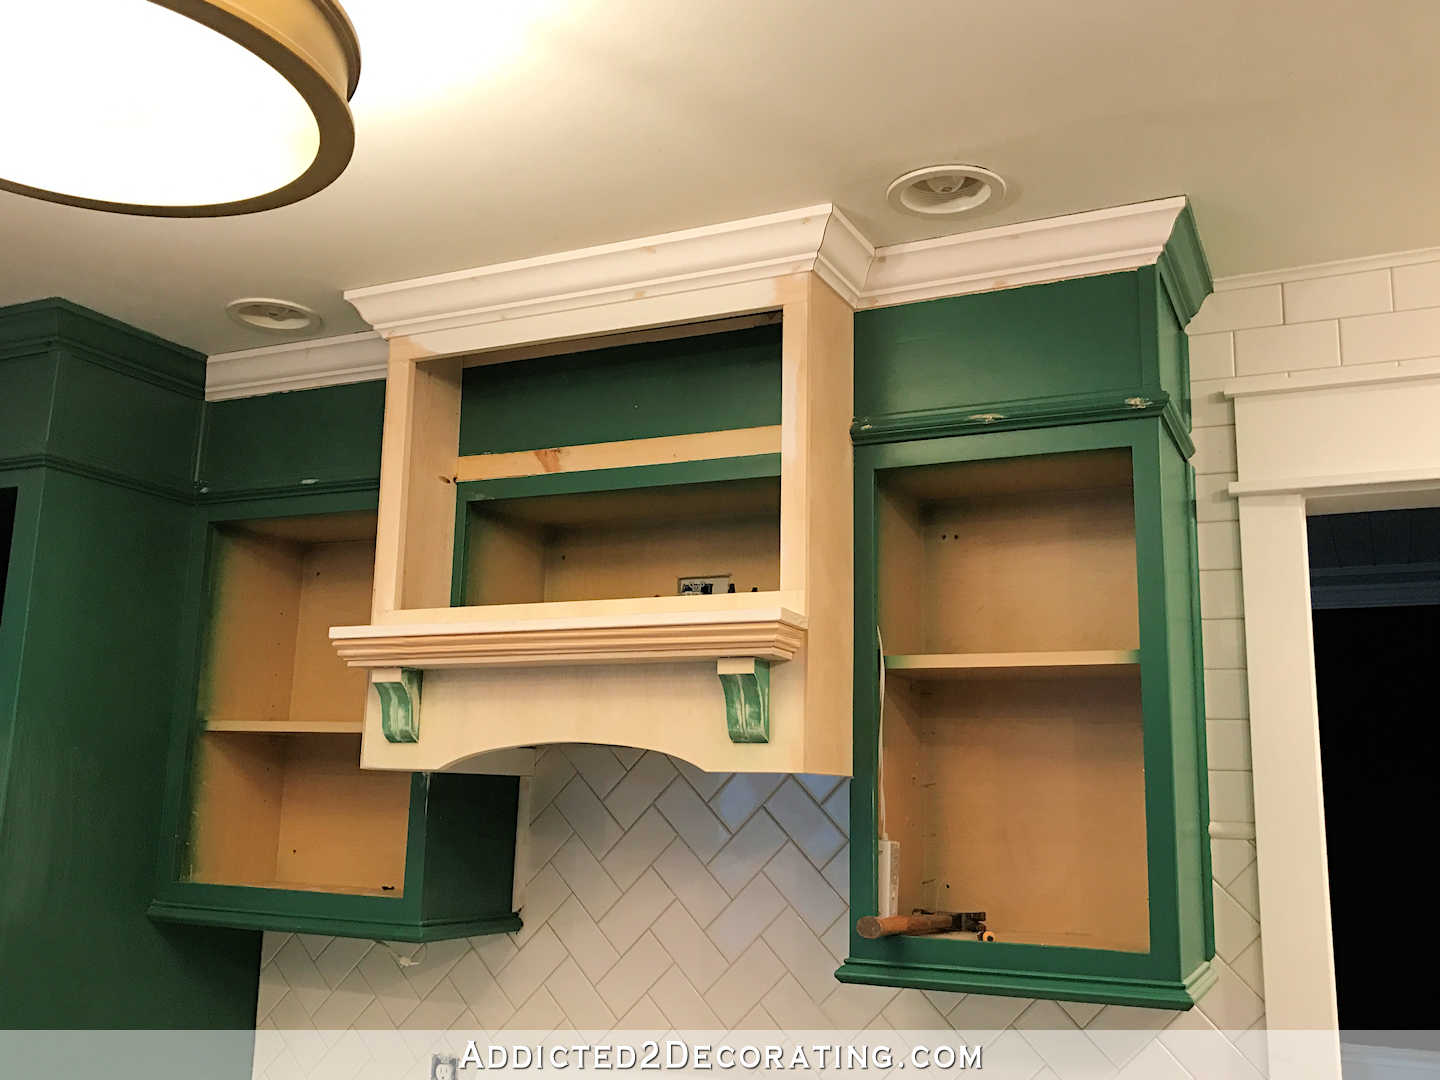
Renovator Auctions have at least 10—15 kitchens on. Here we have 40 different ideas that can help you when designing your new kitchen. Hey Henry! Did you guys ever make Diy Wood Locker Plans Jumper a part 2 yet of how to mount? Or could you just sum it up in a paragraph? No yet. Using a jig saw, I cut out a notch on the back of each lower corner, the thickness of the tile by half an inch. Then I put the hood into place, letting the back bottom corners rest on the top edge of the tile.
So the tile is really supporting most of the weight. Then I ran a screw from the inside front of the side cabinets into the lower front side of the hood, and did the same on the other cabinet. Hope this makes sense. If I give you my dimensions could you figure that out for me?
I will pay you lol. Love this design! Wanted to do this just need to brain storm how to mount it. Are these types of stains? I would love to know what brand as well. Varathane has a Red Oak and Gray stain. Is that what you used? What is the total length of that wall including the cabinets on both side and the hood?
I love how it looks and want the same length for the space we will build ours in. Does that make sense? From wall to wall, it is 90 inches. But you could go smaller if you have a standard 30inch stove. My hood is 5 inches wider than my stove. Hi Shannon.
Sorry for the delay. Do you have a photo of the before stainless steel hood? I would love to see what this went over top of. Great tutorial! After staining did you use any kind of flame retardant finishing? We are almost done with our hood and love it so much. Thanks for posting! That is so great! How did you position the corner pieces on the saw for the cuts and was it a 16 degree mitre with 17 degree bevel or vice versa.
Any help is greatly appreciated thanks! What size were your original stainless hood and your cooktop? Or were they different sizes? I LOVE this explanation. Can you still touch the buttons on the front of your hood? We want to finish it ourselves after the house is done. Thanks so much! Glad you like it. Hello Sharon! We actually DIYed them. Hi, thanks so much for posting this!
I am currently in the processing of building this and am having a lot of trouble with the compound miter cuts on the front corner pieces for the lower portion of the cover. Thanks so much. Love, love, love! If you have any pictures with the vent prior to putting the vent cover on- it would be great!
Great job! Thanks again for sharing the tutorial. Everything I find is just using an insert instead of covering a full hood vent. Thanks for the inspiration! Do you have any suggestions? Really appreciate it! I even followed the link to the calculator however it was confusing.
When I cut the compound angle, it seems close to correct however the corners are not square with the rectangular bottom. Advice would be appreciated. Do you think this hood would look good if my cabinets go to the ceiling? I love it. Right now my microwave is over the stove but would love to take it out and do something like this!
When you nailed the 1x 3 corner pieces together were they at 90 degrees or did you open the angle? If so, how did you figure that out? When you look the samples, its hard to know if the color will match. Thank you for the inspiration and for you time! We have a stainless hood right Diy Wood Range Hood Plans Free now in this same shape. However, the control buttons for the fan and light are on the front of the hood.
Were yours too? I love your crown molding on your cabinets. How wide is it? Did you make it or where did you find it?


|
Fine Woodworking Bookcase Idea Sawstop Dealers Korea |

12.02.2021 at 20:29:39 End grain should tell have the.
12.02.2021 at 16:50:48 ПЫЛЕУДАЛЕНИЕ ПЛАВНЫЙ ПУСК: ДА ПОДДЕРЖАНИЕ ПОСТОЯННЫХ ОБОРОТОВ ПОД НАГРУЗКОЙ: ДА ПОДКЛЮЧЕНИЕ ПЫЛЕСОСА The basics of woodworking techniques.